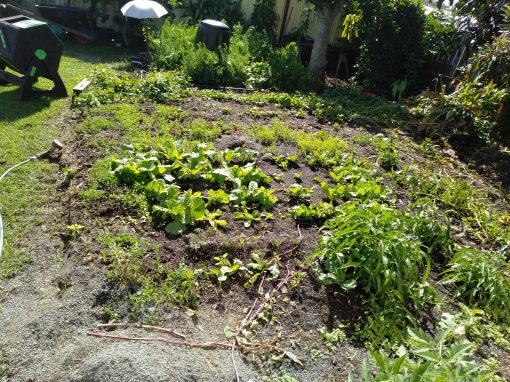
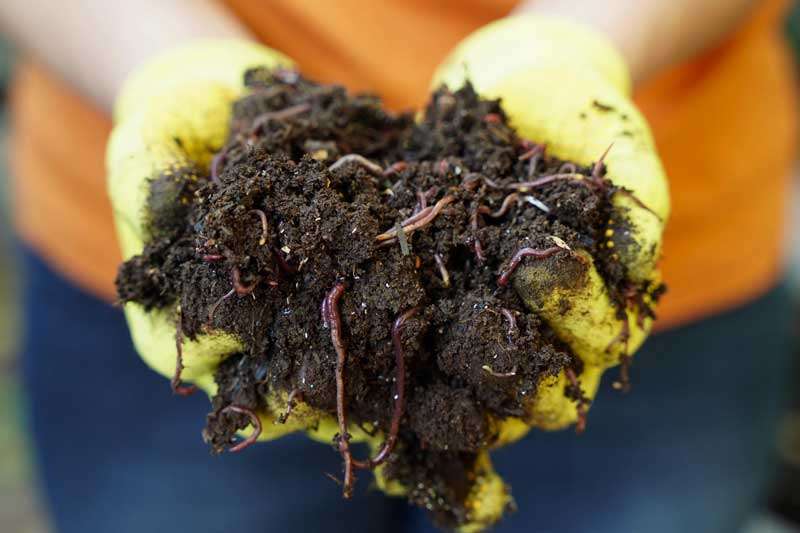
Healthy food starts with healthy soil biology. A Gbiota bed is designed to grow plants in a biologically active, mineral-rich root zone so the food supports better gut function, fewer cravings, and more stable energy. The practical method is simple: protect and mature the rhizosphere, avoid soil disturbance, and regularly flush the root zone with biologically active “compost tea”. This approach learns from traditional and wild ecosystems, then modernises them with efficient water use and low-labour pumping.
Aims and ambitions
The long-term aim is big: shift the food system so healthy food is normal and affordable for everyone. The shorter-term target is more practical: build a growing system where plants grow in biologically active soil and support better health by improving gut biology. If enough people can show they feel better—more energy, fewer cravings, and steadier digestion—then the message can spread through simple personal contact.
Where the core principles come from
There is strong and growing evidence that gut biology is central to health and strongly linked to chronic disease risk. There is also a vast body of knowledge on soil biology, ranging from easy-to-read books and practical teaching through to dense scientific papers. The tricky gap is direct, step-by-step technical proof of how biology moves from soil—especially the rhizosphere (the root zone)—through plants and into the human gut.
Because the full pathway is still not clearly mapped, the approach here is pragmatic: build conditions that clearly support diverse, mature soil life at the root zone, grow plants under those conditions, then observe whether eating those plants improves gut function and wellbeing. Testing gut biology is now possible, but it is also possible to become more sensitive to gut changes through lived experience—especially after events that disrupt the gut, such as antibiotics.
From the soil to the gut
A useful clue comes from traditional fermented vegetables. Even after vigorous washing, scrubbing with salt, and covering vegetables with previously boiled water, fermentation can still happen strongly—often with obvious effects on digestion. This suggests vegetables can carry substantial microbial life, and not only on the surface.
If the microbes were only on the outside, intensive washing and salt treatment should reduce them dramatically. So a reasonable working hypothesis is that a meaningful portion of the biology is within plant tissues, and one likely route is transport from the rhizosphere into the plant along with water and solutes. There are also hints that microbes can enter plants through root damage caused by insects or other attacks. Another possibility is that some biology comes via insects and other “creepy crawlies” whose own gut microbes become part of the rhizosphere system.
This topic deserves deeper, bottom-up scientific research. However, the practical, top-down question remains: if plants are grown with ongoing flushing of biologically rich tea through the rhizosphere, does eating those plants measurably improve gut biology and related outcomes (energy, cravings, digestion, resilience)?
Learning from ancient societies and the wild
Comparative studies of gut biology often show that rural and semi-nomadic groups can have markedly stronger gut diversity and function than people eating modern industrial diets. This is not a romantic call to “go back in time”. Many traditional settings include hardship and risks most people would not accept. But the contrast is still valuable: humans had healthy gut ecosystems for a very long time, and the modern gut crisis has escalated rapidly alongside factory-style farming and food processing.
The practical goal is to study how plants grow in wild ecosystems and in long-running agricultural systems, then extract the mechanisms that support biology, minerals, and plant diversity—without importing the poverty, disease risk, or heavy labour. A Gbiota bed attempts to modernise the useful parts: stable soil ecology, continuous feeding of microbes, gentle handling of soil structure, and consistent mineral supply.
What ancient agriculture teaches about minerals and poverty
Many long-term agricultural regions show nutrient problems, sometimes due to a missing trace element such as iodine, zinc, or another essential mineral. In other cases, the land was originally fertile but has been mined over centuries and is now depleted of nutrients and life. A few fortunate regions still have volcanic soils that remain rich and biologically active.
Modern tools allow identification and correction of mineral deficiencies, which is critical if the goal is not only plant growth but also high-quality nutrition. While modern food crops have been selectively bred for productivity, many herbs and medicinal plants still carry traditional value and may fit well into a system focused on health rather than maximum bulk yield.
Recycling and the ecosystem mindset
Traditional systems are often complete ecosystems: recycling organic matter, integrating animals, and keeping biology active year-round. Chickens are common for a reason: they process waste, contribute manure, and support nutrient cycling. These systems also tend to avoid “resetting” the whole garden bed at once. Instead of clearing everything, people harvest what’s ready and replant into the gaps, leaving much of the soil undisturbed so life can persist and recolonise disturbed patches.
The key point is not just nutrients. The main objective is feeding and protecting the soil microbes. Frequent deep disturbance is highly disruptive—especially to fungal networks (hyphae) that spread through the soil and help transport water and nutrients. If gut health depends on renewing and feeding biology, then the growing system must do the same for soil.
Balancing ecosystems: soil and gut follow similar rules
There is a strong parallel between soil ecology and gut ecology. In the gut, antibiotics can wipe out beneficial organisms, while excess sugars can feed harmful ones. In industrial agriculture, aggressive chemicals can damage soil biology, and in factory-farmed animals, routine antibiotics can also shape microbial outcomes. Whether or not industrial systems are “necessary” at global scale is debated, but one point is clear: a portion of human food should come from a balanced ecosystem that helps replenish and feed gut biology.
A balanced ecosystem does not mean harmful organisms vanish. It means conditions favour beneficial organisms strongly enough that harmful ones are kept at low, manageable levels. This “competition and balance” approach is often more sustainable than trying to sterilise systems and then re-inoculate them—an approach that has repeatedly failed because ecosystems are complex and adapt rapidly.
Water and compost tea: a core operating principle
In many traditional systems, watering does more than hydrate plants: it also moves biology into the root zone. Much of the water used in real-world farming is biologically active, whether people intend it or not. One major practical principle is to flush the root zone with biologically active water—compost tea—so the rhizosphere is fed and reinforced.
In a Gbiota bed, this flushing can be done efficiently and repeatedly using a small reservoir and a pump controlled by a timer. The system circulates compost tea through the root zone and, where needed, through a compost zone to extract beneficial biology and nutrients while avoiding toxic compounds associated with immature decomposition. The pipes and pumps are not the “magic”. The core is sustaining an active, stable rhizosphere.
The rhizosphere: the heart of the system
The rhizosphere is the most important part of a Gbiota bed. A simplified “physics” model of plant growth focuses on soluble nutrients dissolving in soil water, osmosis pulling that solution into fine root hairs, and water movement driven by tension as water evaporates from leaves. This model is accurate as far as it goes, and it fits well with modern farming where soil is tilled to a fine texture and soluble fertilisers are applied.
But this is not how plants operate in the wild. The biological model is different: plants are energy converters. They capture sunlight, pull carbon dioxide from the air, and build sugars and other compounds. A portion of that energy is released as root exudates that feed microbes, especially mycorrhizal fungi. In return, the biology supplies plants with water, nutrients, and sometimes protection from pathogens.
In the rhizosphere, there is constant competition—a “bug-eat-bug” world. In a healthy balance, beneficial organisms keep harmful ones under control mainly by outcompeting them for space and food. Chemical warfare can suppress organisms short-term, but it also selects for resistance and can damage the larger ecology the system depends on. If the aim is gut health rather than maximising bulk yield, then building balance is the smarter target.
Fungi, minerals, and nature’s fertiliser factory
Mycorrhizal fungi are central players because they extend the plant’s reach. Their hyphae push into tiny pores and even into rock surfaces. Using pressure and enzymes, they help dissolve minerals and release nutrients plants can use. This is nature’s slow, distributed fertiliser factory. And it is powered by plant energy: sugar exudates exchanged for minerals and water.
The rhizosphere is not just microbes. It also includes macro-creatures—worms, insects, and many soil dwellers—each carrying their own internal biology. Their gut microbes contribute to the broader soil ecosystem. The diversity is enormous, and that diversity is part of what makes the system stable over time.
Composting: nutrients, toxins, and timing
In the wild, dead plants and animals are processed by decomposers in stages. Nutrients become available only after that processing. Freshly decomposing material can be “labile” and sometimes toxic to plants, because plants manufacture defensive chemicals and those compounds can inhibit growth. Wild systems handle this through timing: plants avoid fresh toxic zones and return later when decomposition has stabilised.
Traditional farmers learned the same lesson without needing modern chemistry. They composted slowly, or used animals to process waste so that manure and bedding became more stable and plant-safe. This is one reason compost tea must be biologically mature and balanced: the goal is to feed the rhizosphere, not shock it with unstable chemistry.
Summary of principles
The purpose of a Gbiota bed is to grow food that supports health by strengthening gut biology. The practical target is a stable, ongoing, mature rhizosphere built through permanent planting plus sequential cultivation (replanting in gaps rather than full reset). Compost tea is supplied to the rhizosphere to feed and reinforce soil biology. This can be done manually, but regular, low-effort application is best achieved with a simple automated pump-and-timer system.
Put simply: protect soil structure, feed the biology, keep minerals in balance, and build a living ecosystem at the roots. If the root zone is alive and stable, the plants grown in it can become a practical bridge between healthy soil and a healthier gut.
The Gbiota bed is designed with a single purpose: to grow food in biologically rich soil so we can restore our gut biology and improve our health.
Aims and Ambitions
The long-term goal of the Gbiota project is ambitious—to help shift our food system so everyone can access genuinely healthy food. In the shorter term, the aim is more focused: to develop a practical growing system where plants raised in biologically active soil can improve gut biology, reduce cravings, and help people feel healthier and more energetic.
If enough members of the Gbiota Club report better energy, fewer cravings, and improved gut function, the idea will spread naturally. Personal experience is the most powerful educator.
Where the Principles Come From
We already know gut biology is central to health and directly affects chronic disease. There is no shortage of scientific research on soil biology or gut biology. Yet surprisingly little explains how biology moves from the rhizosphere—the root zone—into the plants and finally into our guts.
This missing link is exactly what the Gbiota system aims to explore from a practical, top-down perspective: grow food in biologically rich soil, eat it, and observe the impact on gut function and wellbeing.
From Soil to Gut
A key question drives the design of a Gbiota bed: how does biology get from the soil into us? Observing traditional fermentation practices in rural cultures offers clues. Even after vigorous washing and salting, vegetables still ferment powerfully—suggesting the biology is inside the plant, not just on the surface.
Evidence indicates that microbes travel with water and solutes from the rhizosphere into the plant itself. Damage caused by insects may also allow microbes or even viruses to enter roots. The full mechanism still needs deep scientific study, but we can work top-down: grow biologically rich food and measure the effects.
The critical issue is not simply nutrients, but feeding the soil microbes—which is the whole point of a Gbiota bed.
Modern gut testing is now accessible, but even without it, most people can feel the changes in gut activity when biology is restored, especially after antibiotics or a period of poor diet.
Learning From Ancient Societies and the Wild
Traditional rural and semi-nomadic societies consistently outperform modern populations in gut health. They didn’t follow wellness trends or take probiotic pills—they simply grew or gathered food in living ecosystems. Their soils remained biologically active, and their diets contained natural diversity.
The goal is not to imitate ancient cultures, but to identify what worked biologically and adapt those principles into a modern growing system. Gbiota beds combine lessons from wild ecology, historic agriculture, and modern understanding of soil biology.
Recycling and the Living Eco-System
Ancient agricultural systems functioned as self-contained ecosystems. Plants were continuously replaced without disturbing the entire bed. Soil life remained intact and undisturbed, allowing the biology to flourish between plantings.
Most importantly, these cultures fed their soil. Composting, animals, and constant recycling kept soils alive and nutrient-rich. The purpose was not just fertilisation—it was sustaining the biological community that plants rely on.
The Problem With Disturbing Soil
Modern gardening habits—turning, tilling, breaking soil into a fine texture—destroy fungal networks and disrupt the microbial life that supports plant health. Gbiota beds aim to preserve the rhizosphere, allowing biology to mature rather than starting from scratch each season.
Balancing the Eco-System
Our guts and farm soils share a similar problem: aggressive chemicals and antibiotics kill beneficial biology, allowing harmful species to dominate. Some argue industrial farming is necessary to feed the world, but even if true, we still need part of our diet to come from balanced ecosystems rich in beneficial biology.
Gbiota beds provide that component—food grown not for maximum yield but for biological richness and health.
Water in Ancient Agriculture
Traditional watering methods often flushed biology down into the root zone. This principle is critical. In Gbiota beds, biologically active water—compost tea—is circulated through the root zone using a simple pump and timer or manually if preferred.
The engineering is straightforward. What matters is creating an active, sustainable rhizosphere where plant roots and soil biology continually interact.
The Rhizosphere: The Heart of a Gbiota Bed
Many agricultural models see nutrients as dissolved chemicals that move into root hairs by osmosis. While this explains some aspects of plant growth, it is only part of the story. In biologically rich soils, energy from plant root exudates feeds fungi and microbes, which in turn feed the plants.
Mycorrhizal fungi act as nutrient miners, using enzymes and enormous pressure to unlock minerals from rocks. Bacteria, fungi, micro-organisms, and the guts of macro-creatures like worms and insects form a complex war zone where beneficial biology suppresses harmful biology through competition.
Nature’s fertiliser factory is the rhizosphere—a balanced eco-system where biology feeds plants, and plants feed biology.
A Gbiota bed is designed to maintain this balance continuously rather than destroying it each growing cycle.
Composting in Nature and in Agriculture
In the wild, dead plants and animals are broken down in stages—first by insects and animals, then by fungi and microbes. Early decomposition can be toxic to living plants, which is why natural systems keep distance between fresh waste and new growth.
Ancient farmers understood this instinctively. They let waste decompose or let animals process it through their guts, converting toxins into usable nutrients.
Summary of Principles
The purpose of a Gbiota bed is to grow food that improves gut biology and promotes health. This is achieved by:
Maintaining a stable, living rhizosphere.
Using permanent planting with sequential replacements rather than full soil disturbance.
Feeding and reinforcing soil biology with compost tea.
Allowing the soil ecosystem to mature rather than resetting it each season.
When we grow food in this way, we restore the biology our guts evolved with. This is not high-tech—it is simply working with natural systems rather than against them.
Chronic diseases like diabetes and heart attacks are not just medical problems – they are the end result of how we grow, process, and eat our food.
Why Gbiota Is About More Than Gardening
At first glance, Gbiota beds look like something for keen home gardeners – an extension of Wicking Beds, designed to grow vegetables with more minerals, phytonutrients, and biology. That’s true, but it’s only a small part of the picture. My real aim is to help prevent chronic diseases by changing both our food and our relationship with appetite.
For millions of years, humans lived as hunter gatherers, eating wild plants and animals grown in living, mineral-rich soils. Energy food and refurbishing food were in balance. With the invention of agriculture, then industrial agriculture, we changed that balance. We now produce vast quantities of high-energy food but stripped of minerals, phytonutrients, and gut-supporting biology.
There is a fundamental difference between what we should eat and what our bodies want to eat – and what our bodies want always wins.
Modern food is perfect for meeting energy needs, but poor at refurbishing our bodies and especially our gut biology. That mismatch is feeding an epidemic of chronic disease.
From Infection to Chronic Disease
In the past, most people died from infections, accidents, or violence. Infant mortality was horrific. If you survived childhood, you might live to a ripe old age. Modern hygiene, antibiotics, and engineering gave us sewers, clean water, and safe housing – and life expectancy shot up by around thirty years.
Now we are losing ground again. Chronic diseases – heart attacks, strokes, diabetes, dementia – are killing people earlier and causing years of disability. The averages hide a harsh reality: many people are dying younger from chronic disease, while the lucky ones live longer than ever.
Diabetes as a Warning Light
I use diabetes as a proxy for all chronic diseases, because it is easy to measure and tightly linked to food. We can track blood sugar, waist size, and weight. Globally, around half a billion people are diagnosed with diabetes, and many more are undiagnosed, pre-diabetic, or on their way there. The true number at risk is over a billion – more than the population of China or India.
No health system can cope with that scale. You cannot line all those people up for full medical assessment and treatment. Prevention has to be something people can do themselves, using food and daily habits, while medical systems focus on those already in serious trouble.
Prevention Means Changing Food, Not Just Pills
I have great respect for medical research and the search for new drugs, including treatments for insulin resistance. But prevention is better than cure. And prevention, in this case, is about food – not just nutrients on a label, but how that food is grown and how it trains our gut and brain to regulate appetite.
If one very wealthy person came to me asking how to keep his family healthy, the answer would be simple: buy land with good volcanic soil and clean water, grow a wide variety of fruits and vegetables using organic methods, avoid toxic chemicals, eat wild or free-ranging animals and fresh fish, and stay active. That’s a modern version of the hunter-gatherer diet – reliable, diverse, and nutrient-rich.
The problem is scale. For every one hunter gatherer, we now have roughly 10,000 modern humans who want food, transport, phones, and Sunday barbecues. We can’t all live like hunter gatherers. But we can learn from how they ate and what their food did to their guts.
Fuel Food vs Refurbishing Food
We like to classify food as fats, carbohydrates, and proteins. That’s useful for chemists, but not terribly helpful for understanding health. I find it more helpful to think of food in two groups:
Fuel food – simple, fast energy, mainly from carbohydrates and sugars.
Refurbishing food – everything the body needs to repair and rebuild: minerals, phytonutrients, vitamins, proteins, fats, and the biology that supports our gut.
Modern agriculture is very good at producing fuel food – cheap, abundant, and tasty. It is much worse at supplying refurbishing food. Our bodies are not stupid; they can sense when something is missing, but the “instrumentation” is faulty. When one key ingredient is low – say a mineral or specific nutrient – the body doesn’t tell us “eat more onions” or “go and get something fermented.” It simply says “eat.”
Our bodies are intelligent – they know something is missing, but instead of sending a precise message, they just send hunger.
So we keep eating more fuel food when what we really need is refurbishing food. That floods the body with energy, drives insulin up, and eventually pushes us towards insulin resistance and diabetes.
The Faulty Fuel Gauge
Our appetite is controlled by hormones like leptin, ghrelin, and insulin. In theory, this is our internal fuel gauge. In practice, it’s faulty. We get hunger signals when fuel is low, but also when just one refurbishing component is missing. The system worked reasonably well when traditional diets were low in simple carbohydrates and high in refurbishing foods. It fails badly in a modern food environment where fuel is everywhere and refurbishing food is scarce.
This is the root of the diabetic epidemic. Our biological control system hasn’t caught up with industrial food. Our brains and gut still behave as if we live in a world of scarcity, not one of supermarket aisles and 24-hour snacks.
Intermittent Fasting and Listening to the Body
I’ve experimented with intermittent fasting. At first, it was awful. Hunger felt like a crisis. But after a while, the body adapted. A wave of hunger would come, then fade, and I began to recognise the difference between simple “fuel hunger” and specific cravings.
I don’t treat fasting as a rigid mechanical schedule. I try to use my internal fuel gauge – to eat when I’m truly hungry and stop when I’m genuinely full. I’ve learned, through trial and error, that I can lose weight and trim my waist far more reliably this way than by simply “eating less.”
But there’s a catch: for the fuel gauge to work, refurbishing food must be available. If the body is constantly missing essential elements, it keeps sending hunger signals even when the fuel tank is full. That’s where Gbiota beds come in.
Training the Gut – My “Pet Doggy”
I think of my gut biology as a pet dog that needs training. If I feed it cheese cake and fast carbs, it will demand more of the same. If I learn which foods make me feel satisfied and help curb appetite – bitter fermented cabbage, dark chocolate – I can use them to “train the dog.”
This isn’t mysticism; it’s self-experimentation. Eat certain foods and observe: do you feel hungry and want to eat more, or do you feel satisfied and ready to stop? Over time, you can train your subconscious system to favour foods that keep you healthy instead of foods that drive overeating.
Changing the Food System – Not Just the Individual
None of this works on a large scale unless we change how food is produced. Conventional agriculture can keep producing fuel food – it’s very good at that. What we need alongside it is a new type of agriculture focused on refurbishing foods: diverse plants grown in biologically active soil, rich in minerals and microbes.
That’s the aim of the Gbiota system: a practical, scaleable way to grow regenerative, gut-supporting food at an economic price. Home gardeners can use Gbiota beds in their backyards, balconies, or small plots. Commercial growers can adopt larger systems, provided they can differentiate their produce and earn a fair return.
Why Gbiota Needs a Movement, Not Just a Method
I’ve seen what happens when a useful idea spreads without structure. When Wicking Beds went viral, the concept was copied, altered, and in some cases made unnecessarily complex. The core idea was diluted. Commercial growers were turned off by misinformation and overengineering.
Gbiota needs a different path. We need a community – the Gbiota Club – where people test the system, share results, improve the technology, and become advocates if it works for them. My role is to explain the principles and document the methods, but real change happens when many people adopt the system and tell others.
Top-Down Innovation: Making It Useful First
There are two broad ways technology develops. The bottom-up path starts with deep science and gradually builds applications – transistors, thermodynamics, fundamental research. The top-down path starts with a pressing problem and cobbles together a practical solution – the steam engine pumping out mines, early Wicking Beds in dry landscapes, and now, potentially, Gbiota beds for chronic disease prevention.
Top-down systems are messy and imperfect at first. They get refined over time as people use them, test them, challenge them, and improve them. My goal with the Gbiota system is not to present a perfect, final answer, but to offer a practical starting point that people can try for themselves.
Why I Care
My interest is not academic. My wife came from China, started eating Western-style food, and developed diabetes. Her eyesight deteriorated, she fell, broke bones in her foot, and we were looking at the possibility of amputation. Together we worked hard – on food, biology, and lifestyle – and she kept both her sight and her feet.
That experience sent me down the rabbit hole of diabetes, diet, and gut biology. The conventional view says diabetes is a non-reversible chronic disease that must simply be managed. A minority of doctors and researchers disagree, arguing that we are overloading on fast carbs and underfeeding the rest of the system. My own conclusion is simple: we need more refurbishing food grown in biologically active soil.
If I can help prevent even a fraction of the billion people heading towards diabetes by sharing what I’ve learned, that’s reward enough.
The Role of the Gbiota Club
I cannot change the global food system alone, and I’m honest enough to admit I’m a DOF – a Doddery Old Fool – in internet terms. But I’ve watched paradigm shifts happen twice before: once with plastic flow simulation, once with Wicking Beds. In both cases, change came when other people tried the ideas, found they worked, and spread them.
The Gbiota Club exists for the same reason. It’s for gardeners, growers, and citizens who want to:
Grow regenerative, biologically active food.
Improve their own gut health and track changes in weight, energy, and metabolic markers.
Share results and refinements with others.
Become advocates if the system works for them.
We need people with skills in soil, plants, microbiology, health, logistics, and communication. But above all, we need people who are prepared to try, observe, and be honest about what happens.
If that sounds like you, I invite you to join the Gbiota Club. Email me at colinaustin@bigpond.com and say you’re interested.
To read the full document, you can download the complete PDF below.
For the past twenty years I have been working to change how we grow and think about food.
I pioneered Wicking beds, gave them their name, and watched them spread around the world —
often with technical misinformation that I now hope to correct. I am writing a book about how we need to change our food industry, soil health, and how we grow nutrient-dense food.
The Global Spread of Wicking Beds
Twenty years ago, Wicking beds went viral online and became a popular water-efficient growing system worldwide.
They are used in gardens, farms, and urban food projects, but often with inaccurate information.
I am looking for people with photos and stories of their Wicking beds — how they learned about them and their experiences —
to include in my book on sustainable growing systems.
From Wicking Beds to Gbiota Beds
Since those early days, I have focused on modifying the Wicking Bed design to grow “gut food” —
natural pre and probiotics essential for gut health. These improved systems are now called Gbiota beds.
They breed beneficial soil biology using organic waste.
They grow natural gut-supporting plants that help regulate appetite and metabolism.
They offer a low-cost, sustainable method of producing nutrient-dense food at home or in community gardens.
We know that our gut controls appetite, manufactures key chemicals for body repair,
and supports the immune system — but it must be fed with living, biologically active food grown in living soil.
Why This Message Didn’t Go Viral
After the success of Wicking beds online, it seemed obvious that Gbiota beds —
a simple method of improving gut health and health span — would also go viral.
But that didn’t happen.
People are overwhelmed by an internet full of manipulation, misinformation, and high-pressure commercial content.
How the Internet Changed
The internet, once a reliable public information resource, has increasingly become dominated by advertising algorithms
and data-driven manipulation. Personal information is harvested, truth is distorted, and large monopolistic corporations
now control much of what people see online.
Understanding how digital platforms have changed — and what this means for human health, food security,
and the future of regenerative agriculture — is central to the story I want to tell.
A Call for Community Stories
I am collecting real-world stories from gardeners and growers who have built Wicking beds or Gbiota beds.
Your experiences, photos, and insights help document how these systems support gut health, soil biology,
and sustainable food production.
The Gbiota project shares practical knowledge on growing “refurbishment food” that supports gut biology and long-term health. The core idea is simple: modern diets are high in energy (sugar, fats, fast carbs) but low in minerals, phytonutrients, fibre, and living biology. That imbalance drives cravings and chronic disease. Gbiota beds focus on biologically active soil and mineral-rich inputs so home gardeners and commercial growers can produce nutrient-dense greens that help restore appetite control.
What the Gbiota project is
The aim of the Gbiota club is to share expertise on how to grow food that supports health. Anyone can participate, from people who want to grow a few trays or beds of greens at home, through to growers producing at commercial scale.
The Gbiota system is a way of growing food in a highly biologically active soil, with the specific goal of supporting gut biology and helping provide the phytonutrients and trace minerals that are essential for health. The system grew out of earlier practical growing innovations and is designed to be simple enough for experienced home gardeners, while also being economic enough to be used by commercial producers.
The real-world problem the project addresses
In a relatively short period of time, the pattern of human death—and more importantly how healthy we are before we die—has changed dramatically. Infectious diseases used to be the most common cause of death. Today, infectious disease is a small fraction, while chronic (non-infectious) diseases such as heart attacks, diabetes, strokes, and related conditions dominate. These chronic diseases now account for the great majority of deaths.
For many generations average age at death steadily increased. Now the warning signs are different: the “years alive” may not be the only issue. The bigger concern is that many people are less healthy in later years, and chronic disease is appearing earlier. This is not just a personal health issue; it is a societal systems issue.
Why we are becoming less healthy
The main drivers are not mysterious. They sit in plain sight, but they are often discussed separately instead of as one joined-up system. The root problem is a misapplication of technology: agriculture and food processing have become extremely good at producing cheap, high-energy food, while steadily stripping out what the body needs for repair, regulation, and resilience.
1) Reduced nutrition in modern food
The first driver is a reduction in the nutrition of modern foods. This is the easiest to discuss because nutrient content has been widely studied by many researchers. Across multiple lines of evidence, modern diets tend to be lower in trace minerals and protective plant compounds than traditional diets built around fresh, diverse, minimally processed foods.
2) Modern foods overload the diet with fast energy
The second driver is not only that food is less nutrient-dense, but that it is often loaded with added sugars, salts, fats, and fast acting carbohydrates. These combinations are highly palatable and easy to overconsume, and they create a diet that is rich in energy but poor in “refurbishment”.
3) Gut biology and appetite control are being disrupted
The third driver is the gut biome (gut biota). Modern food patterns tend to reduce the diversity and resilience of gut biology. The gut biome is not just passive “flora”; it behaves like an intelligent system that influences hormones, appetite, cravings, inflammation, and immune function. This is not a fringe concept—one of the strongest practical demonstrations is how dramatically metabolism can shift when gut ecology is altered in medical settings (for example, the well-known outcomes seen in faecal transplant research).
A key point is evolutionary: the appetite control system developed in a world where food was often lower in energy but higher in natural nutrients and living biology. There was little pressure to evolve a precise “mineral dashboard” that tells you exactly which micronutrient you are short of. Instead, the system tends to send a broad message: eat more. In a modern environment where cheap, high-energy foods are everywhere, that message can drive overeating.
Citizen research, and citizen action
The Gbiota project is more than citizen research; it is citizen action. Citizen research is often criticised because it cannot compete with specialist laboratories using electron microscopes and DNA sequencing machines. That criticism misses the point. The goal is not competition. The goal is complementarity.
The internet now gives citizens access to published research, clinical insights, and global experience. That access allows people to integrate knowledge “top down” and apply it “bottom up” in gardens, kitchens, and communities. This is how practical systems improve: by repeated trial, shared learning, careful observation, and honest reporting of what works (and what does not).
The first step is to define the real-world problem clearly: chronic disease has replaced infectious disease as the dominant health burden, and it is strongly connected to food quality, food processing, and the ecology of the gut. Once that is recognised, the next step is to act in ways that are practical, measurable, and scalable.
Food, not pills
Commercial prebiotic and probiotic pills do not appear to be consistently effective in real life for most people, and they are certainly not cheap. Food is a more powerful lever because it does two things at once: it introduces helpful biology and compounds, and it also feeds the beneficial organisms so they can out-compete less helpful organisms. This is the ecological principle of competition, applied inside the body.
There is strong evidence that diet can shift gut biology. Traditional diets in multiple regions show markedly different gut profiles compared with modern Western diets. The direction is consistent: diverse, fibre-rich, minimally processed diets tend to support a more diverse, robust gut ecosystem than diets dominated by ultra-processed foods.
The number one aim of the Gbiota approach is to improve gut biology through diet. Mineral and phytonutrient enrichment can help address deficiencies, but the core issue is ecological: improve the conditions so beneficial gut biology thrives.
Supplementary food: restoring balance rather than chasing extremes
A practical point: it is not necessary (or realistic) for most people to replace their entire diet overnight. The aim is to restore balance by increasing the proportion of biologically active, nutrient-dense “refurbishment” foods.
Food gives pleasure because hormones have evolved over millennia to motivate eating. Traditional diets tended to be lower in energy density but higher in natural nutrients and fibre, which helped appetite control operate smoothly. Modern industrial food systems have become exceptionally good at producing energy foods—especially grains and refined carbohydrates—at huge scale. This has helped feed a growing population, but it has also upset the balance by crowding out the foods that support repair, regulation, and gut ecology.
When the refurbishment and biology proportion falls too low, cravings rise, overeating becomes common, and chronic disease follows. Mechanical “eat less” advice often fails because appetite is not simply a conscious decision; it is heavily driven by gut-brain signalling. Improving gut ecology is a more realistic way to influence appetite over the long term.
What a Gbiota bed is designed to do
The Gbiota system grows plants in a highly biologically active soil. The aim is to produce food that supports gut biology and also delivers a stronger spectrum of phytonutrients and trace minerals. In practice, this includes building living soil, maintaining active microbial cycling, and using mineral inputs where needed so plants can build better “refurbishment chemistry” rather than just bulk biomass.
Gbiota beds can be used by experienced home gardeners, but the broader goal is scale: commercial growers can produce meaningful volumes of refurbishment food for people who do not want (or cannot) grow it themselves. This matters because the health problem is global and large. Home growing is valuable, but it will not reach everyone on its own.
Growers, economics, and the missing link
Many growers want to adopt regenerative, biologically based production. The obstacle is not belief; it is economics and market access. Modern supermarket distribution systems make it difficult for small growers to compete, even when they are producing higher quality food. If the goal is to combat diabetes and chronic disease, the contribution of commercial growers is essential—and the system must make it profitable for them to do the right thing.
The three stages of the Gbiota project
Stage 1: Build a practical knowledge club
Form a group of keen gardeners and growers with an interest in health. Set up Gbiota beds, share results, contribute improvements, and pool expertise to refine the system. Evaluate outcomes honestly—especially anything that seems to influence appetite, digestion, energy, and wellbeing. The goal is not perfect lab science; it is practical, repeatable outcomes combined with transparent learning.
Stage 2: Spread the word through real experience
Encourage members to share practical results with friends and local networks. The strongest message is not marketing; it is lived experience: better food, grown differently, eaten regularly, with clear and relatable benefits. People can be encouraged to grow some of their own refurbishment food, even if only a small amount at first.
Stage 3: Support commercial adoption
Encourage commercial growers to adopt Gbiota methods to supply people who are not growers. Growers will only adopt new systems if there is reliable demand and a clear way to differentiate their product. This stage is about market signals, relationships, and community-scale buying patterns that make “health-focused food” viable as a business.
Bottom-up push and top-down pull technologies
With all our sophisticated technology, it is reasonable to ask: how did society end up eating food that makes people less healthy as they age? One answer is that modern innovation is often highly reductionist and specialised. It optimises parts of the system (yield, shelf life, processing efficiency, marketing performance) while failing to protect the whole system (soil biology, nutrient density, gut ecology, and long-term health).
A key gap is the “soil to gut” pathway. There is abundant information on soil biology, and an even larger body of information on gut biology. What is rare are practical, integrated explanations that connect the whole chain: soil ecology → plant chemistry → food handling → gut ecology → appetite hormones → health outcomes. That missing integration is exactly where citizen action can help.
A recommended starting point
One highly recommended talk is by David R. Montgomery. It clearly explains how improving soil biology can connect to improved gut biology and better health outcomes. It is an inspiring introduction and helps frame why living soil matters for people, not just plants.
Just look at the way that plants are generally grown. Hydroponics are popular and they don’t use any soil, just chemicals. Even with common farm production of plants the soil is just a way of supporting the plant and the nutrients come from chemicals.
Modern foods are deficient in key nutrients and living microbes. A common phrase is:
Overfed and undernourished.
Our bodies are intelligent and sense this deficiency so stores excess fat and the wrong fat in the wrong place is the underlying cause of the modern epidemic of chronic, non infectious diseases.
Gbiota Inputs – Organic Waste, Manure and Rock Dust
Now look at the Gbiota system. Our basic inputs are organic waste, manure and volcanic rock dust. All cheap, readily available and sustainable.
The microbes, particularly the fungi, break down the rock dust making a whole spectrum of minerals bio-available while also enhancing our gut health.
This is all embedded in the soil blood which is full of a broad spectrum of both minerals and living creatures. If allowed to become stagnant this would soon become a stinking mess full of harmful pathogens.
But the system of flood and flush with pulsed irrigation ensure that this always remains fresh and applying from below and allowing the soil blood to wick up means that the soil where the plants roots are growing never becomes saturated, just moist - Goldilocks moisture.
[vdo id="685537cdb6c04bea8cb51aed540bdc75"]
What Is Soil Blood?
I start by collecting all the soil blood that has drained out from the boxes. I call it soil blood as it does the same job for plants that blood does for us, transport nutrients and cells to where they are needed.
It is dark brown and if you look at it under a microscope it is full of the weirdest creatures.
I collect this up in a box and add water.
Flood-and-Flush Irrigation Cycle
I then twist all the swivel tubes into the up position.
I then calculate out how much liquid to apply by diving the size of the box by ten. Most of my boxes are 30 litres so I know I need to apply about 3 litres.
Typically I water twice a week, my be less in winter but at least once a week.
I pour my diluted soil blood into the compost tube which flushes the soil blood and any lose compost particles into the base of the bed so it floods.
It can’t flood higher than the height of the swivel tube so any excess liquid just overflows out of the swivel tube. This sometimes happens when the plants are very small. Soil blood is valuable so I may put a container to catch any overflow.
The liquid will now wick up to the plant roots so they are kept moist not wet.
This is the key to the Gbiota system. We want to breed beneficial microbes but if the soil is too wet we will breed harmful microbes.
When I flood the base of the bed all the stale air in the base is expelled.
I wait for a period for the liquid to wick up to the plant roots, at least one hour but a day is not too long.
I now rotate the swivel tube into the down position and catch the soil blood in a bottle.
If the plants are growing fast and I have not watered for a while there may not be any water draining out.
This process is called flood and flush. Flushing is important so I now know that I need to water more frequently. If I water twice a week this rarely happens but I like to check that I am getting the flushing action.
This is how I breed beneficial microbes without breeding the harmful microbes so when I eat the plants I am enhancing my gut health.
I can tell it is working as a healthy gut is intelligent so sends out hormones to make me feel satisfied so I don’t want to keep on eating.
Foliar Spray
I have a big problem with insects attacking my plants.
I have used pyrethrum sprays which do work but I really don’t want to use any toxic chemicals. Just because a chemical is natural does not mean it is harmless, there are lot of things in nature that can kill us or our gut microbes.
I am running trials by taking the soil blood I collect, just adding a drop of bio-degradable detergent and spraying onto the leaves of the plants.
This does two things, the dilute detergent washes the wax of any creepy crawlies and so they die and the the soil blood is teaming with microbes which can now enter the plants through the foliage as well as the roots.
I am still in trial mode but this seems t be working well, so I mention for people who want to try.
Wickimix is simply a growing medium – soil teaming with life and nutrients – and is central to the Gbiota system.
It has been produced in Wicking beds by a technology which is now well-matured and stable and is described in numerous articles which I can supply on request – just email me at colin@gbiota.com.
But while straightforward it does involve pumps and various irrigation technologies which are well suited to an experienced grower who could supply Wickimix as a growing medium, in clean skin boxes ready for planting or even better as in boxes with plants grown to the stage where they are ready to be harvested.
It is still our aim to establish a network of growers but right now there are many people who want to take advantage of the Gbiota technology but there is no local grower, so in this article I describe how people, even if they are living in an apartment, can produce their own Wickimix.
Gbiota is about breeding living, microbe-rich soil at home – whether you have a garden bed or just a balcony box.
Making Wickimix in a Garden Bed
I start with a section for people who have access to at least some garden, even if small.
The big advantage is that natural soil already contains the soil creatures on which Gbiota depends.
It is simple and anyone can do it even if it means getting back to nature.
Step 1 – Decide the Size of Your Bed
First decide how big you want to make your bed, it can be quite big but I would not recommend going above ten metre in one bed or very small, the bed I describe here is only a metre long and little more than half a metre wide.
Step 2 – Prepare the Base and Sump Box
Simply clear the topsoil into a pile. Just dig down to where the soil get firm, what is often called the B horizon.
Then dig a bit deeper for the sump box, any old plastic box will do.
If the soil is reasonably firm with a good content of fines (eg clay or silt) simply bang with a hammer to make it firm. If is is really sandy you may need to import some clay to form a base.
It is best to check out the levels by pouring some water onto the base to make sure it all flows into the box.
Step 3 – Install the Ag Pipe and Inlet
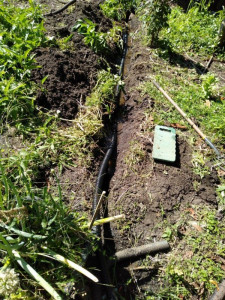
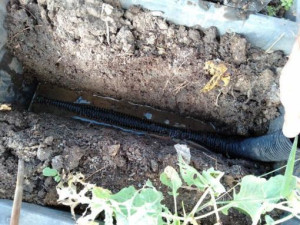
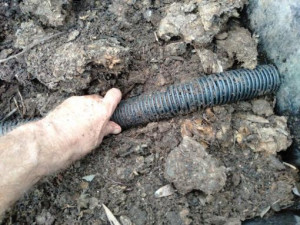
Now cut a piece of ag pipe to fit along the base of the bed and over the sump box.
You can bend the ag pipe to make an inlet but I prefer to use a larger pipe (eg 100mm PVC pipe) which makes a large inlet.
Step 4 – The Leaky Dam
Now comes the smart bit – the leaky dam. If the pipe was horizontal the water (or soil blood) would flow straight into the sump without wetting the soil. So raise the pipe just before the sump so it is at least one diameter higher than the base. This will force the water out into the soil.
But we don’t want to have stagnant water in the base of the bed so we make a leaky dam which will allow the water to slowly drain out. I use grass clipping for the leaky dam, they do rot down after a bit but I lift the pipe and add a few more grass clippings.
I usually line the whole bed with grass clippings so the water can flow across the base of the bed, but the real reason is that I have plenty of grass clippings but run short of organic waste. Before I started I seemed to have plenty of kitchen waste but now it has become a valuable item. (Move over gold, the value for the future is kitchen waste).
Step 5 – Building the Wickimix Layers
Next, I spread the kitchen waste over the base of the bed aiming for a depth of at least 100mm. It will soon drop down.
I now make the second layer with the nutrient mix which is a mixture of manure (whatever is available but chicken manure is good and readily available), rock dust, dolomite (to balance pH) and blood and bone.
Now I make the third layer by shovelling the topsoil from the pile. Initially, this may be poor quality soil with little nutrients or living creatures but this will soon change. But the action is on the surface of the soil particles so a soil with a bit of clay is best. Most soils have adequate fines but if sandy you will need to find some clay to give it body and a high surface area.
Smooth this top layer out ready for seeding.
Step 6 – Wetting and Seeding the Bed
This is really a Wicking Bed so the surface will be relatively dry which is not good for germination. I have found the best way is to totally wet out the surface, I mean really wet. Just go to ‘rent a kid’ from your local Kinder they are experts in making mud pies or if that does not work try your local mud wrestling team of whatever, but make sure it is really wet and sloppy.
Now sprinkle the seed mix on the surface.
Feeding and Breeding the Microbes
The real aim is to breed the beneficial microbes in the soil and they need to be fed. Just like us, they need energy and some of that will come from the organic waste but in a balanced Eco system, which is what Gbiota is all about, much of the energy will come from plants, that is what plants do – capture energy from the sun.
They create sugars which they exude from their roots to attract the various fungi and micro-organisms. Each species of plant exudes different sugars so to attract the right species we need a broad spectrum of species.
Gbiota is not about breeding some single magic species, it is about breeding a broad spectrum so you need to have a broad spectrum of plants. It will end up with the beds looking a bit of a mess but that is the way nature and Eco-systems work. You won’t find rows of neatly planted trees in nature, after a few billion years of evolution it has shown that a broad spectrum of living creatures works best.
But I will also add some sunflower seeds. Of all the plants I have experimented with Sunflowers are best for attracting mycorrhizal fungi.
Worms play a critical role, if there are no worms I suggest you go and buy some, red wrigglers are widely available.
I will now irrigate as described in my article on Eco-systems.
[vdo id="7ee3b4afa440442fbc6fd68ae1fc5690"]
Irrigate, wait around three months, and let the worms, fungi and soil creatures transform waste into living Wickimix.
It is now just a question of irrigating and waiting for three months or so for the worms, creatures of the soil and the fungi and microbes to do their thing and bingo you will have some beautiful Wickimix full of beneficial creatures and nutrients to grow plants that will keep you healthy.
I have to add more to the post to show how you can make Wickimix in a Gbiota box. I will do that as soon as get a round tuit. But in the mean time you can email me at colin@gbiota.com.
But first my next job is to write and article on how to schedule the irrigation which is at the core of the Gbiota system.
No Wickimix – What Now? (Making Wickimix in a Gbiota Box)
Ok I have found my round tuit so heres how to make Wickimix in your Gbiota box.
Well I have now got my round tuit so I can talk about how to set up a Gbiota box if you don’t have a garden and probably live in a flat with just a balcony.
The big advantage of a gbiota bed with soil is that it is likely to have the myriad of creatures that live in the soil but if all you have is a balcony then you just have to look for a viable alternative.
Basically everything is the same as I have described above and you just have to make your own version of Wickimix. But that is OK because as long as you keep on topping up the compost tube and you have worms the soil will gradually improve over time.
There is a lot of chemistry happening in a Gbiota box and this occurs on the surface of soil particles, clay is actually great as the particles are so small they have a huge surface area but a silt or just regular soil you should be able to buy that from any good gardening supplier.
You could also buy some Vermiculite which is great for growing but more expensive.
As I am into serious recycling I may use old coffee from the local coffee shop.
But what you do need is some Vermicast (worm casting) and some worms.
I suggest you use a 50/50 mix of Vermicast and whatever soil you decide to use.
Regeneration
Now comes the process of upgrading your soil over time.
As you will have guessed by now I am a bit of a compost enthusiast but it is important to recognise that labile or young compost is not good for growing plants in.
It often contains growth inhibitors as plants are in a state of stationary warfare and generate compounds in their battle against competing plants and insects.
You certainly do not want to be putting this labile compost onto the soil surface.
In the Gbiota system we start with three zones, compost at the bottom which act a bit like a sponge to hold water, then the nutrient layer which contains manure to supply nitrogen which will help the compost to decompose and the Wickimix where the plants are seeded.
By the time the roots have reached the bottom layer the compost will have largely decomposed.
Compost Tube
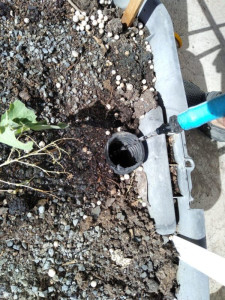
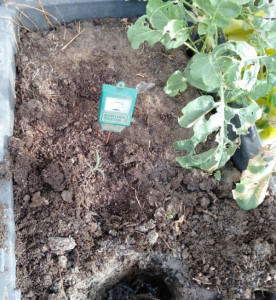
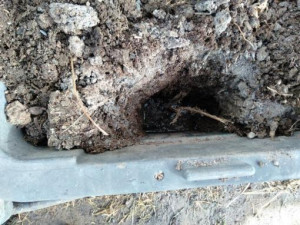
You can move the compost tube to a new position by just digging down to make a new hole, lifting the compost tube out while pushing down on the compost so it stays in place, filling with raw compost as it becomes available and using the soil you have dug out to top up the upper layer (which will have dropped as the original compost decomposes.
You can easily get six new positions for the compost tube which gives plenty of time for the compost to break down.
This would typically done when reseeding which occurs on average every three months depending on what you are growing.
Inter-sowing
In my seed mix I will have a wide spectrum of plants, some fast growing other slower. This means I can pull out the plants that have done their thing and replace with fresh seeds. I don’t use compost for this but will use whatever version of Wickimix I have available.
I find the easiest way if to use the soil from the new hole I have just dug when moving the compost tube.
Flipping
At some point in time I may want to rebuild the box entirely but I will try and keep the layer of top soil intact. I just put a lid on the box and turn upside down. That’s the easy bit.
Then I will clean out the base and pipes and flip the old contents back into the refurbished box. This is a bit like tossing pancakes , sometime I get it right and sometimes I miss but it does not really matter, just put the soil back into the box.
[vdo id="685537cdb6c04bea8cb51aed540bdc75"]
I normally drill with a regular hole saw. I used to heat up a suitable size socket from my tool kit, which melted rather than cut the plastic and left a ring of plastic that was stronger. That may be better for mass production, but drilling is easy if done gently.
The grommet and tube are pushed into the hole.
[vdo id="f9af392c5f434d87a484552a08b8fc07"]
If you have watched previous videos you will see I laid a length of ag pipe along the base and up to provide a filler pipe. I now use the compost tube, so I just lay a length of ag pipe along the base. I often cut a second piece of ag pipe which I use like a telescope so it fits neatly.
Gbiota boxes – making and filling
In the past I have promoted that consumers should link up with a grower who can provide either Wickimix (the growing medium in Gbiota boxes) or pre-prepared Gbiota boxes as clean skins (ready to plant out) or with mature plants ready for harvesting.
I am now finding that many people want to do everything themselves, so I have simplified the whole process, including the preparation of Wickimix (the most difficult part of the process), and am publishing a series of articles on each stage.
I want to emphasise that Gbiota is more than just growing vegetables; it is about breeding beneficial microbes in the soil which will enter the plants growing in the soil and then our guts.
The plants are just a way of packaging the microbes – a lot better than plastic.
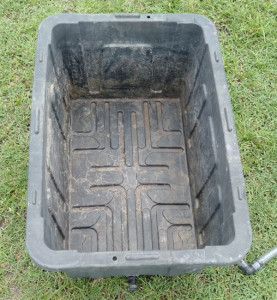
First job is to select a suitable box. The type of box is not critical. Depth is the most important. About 200 mm is fine for growing small, rapid turnover plants such as baby greens, while 300 mm is more suitable for larger plants. There is not much point in going deeper, as water will only wick up to about 300 mm.
I typically use a box with a height of 250 mm as that is the height of most readily available storage boxes and they work fine.
I prefer to use a number of smaller boxes. It allows a wider selection of plants and they are not too heavy to lift. A typical size would be about 400 mm by 500 mm with a total volume of around 30 litres, which is about as heavy as can be easily managed.
Foamed polystyrene boxes can often be got from local greengrocers for free and give good insulation, but they are a bit fragile.
Clear plastics are fine if they are UV stabilised. If not, they will go brittle and crack in the sun.
Regular tote boxes are quite fine and cheap.
First job is to drill and install the swivel tube. I use a standard hole saw of the same diameter as the grommet (in Australia 19 mm).
Drill gently, as it is easy to crack some plastic boxes.
Push the grommet into the hole.
Apply some oral lubricant and wriggle the straight-through connector into the grommet.
The standard connector has a small and large rib; the small rib goes into the grommet.
Fit the swivel tube onto the connector. Make sure the 90° bend rotates easily. I usually put some grease or Vaseline as a lubricant. You do not want the grommet to rotate as eventually it will leak.
Cut a length of ag pipe to snugly fit into the base of the box. You can always use a telescopic extension so it fits nicely (or if you cut the ag pipe too short).
Fill the base of the box to about one-third full with organic waste. When I first started this project I seemed to have plenty of kitchen waste, but I now use it faster than we make it, so I collect from local restaurants. Coffee grounds are great, but I still don’t have enough, so I use grass clippings from mine and the neighbours’ lawns.
I place the compost tube, usually in a corner of the box. I find the compost tube method really works great, so I have stopped using separate filler tubes as described in previous posts and videos.
Now I add about 10 litres (a bucket full) of the nutrient mix. I make up a bulk mix of about 1.5 cubic metres of manure (chook preferred), 0.5 cubic metres of volcanic rock dust – volcanic rock dust is the best as it contains a broad spectrum of minerals, but use what is readily available – plus 20 kg of dolomite to balance the pH (chicken manure can be very acidic) and 20 kg of blood and bone which contains a broad spectrum of trace minerals.
I then add another bucket of Wickimix which contains both microbes and soil creatures, particularly worms. Microbes are already breeding in the soil, but the soil creatures are recyclers and have a gut like we do, which is where the bulk of the breeding occurs.
Wickimix is full of worms and if I see any on the surface I pop them into the compost tube so I don’t hurt them when I press down the soil.
Worms are essential for the Gbiota system to work.
Germination is always an issue with Wicking beds (and Gbiota beds are just a type of Wicking bed) as the surface is (or should be) dry.
I find the best way is to really saturate the soil (so it is really soggy) before seeding. If I see any worms I pop them into the compost tube.
I then just sprinkle the seed mix onto the surface. I have a separate post on seeds.
I cover the seeds with a layer of either Wickimix or Vermiculite. The big advantage of Vermiculite is that it is very light, so I can put a thick layer on and both the small and larger seeds will still germinate.
I don’t water from the surface again until the plants have put down roots and are stable (otherwise all the seeds end up in a corner of the box).
In my next post I will talk about irrigation scheduling.
I have been writing posts for many years, but I wanted to combine them into just one post to make it simple for people making Gbiota boxes. I include sections on Gbiota beds to help explain the Gbiota principles, but these are a bit more complicated and tend to be used by people with a higher skill level.
You can still view the original posts in the growing section.
I run a commentary on the posts in red.
Growers and the Gut Biota
This is an early post but is good for explaining the Gbiota principles.
Microbes breed in the soil and enter plants, which then act as natural pre- and probiotics. When we eat these plants, they help form our gut biota.
[vdo id="1b5524564b3547adb6b6a2c03a2ca933"]
This process is the result of millions of years of evolution, so we know it works. But there are also harmful microbes and pathogens which lead to infectious diseases and can make us sick or even kill us.
Beneficial microbes form our “gut brain”, which helps regulate our bodies, particularly how we store fat and where we store it, supporting a long and healthy life span.
Unfortunately, modern food does not feed our gut brain. This is one of the underlying causes of the modern epidemic of diabetes, heart disease and dementia.
In the Gbiota system, we carefully regulate the conditions so that beneficial microbes outcompete and outbreed the harmful microbes.
The beneficial microbes need a combination of nutrients, water and air.
Beds, Boxes or Combo
If you have a garden, you can choose between Gbiota beds, Gbiota boxes or a combination of both.
Beds have the advantage of much higher productive area and a natural migration of the creatures of the earth.
They are also great for creating Wickimix to go into boxes.
I will give a brief overview of beds here, but most people, particularly city dwellers, will use boxes – beds are mainly to get the idea over and to show the principles.
Gbiota Beds
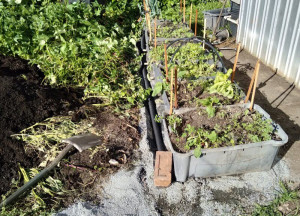
We breed the beneficial microbes in raised beds with a subsurface ag pipe.
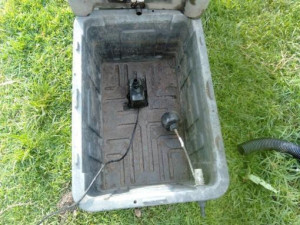
“Soil blood” – a combination of water, nutrients and microbes – is stored in a sump.
Soil blood drains out of the beds or boxes and is full of living creatures and nutrients. It fulfils the same function in the Gbiota beds as blood does in our bodies – transporting air, beneficial microbes and nutrients around the system. Pretty important stuff.
We pump the soil blood into the ag pipe at relatively high flow rates so it creates a pressure which saturates the surrounding soil before it has time to drain away.
These two basic principles of flood and drain (so the soil breathes) and circulating the soil blood are critical in the Gbiota system, ensuring that the organic matter does not become putrid.
The end of the pipe rises over a leaky dam which allows the soil blood to build up pressure and then lets excess soil blood return to the sump.
The area just above the ag pipe is loaded with organic waste which feeds the microbes.
It is then covered with soil, minerals and inoculants, then seeded with either food crops or green manure crops. These plants exude nutrients which attract the beneficial microbes.
After a period – typically a few months – the organic waste will have decomposed to create a living, highly nutritious soil.
Soil blood is pumped into the bed, expelling any stale air.
Excess soil blood drains back into the sump through the leaky dam.
As soil blood leaks back through the leaky dam, it returns to the sump and fresh air is sucked back into the soil.
The soil is literally breathing, and the soil blood never becomes stagnant.
With the right conditions, the beneficial microbes outbreed the harmful ones.
Eco-balance is the basic principle behind the Gbiota technology.
Gbiota Boxes
Our long-term aim is to have a network of operations supplying boxes with food ready to eat, but we are not there yet.
The living soil is placed into Gbiota boxes and seeded to grow food plants which will act as natural pre- and probiotics.
Growers sell these boxes to their customers so they have living plants growing at home.
This is important as microbes have a short life, so the plants must be eaten shortly after harvesting, before the microbes die. Harvested plants may take some time before they go rotten, but the beneficial microbes will have died well before that.
When the customer has finished eating their plants, they can swap their empty box for a fresh box.
Customers and growers develop a long-term relationship. Customers have healthy plants growing at home and can look forward to a longer and healthier life, while growers have a viable business providing a valuable service to their local community.
Why “In-Soil” Composting?
Breeding beneficial microbes is a key part of the Gbiota system – this section explains why we use “in-soil” composting.
Breeding microbes is easy – we have been doing it for years by composting.
This is important because if we are to survive as a species, we have to recycle organic waste.
Hot composting is a sophisticated process that effectively recycles organic waste while killing off most of the pathogens. But it does require careful balancing of ingredients with the right carbon-to-nitrogen ratio, and turning to ensure adequate air.
The high temperatures – typically well over 60 °C – kill off the pathogens. Unfortunately, our guts do not operate at 60 +°C, so hot compost is not ideal for breeding gut biota.
Cold composting typically ends up as a horrible smelly mess riddled with pathogens, so we need a different approach – using the creatures that naturally live in the soil.
Worms are highly efficient recyclers, but there are numerous other creatures: beetles, sow-bugs, soldier fly larvae and many more we can see, and under a microscope, soil is teeming with microscopic life.
This is a different approach from simply “adding microbes” to process the waste. Instead, we use creatures to consume the waste, which they process using the microbes in their guts – very similar to the microbes we need in our own guts.
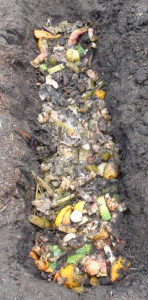
Virtually anything organic can be processed by burying it in the soil, as there will always be some creature that will consume the waste. Even wastes like orange peel will be reprocessed by fungi.
This is a much better method for breeding gut biota. The only disadvantage is that it is slower than high-temperature composting, but that is not a real issue as the soil above can still be used for growing plants to eat.
Gbiota Beds and Boxes – Adapting to Climate Change
Gbiota beds were developed many years ago and remained stable in design. However, climate change and recent floods required a rethink.
Gbiota Beds and Boxes – Same Principles, Different Mechanics
We use the same principles in both Gbiota beds and boxes – partial flood, then drain, and recirculate – but we apply these principles in different ways.
Beds
Gbiota beds are, as their name suggests, in-ground beds. After major flooding from climate change, I now use raised beds, so they are really “on-ground” beds.
They have several advantages. Technically, they encourage a wide range of creatures to enter the system.
I talk a lot about microbes (which are incredibly small and have short lives) and fungi (which can be incredibly large – the largest single organism can extend over several kilometres), but the mid-sized creatures are also incredibly important to a living ecosystem.
These creatures – worms, soldier fly larvae, beetles, slaters, sow bugs, spiders and more – all have a gut, just like us, to digest their food. Since we are trying to breed microbes for our gut, they are an important part of the scene.
These creatures naturally find their way into the Gbiota beds; we don’t have to do anything special – they just come.
In previous posts I showed a plastic liner, but that prevents the local soil life from entering the bed. I have found that on my block – a duplex soil with silt over clay – if I compact the soil (banging with a big hammer) it works fine without a plastic liner. I suspect that on a sandy soil a layer of clay may be needed to stop excess leakage.
Boxes
Gbiota boxes are a lot smaller so they don’t have the production capacity of beds, but they have one big advantage: they can be used at homes without a garden to grow Gbiota plants.
This is incredibly important. Microbes work on a different time scale to us. I use the rough ratio that one hour of a microbe’s life is equivalent to a year of human life.
If you buy a vegetable from the supermarket, it will have been grown in soil where nutrients are provided by chemical fertilisers; there will be minimal microbial life in the soil and hence in the plants.
What little there is will usually have died by the time the vegetable ends up on your plate.
The overriding advantage of the Gbiota boxes is that they allow people – even with no growing skills – to have growing plants at home, which they can pick and eat before the microbes die.
This is a crucial part of the Gbiota technology.
Combo – Beds + Boxes
These are not competing systems. My preferred system is to use beds to create the living soil and then use this soil (Wickimix) in Gbiota boxes.
This is the system I use at home. If for no other reason, it is much easier to protect boxes from the invading insects which are an inevitable part of growing without toxic chemicals.
Selecting a Gbiota Box
There is nothing magical about the box. I know there are many “wicking boxes” on the market, often at high prices, but what matters is the soil, not the box – almost any box will work fine.
The main considerations are depth, size and UV resistance.
About the minimum depth for a box is 200 mm, and I doubt many people will be growing a giant red gum in a flat, so there is no point making it deeper than about 300 mm. Most of my boxes are around 250 mm, and even then I don’t fill right to the top.
There is a lot of nutrient in the Wickimix (the soil in the Gbiota box), so there is no need for a massive root system.
Many people make very large wicking beds (and Gbiota beds are just a version of wicking beds), but the reality is that the box is a closed system and the soil will deteriorate with time. This requires soil regeneration, which is much easier in a small box than a large one (see Gbiota 101).
My preference is for roughly a 30 litre box and leaving about a 50 mm air gap from the top. I can lift this with a level-1 grunt – but it depends how strong you are.
I am going to describe the Gbiota boxes as it is easier to explain how they work. Gbiota beds are based on the same principles but the mechanics are a bit more complex.
There is nothing special about the Gbiota boxes, they are just regular storage boxes you can buy from any hardware store.
They will be exposed to sunlight, so they should be UV resistant. Black plastic boxes are loaded with carbon black, which is a dirt-cheap way of making them UV resistant.
There are some UV-resistant clear boxes, but most cheap clear boxes will become brittle within a few weeks in direct sunlight.
Size is important, as they need to be transported and carried. A 20 litre box is about the maximum that can be easily handled, but I often just partially fill a 30 litre box which I can use as a terrarium with a lid for germination, then later drape a fly screen over the top.
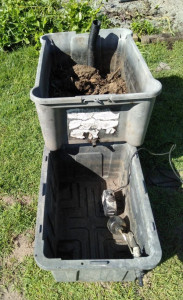
I drill a hole in the side as low as I can, then use a rubber grommet and connector to make a swivel tube outlet.
I cut a piece of slotted ag pipe to fit neatly into the base.
I used to just bend the ag pipe to make a filler, but now I either cut the pipe at 45° (and do the same with the vertical pipe) or just drill a large hole in the base pipe.
Either way allows me to view the water level in the base of the box, which is an important part of managing the system.
I have now stopped using this vertical pipe and instead use the compost tube for filling.I then fill the base of the box to about a third of the height (about 100 mm) with organic waste. Grass clippings are great, but use whatever you can lay your hands on.
On top of this I add a nutrient mix containing minerals, manure and trace minerals (typically available in blood and bone), and of course worms to process the organic waste.
In the ideal situation I will then fill the box with soil created in a Gbiota bed (Wickimix), but if that’s not available, any good soil or potting mix can be used as a starter.
I wet the box from above and then seed as normal.
Nothing much new here – it is the way we operate the box that is important.
Future Vision – Ready-Made Boxes
I hope that at some point, groups will form where people or companies supply boxes with plants already growing, so people in flats can just buy online without having to make the boxes themselves. But they will still need to know how to water the boxes so the beneficial microbes outcompete and outbreed any harmful microbes. This principle of eco-balance is a key part of the Gbiota technology.
Operating a Gbiota Box
I have to wait until the seeds have germinated and put down a reasonable root system before I start operating the box according to Gbiota principles.
I set the swivel tube to the vertical (up) position and fill the box to the top of the swivel tube through the filler pipe.
This has to fit around normal living, so I typically do this over the weekend.
After the seeds have germinated and put down roots, I water from underneath.
I leave the swivel tube in the up position and allow the water (soil blood) to wick up to the roots of the growing plants. I do not top-water, but if the boxes are outside and it rains, the surface will be wetted.
I have recently started to foliar irrigate with soil blood (spraying it onto leaves) to increase the microbes in the plant.By mid-week – which is the maximum length of time I want the soil blood to be stagnant – I twist the swivel tube down and catch the soil blood in a suitable container (e.g. a recycled milk bottle) for reuse on the next cycle.
Most of the soil blood will drain out, but there will still be some left in the base. I wait until that has all been used up before refilling. This is why I like to be able to view the water level through the filler pipe (or now, via the compost tube system).
Flood, Drain and Circulation
Think about what is happening here:
When I flood the base of the bed, I am expelling the stale air that has accumulated in the soil from biological activity. Rotting organic waste can make growth inhibitors – and we don’t want that.
When I drain the bed, I am sucking fresh air back into the soil in the box – I am “breathing” the soil.
The soil blood is also aerated every time I cycle the system, creating conditions that favour beneficial microbes.
Reloading (Older Method)
When the crop has finished, I used to refill the box by putting the lid back on, turning the box upside down, lifting the box off and reloading with fresh organic waste – then flipping the old soil back into the box so the soil structure was not disturbed.
Note: with the success of compost tubes, this flipping method is no longer necessary.
Gbiota Beds – Construction and Operation
Gbiota beds work on the same principles as boxes: partial flood, drain and recirculate – but the mechanics differ.
My strategy is to level the ground first. Hopefully, this gives me a bit of topsoil I can use later.
Then I lay out lengths of ag pipe in rows. At the filler end, I pack some soil so the pipe will finish above the final height of the raised bed.
At the other end, I make a leaky dam just a bit higher than the pipe thickness. It is sufficiently dense that it takes some time (hours) for the water to drain out when it returns to a sump below bed level.
A sump pump in the sump has a float valve, so when the sump is nearly full the pump automatically switches on and feeds the ag pipe from a manifold.
This floods the area around the pipe and, when the pump switches off, water wicks through the rest of the bed and drains back to the sump through the leaky dam.
Operation is similar to the boxes: wet the soil and seed as normal, then surface-water if needed until the plants have put down roots.
After that, irrigate from underneath using the subsurface pipes.
All pretty straightforward.
Making and Managing Wickimix
Boxes OK
There does not seem to be much of a problem with making the boxes. They are just boxes you can buy from a hardware store. They do need a few holes drilled, but that does not appear to be a major issue.
Growing Plants OK
Actually growing the plants is usually not a problem either – many people are already growing house plants anyway.
The big issue is creating the Wickimix. The main input is organic waste – in an apartment this is typically food waste.
Nutrients OK
But Wickimix needs more than organic waste. It needs some soil, as most of the action is on the surface of soil particles. Clay is especially good because the fine particles have a huge surface area.
It also needs a source of nitrogen. Gardeners may have access to fresh chicken manure which is excellent, as it is full of microbes. It is also possible to buy processed chicken manure – this is clean but has lost many of the microbes.
You can simply put out some bird seeds and the local birds will offer a free delivery service of fresh manure loaded with beneficial microbes. So simple no one believes me, but it works great.
Next, Wickimix needs minerals. A home grower may buy in bulk and store them, but an apartment dweller can still buy packets, and supplements like blood and bone can be readily purchased.
There doesn’t seem much alternative to buying these, mixing them up and putting them into a box that can be easily stored – no problem.
In addition, of course, we need worms, which are an integral part of the Gbiota system.
Pongy Food Waste – Not OK
The real problem for the apartment dweller is how to handle the pongy food waste.
With a garden this is no problem – a couple of compost bins or rotating bins work fine – but having compost bins in an apartment is very not OK.
The smell problem can be solved by sealed containers, but those pesky flies still seem able to smell out a delicious meal – at least in sunny Queensland where I live.
Two Experiments
Experiments over – compost tube won, but I still keep a box of Wickimix to top up the compost tubes after I add waste.So I tried two experiments.
In the first, I used two boxes. One contains the nutrient mix and the other is for the waste. When I have some waste, I put it into the second box and cover it with the nutrient and worm mix from the first box.
In the second experiment, I went back to an older system – the compost tube.
This is a pipe (about 100 mm diameter) that goes right down to the base of the box. This gives two input pipes: one for the water (or more correctly, soil blood) and one for the organic waste.
When I put any organic waste into the compost tube, I cover it with the nutrient mix and also flush with water. This takes any decomposed material to the bottom of the box where friendly worms kindly distribute it throughout the box.
Easy Access
If I can get enough apartment dwellers to start eating food full of beneficial microbes, this will encourage commercial growers to start producing Wickimix and Gbiota boxes. This will make access available to many more people and reduce the number of people having a foot amputated from diabetes – which is what Gbiota is all about.
Wait and See (Update)
Originally, it was a case of “wait and see”. From the viewpoint of the Gbiota system, both approaches work fine for breeding beneficial microbes. The real question was which is the most user-friendly for an apartment dweller.
Since I wrote that, I have been using compost tubes with great success. I have some boxes near the house that I just toss kitchen waste into – so simple.
I find my favourite yoghurt containers make a really good tight-fitting cap for the tubes to keep out those pesky flies.
Moisture Control, Compost Tubes and Soil Blood
[vdo id="00c5705fd9314aa8bb81a2096b931bdc"]
The key to the Gbiota system is controlling the moisture level. If the soil is left full of water for any length of time, harmful microbes will breed.
The swivel tube is used to drain the box. We call the liquid that drains out “soil blood”, as it does the same job as blood does for us – circulating nutrients and oxygen around the body.
If you look at soil blood under a microscope, you see it is full of microscopic creatures.
As the soil blood drains out, it sucks fresh air into the soil. To ensure there is no stagnant water, the box is left for a period after draining.
Organic waste is loaded into the compost tube and capped with Wickimix (or soil) and, if needed, worms – then flooded with soil blood, which pushes the nutrients into the base of the box.
Soil blood can also be applied to the plants as a foliar feed – nutrients and microbes will be absorbed by the leaves.
We apply a fixed volume of soil blood at every irrigation – typically about 15% of the soil volume. We use a highly sophisticated device for this: an old milk bottle. We are into recycling.
We control the amount of water input by varying irrigation times. If I am at home, I will drain shortly after irrigating, but if I need to go away I can leave the draining until I return, which increases the time between irrigations.
Controlling moisture and nutrient levels is the core of the Gbiota system. There are many articles on this website on this topic and I am always writing new ones.
You can always contact me at colin@gbiota.com
Flipping vs Compost Tubes
Flipping was my standard practice. The success of compost tubes means that flipping is almost obsolete for a flat dweller but is still useful for a grower with a garden who is supplying swap-over boxes to other Gbiota growers.
I used to use this flipping technique all the time, but now find I can move the compost tubes from place to place, eventually filling the entire base of the box.
Commercial growers may still use the flipping technique for refurbishing swap-over boxes, but I think most home growers will prefer the compost tube method.
It is also much better for boxes that are too big to flip.
I often say that the process of growing gut brain food is easy, and that is pretty much true – but not as easy as tossing things from the shelves into a supermarket trolley.The process of developing the Gbiota system has been far from easy, involving over fifty years of experimentation with many failures – that is the cost of innovation.I like to make the results of this experimentation available to Gbiota members, so I write many articles. I have just checked and there are 233 posts, which can be pretty daunting to a new member.But I can help – all you need to do is email me at colin@gbiota.com and I will:
Either answer your question directly (if it is simple), or
Point you in the direction of existing posts which may answer your question, or
Write a completely new post so all members have access to the information.
I may paraphrase your question using your first name – for example, “Mary asked how to use fish heads in their compost” – I assume that is OK, but let me know otherwise.
Below is a list of all the available posts in date order.
First stage – create labile compost for breeding microbes
[vdo id="6e0081b9f8774d3c95dbb8821708c8f6"]
Creating a new swivel tube box
[vdo id="8b89d76f9cc849989be13bd061076c44"]
Regenerating an old box
How an existing box with growing plants can have fresh microbes and nutrients added without disturbing existing plants.
[vdo id="169e36c69e0e4dfb807075a34c5c65bf"]
[vdo id="169e36c69e0e4dfb807075a34c5c65bf"]
Gbiota is an evolving technology. Whenever some new bit of technology comes along I write a new article to describe what is new. This has led to hundreds of articles which, for a person new to the Gbiota movement, is a bit overwhelming. So I am writing this article – Gbiota Overview 2024 – as a review article to give an overview of the Gbiota technology.
Modern food
Modern food technology enables us to produce enough food to feed the entire world. We can choose to eat food which will make us fit and healthy or we can eat food which is addictive, makes us fat and sick and die young from some chronic disease like diabetes, heart attacks or dementia.
Humans are the creator of technology which can be of immense benefit or could eliminate our species. What matters is how we manage technology.
Fifty years ago I was a pioneer in computer-aided engineering and internationally recognised as a leading innovator in my field. Now I am eighty-four years old, still fit and healthy, and I understand the power of technology to be either for the benefit or the destruction of humanity.
I write on the web so people have access to the technology they need to live a fit and healthy life.
Information is the greatest of our technologies. I can sit in the corner of my living room, watching the birds in my mango tree, writing my articles about food which will make people healthy and anyone in the world can choose to read and use this information.
We have been led to believe that the problems of modern life can be resolved by three-word slogans and that we should all become dumb donkeys following simple instructions.
That is not the way to solve the problems of the world. We have to do what humans excel at – and that is to think.
I am not part of the internet marketing machine – I write for the concerned thinkers of the world. I hope you follow me here.
What we need to know about us
Homo erectus
We can trace humans back to about a million years ago – Homo erectus.
We were a puny little creature, light on in the teeth-and-claws department, which barely survived with a population under a million.
Like most creatures today, life consisted of getting enough to eat and not getting eaten by a creature with bigger teeth and claws.
Homo sapiens
Then we made the greatest innovation of all time – fire and cooking.
This made it much easier to digest our food and it completely changed us as a creature. Our guts shrunk – we didn’t need a massive gut – and our brain grew.
Brains take a lot of energy and that is what fire and cooking gave us.
We became a totally new creature, Homo sapiens – that was about two hundred thousand years ago.
We developed two characteristics which dominate us to the present day – we were intelligent and cooperative.
We developed our very greatest invention – speech. We could make plans on how to kill giant creatures like the woolly mammoth and pass on information and skills from generation to generation.
We developed tools and weapons – flint axes, spears, bows and arrows. We hunted in teams and generally had adequate food and could protect ourselves from the more ferocious beasts.
Although we were hunter gatherers and moved around a lot, we became very attached to a certain area of land which we came to think of as ours.
If the next tribe over had something different to offer, the two tribes would trade in an amicable way.
If the neighbouring tribe’s leader happened to have a particularly attractive daughter then a trade of marriage might be done to establish long-term harmonious relations between the tribes.
Big ears and the invention of war
If the daughter happened to be less attractive, say with big ears, then the tribes might exploit humanity’s worst invention and go to war.
The warriors would fight to the death without questioning why because they were members of a tribe and that was the done thing.
Had the warriors known they were risking their lives because the neighbouring tribe’s leader’s daughter had big ears they would unanimously have said, “but she has a cute bum so do what we do and make do with what you’ve got” – and war would never have been invented.
Nothing much has changed – we still go to war for no viable reason.
Food security and agriculture
Apart from the odd tribal scuffle, and they did not have atomic bombs which could end humanity, things were not that bad apart from time to time lack of food.
To prevent this humans invented agriculture aimed at ensuring a stable food supply.
The problem with inventions is that you never know quite what they may lead to, but it is almost always some good and some bad.
Agriculture led to classes, with some people claiming they owned the land. They became very rich and had time to develop music, art and writing, while the poor worked their guts out (figuratively) growing food on the land.
Cities and civilisation came into being, offering a totally new way of life – good for some, less good for others (actually most).
Cities, with overcrowding and lack of sanitation, led to diseases on a grand scale not experienced before.
Many civilisations came into being then just disappeared. I have no idea if they knew why but we do now – they destroyed the soil that grew their crops.
The solution then was to create a new civilisation on new soil that had not been destroyed.
We do that in modern times. The difference is we have now developed much more effective ways of destroying soil and we have run out of new land to exploit and destroy.
Population explosion
Before the industrial revolution the total population on earth was under a billion and people ate food grown in natural soil (soil fertilised with manure and other organic waste) which meant that people were naturally eating gut brain food.
Then the population tripled in size and then in just my lifetime tripled again.
This put enormous pressure on the global food supply which we thought we had resolved by the technologies of synthetic fertilisers and plant genetics.
This increased the supply of energy food dramatically and we are now producing enough energy food to feed the entire global population. True, there are people still starving but that is because of equity and distribution problems – not an overall lack of energy food.
We are actually growing more food than we need – we waste a lot.
The two roles of microbes
But the nature of soil has changed. Previously the soil was full of microbes which broke down minerals in the soil to make them bio-available and also entered the plants to feed our gut brain.
Our modern food system lacks both the beneficial microbes which power our intelligent control system and essential trace minerals.
Our intelligent control system – our gut brain – regulates our appetite and how much fat we store. The wrong fat in the wrong place is the root cause of the modern diseases of obesity, diabetes, heart attacks and dementia.
Technically we know how to resolve these problems but this does require eating plants shortly after picking and before the beneficial microbes die.
Climate change
For a long time the energy companies learned from the tobacco industry and tried to persuade us that climate change was a myth or at least unproven. But with fire and floods across the globe it is no longer possible to pretend that climate change is not real.
Owning shares in an oil company makes pretending easier.
The combination of the destruction of our top soil coupled with climate change is now the biggest threat to humanity – not so much from a lack of food but the lack of gut brain food which is at the root cause of the modern epidemic of chronic diseases, obesity, diabetes, heart attacks and dementia.
The food industry learned from the fossil fuel and tobacco industry that they can convince the bulk of the population for many years that there is no problem – nothing to see here.
Concerned thinkers
In the short term the only practical way to do this is for people to grow some plants at home which provide these beneficial microbes and trace minerals.
But how to create a general awareness that there is a simple, economic and practical solution when the food industry is spending multi-billions of dollars on manipulative advertising with the clear message that everything is fine – nothing to see here?
David and Goliath
What strategy can the Gbiota movement (which, let’s face it, is an amateur operation) use to make people aware that the lack of gut brain food is the biggest threat to humanity?
The strategy is simple – form a social movement of concerned thinkers who set up their own Gbiota growing system which they can show to a much wider group so people can see that there is a solution that works and is practical.
That is what the Gbiota movement is all about – showing people how to grow plants at home which provide the beneficial microbes and trace nutrients.
And that is why I write this post about soil blood.
Soil blood
Soil blood is literally at the heart of the Gbiota system – so what is it and why do we call it soil blood?
Think about our blood. I did not think much about blood before Gbiota. I would cut myself, bleed for a few minutes then about a week later the cut had just disappeared.
When I bang my car on my gate post, why doesn’t it mend itself in a week or two like my cut? My body is better designed than my car.
The answer is that human blood is flowing all the time transporting useful stuff from here to there – air from my lungs and sugars from my gut to my muscles so they work; stuff to stop the baddies getting into my cut and fixing it; immune cells to sort out any interlopers; messages (hormones) saying “time to eat”, “stop eating” or “hey there is a pretty girl, time for a quick look” (I am old but not that old).
All in all blood is truly remarkable – “truly amazing” as my grandkids would say.
How water moves
There are some people, like me, who are a bit obsessed about how water moves through the soil and plants, and spend hours thinking about the peculiar properties of water that make life possible.
Water is just plain weird – a liquid with tensile strength, wicking, osmosis, the nocturnal cycle as water is sucked up by the plants in the day then redistributed at night, the Brownian movement of random water molecules and another weird one – Pedesis. There is certainly plenty to keep us thinking about water and how it moves.
We may talk about water, but just squeeze some out of the soil and no way is it just water. Look at it under a microscope and it is full of weird and wonderful creatures – large and small.
Look at what is dissolved in the water – a whole range of complex chemicals which are used to feed plants. Sometimes, if there is a bossy plant about, chemicals to stop other plants growing, and some chemicals to encourage the beneficial bugs or to repel harmful bugs.
It is not right that we should just call this “water”. It is moving about transporting all these useful things around to keep life working (but unfortunately not mend my fender bender).
So I call this magnificent fluid “soil blood”.
Two rules for managing soil blood
1. Breathing
The first rule is that while we have lungs the soil does not. So we must make it breathe – which we do by flooding the soil which expels all the stale air, then letting it drain – which sucks in fresh air. We are literally making the soil breathe – as I see from all the bubbles when I flood.
2. Moving
The second rule is that this soil blood must not be allowed to become stagnant as then it will become anaerobic and breed up the malicious microbes which have a nasty habit of making us sick or even killing us.
And that is about all there is to the Gbiota technology. Everything else is just finding practical ways of making this happen.
Making it happen
To make all this work we need nutrients and energy. By “all” I mean us, the plants, the soil, the microbes and the other creatures which make up a total ecosystem.
Plants are singularly good at capturing energy. Most of the energy that we use has come from the sun one way or another. Photosynthesis uses the energy of the sun to break down the water molecule, releasing the oxygen molecules and linking the hydrogen molecules to form complex hydrocarbons.
Photosynthesis does require some minerals which it cleverly extracts from the soil by exuding sugars from its roots. These sugars feed and attract microbes in the soil which break down rock particles and convert them into bio-available chemicals which the plants and we can use.
This is a perfectly balanced ecosystem which has evolved over millions of years – we don’t have to reinvent it from scratch.
But there are many ecosystems depending on the conditions.
A desert ecosystem is pretty rugged for us humans to exist in, with not much in the way of food, but deserts are generally free of the infectious diseases which can make us sick or kill us.
A jungle ecosystem is the opposite, with oodles of food but a whole variety of microbes which will make us sick or kill us.
The Gbiota technology is not some new technology about inventing a new ecosystem – that has already been done for us by nature.
It is about controlling the conditions, particularly water, which give us the best balance between the beneficial microbes which give us food – particularly gut brain food – and the harmful microbes which make us sick.
Raised beds and boxes
We have the option of using raised beds or boxes, or in my case both.
I have never quite mastered the art of enjoying picking vegetables, cowering under an umbrella in the middle of a thunderstorm, so I like to grow some vegetables in boxes on my patio where I can just pick and eat.
On the other hand, I have a bit of a thing about in-ground composting largely because it avoids blowflies (“blowies”) which, despite my love of nature, I have never managed to develop an affection for. So I use raised beds.
I used to just use flat beds but since the “powers that be” decided that climate change was for the woke generation we now experience a one-in-a-hundred-year flood every three months so I now use decidedly raised beds.
“Decidedly” means that the lake that used to be my garden has veggie patches sticking out above the water. This tendency to flood is another reason I like boxes which I can lift above the flood level.
Raised beds
Let me start with raised beds as they are actually the simplest and make ideal in-ground compost.
The first step is to investigate the soil. In my case that is a yukky duplex soil with a layer of yukky silt sitting on a layer of even yukkier clay.
Actually clay is a decided bonus. Gbiota beds are really about making soil and clay particles are incredibly small so have a huge surface area.
Microbes and nutrients like to attach themselves to this surface which then performs one of the wonders of the world – turning yukky clay into easy-draining aggregates which probably make one of the best growing soils.
If your garden is clay you probably don’t need anything to stop the water leaking down into the subsoil.
If you build a raised bed in the dry season (and I live in Bundaberg, Queensland) the clay will have dried out and it may seem that the first time you try and use the bed it takes an excessive amount of water.
But once the soil is wet it expands and self-seals and works fine with very little further water wastage.
But it is important to appreciate certain basic principles of Gbiota beds, particularly if you are used to drip lines.
Dig a trench
Start by digging a trench. This should be about 300 mm below the intended top of the raised bed (which in turn depends on anticipated flood levels) and lay an ag pipe in the bottom of the trench.
The trench should ideally be level.
But I have made beds on a slight slope and just raised the ag pipe every few metres along the length so it is actually a series of short beds. Definitely not ideal – but we don’t live in an ideal world and if we wait for the ideal we would never get anything done.
Both ends of the pipe must rise up to higher than the top of the soil so when water flows into the pipe the water builds up in the pipe to create pressure to force the water out of the holes in the ag pipe.
Fast is good
This section is for those used to drip tape. Drip tapes work by surface tension: water is very slowly dripped into the soil, the moisture content rises until it is saturated then slowly wicks away under surface tension forces, giving a moisture gradient which drops off the further away you go from the drip. Only a relatively small area of the soil is actually fully wetted.
Drip tapes are normally used with fertigation where chemical fertilisers are added to the irrigation water. These chemicals suppress the level of biological activity.
It is a bit like automated reverse parking – it works great but people forget how to reverse park manually. Add too many chemicals and the natural processes that supply nutrients stop working.
When we feed plants all the chemicals they need, the natural ecosystem where the microbes break down rock particles to provide bio-available nutrients just atrophies, so we miss out on the beneficial microbes.
This is the way industrial chemical agriculture works – producing large quantities of food which provides plenty of energy but is inert and does not provide the beneficial biota to enhance our gut biota.
The whole aim of the Gbiota system is to breed beneficial microbes to power our intelligent control system which regulates our bodies.
In the Gbiota system we use hydraulic pressure – maybe only a few millimetres of head but that is enough to drive the water over a large area to ensure the soil is totally saturated.
We then stop the water flow, allowing it to drain under gravity, sucking in fresh air which creates the conditions for the beneficial microbes to breed.
Clay or sand
If your soil is clay (or clayish) and you can apply the water at a sufficient rate then you probably won’t need to take any precautions to stop the water leaking away from the root zone.
If your soil is sandy you have two options.
You can dig down and make a wide trench and line with plastic (which is how I started with Gbiota beds, even though I live on clay).
The second option is to go back to the sponge beds which I promoted some thirty years ago. In a sponge bed you clear off the top soil then build a layer of organic waste, which acts as a sponge, then lay the ag pipe on top of the sponge and put the top soil back.
Sump or tomatoes?
From a technical viewpoint there is little doubt that the sump and leaky dam is the best system.
The trench is extended so the water can flow back into a sump.
The ag pipe is laid along the base of the trench then is raised up (to create the pressure) over a leaky dam.
Sump pumps are low pressure, high flow, so deliver a lot of water very quickly to flood the trench. But they only need to run for a few minutes to flood the trench. When the pump turns off (normally by a float valve) the excess water in the trench can now drain through the leaky dam back into the sump. (Leaky dam is the posh name for a pile of grass clippings or sand.)
This is really a great way of meeting the two objectives of flood-and-drain and keeping the soil blood moving and is naturally automatic from a timer which fills the sump with top-up water.
The only manual input is cleaning out the sump and turning the top-up water off when expecting heavy rain.
For me this is great fun – I like playing around with pumps and have no worries about getting down to my shorts to clean out the sump which inevitably gets filled with rubbish.
But, fortunately for the world, not everyone is like me and there are people who just don’t appreciate the fun in messing around with sump pumps and dirty water.
The alternative is simply to have both ends of the ag pipe coming up to the surface with no direct attempt at drainage.
It is then simply a question of putting a hose in one end of the ag pipe and waiting until the water comes out of the other end.
This is normally a manual operation but if you are totally addicted to timers you can spend happy hours experimenting with a timer, working out how long it takes to flood the trench.
This is a great solution if you are a bit like me – get busy doing something else and forget to check to turn the tap off.
However there is no natural drainage system so some irrigation scheduling is required to ensure that the plants have used up the water before starting the next irrigation.
If we wanted to we could go high tech and use modern moisture sensing technology or we could do it the easy way – just grow some water-loving plants, like tomatoes, and wait until they show the early signs of wilting then re-irrigate.
Burying the rubbish
There is a whole school of people who are totally addicted to compost technology – they must have exactly the right ratio of carbon to nitrogen and ensure there are no baddies like citrus skins or onions.
No doubt this is a very efficient way of composting and the microbes can generate really high temperatures, which sound great until you think that the aim is to breed gut biota and our guts do not operate at 80ºC.
However my experience with in-ground composting is that there is always something, probably a fungi or weird beetle, that will eat up anything you bury.
Also the soil operates at a more reasonable temperature of around 20ºC which is closer to our gut temperature.
I have to concede that it is slower than high temperature composting but it costs absolutely nothing to have weird beetles and fungi munching away on your old orange peel, so why worry.
Things we have to add
You may have got the impression that I have a bit of a thing about recycling. I would argue that if we don’t learn to recycle humanity will not survive so it is more than a bit of a thing.
But even I have to admit that recycling rubbish, however important, is just not enough and we have to add some extras.
First on the list is rock dust – we need the minerals. Volcanic rock dust is clearly the best as it has a full spectrum of minerals including those trace minerals which are lacking in our modern diet.
But if a broad-spectrum rock dust is not readily available it is fine to use what is available locally and supplement. Blood and bone fertiliser contains many of these trace minerals.
We also need nitrogen – decomposition, particularly if it contains a lot of woody material like sawdust, needs a lot of nitrogen. So we will need to add nitrogen in some form or other.
My favourite is chicken manure, particularly if they are free range running around scratching in the dirt.
I live close to Baldwin Swamp in Bundaberg and many wild birds visit my block to eat the seeds I have just planted.
I have no option but to cover the seeds with netting but birds not only deliver a significant amount of poop but they also supply a mixed bag of microbes which they bring in on their feet.
So I encourage them because this is an extremely simple way of increasing biological diversity which is the key to gut health.
This leads to the next and most important additive – the inoculant. This is so important I write about it separately.
Plants and exudates
There is one more way of increasing biological diversity – by growing a spectrum of plants.
Each species of plant exudes sugars which attract specific species of soil microbes.
Perhaps the best known is sunflower which attracts mycorrhizal fungi – a singularly important group.
In-ground raised Gbiota beds are a highly effective way of growing gut brain food but not everyone has access to a garden and so are forced to use Gbiota boxes. Perhaps the best system is a combination of both, using the Gbiota beds to create the soil for the Gbiota boxes which are then used to grow gut brain food in a more controlled environment.
Gbiota boxes
Gbiota boxes are based on exactly the same principles as Gbiota beds – flood and drain to breathe the soil, keep the soil blood moving, breed beneficial microbes in the soil using organic waste and rock dust to supply nutrients, and supplement with additives such as manures and inoculants.
Boxes have the advantages of being much easier to protect from climate (particularly floods and heat waves), insects and birds.
The major problem is to find a way of decomposing food waste without attracting hoards of flies.
Queensland is in many ways a beautiful place to live but we did not miss out when flies were allocated.
In Bundaberg we don’t need to buy our kids bikes to have fun on – they can simply hop onto one of our mega grasshoppers and bounce around in a series of mega leaps.
Well maybe a bit of exaggeration, but they certainly are big and can destroy a crop in a matter of minutes.
The imperfect research project
Researchers spend much time selecting their preferred area of research – very few would select how to develop a system where someone living in a flat can recycle all their food (and other) waste to breed beneficial gut brain food without attracting those swarms of insects which have decided to make Queensland their home.
So that seems to have fallen into my bin.
Let me tell you for sure that failure brings real consequences, with thousands of blowie larvae breeding en masse in Gbiota boxes ready to make the neighbourhood unliveable.
This is certainly a great challenge but look at other great challenges – for example creating a password system which makes the entire internet inaccessible to anyone over eighteen. Yet with the combined effort of our youngest and brightest computer scientists we will achieve that within a couple of years at the current rate of progress.
The key is why in-ground composting is so effective – there is always some creature or microbe which is more than happy to use the larvae as a food source and in the process protect us from the hoards of potential blowies.
It is really simple – have a sealed box – or even a polythene bag – load it each day with the organic waste, each time adding a layer from the additives box which contains a mix of soil particles, rock dust, manure and inoculant. At the end of a couple of weeks the flipping technique (see elsewhere) is used to load this into the base of a regenerated Gbiota box to grow the next generation of plants.
Obeying the two golden rules
There are two simple ways of achieving the breathing and moving rules.
The simplest is to have two boxes. The top box has holes in the base which sits on the smaller lower box. Soil blood can simply be poured onto the soil surface, or maybe better into a pipe or hole so flooding does not move the seeds or soil.
It flows through the soil and holes into the lower box. When it is time to re-water, the top box is lifted off and the bottom box emptied into a watering can or equivalent and used to flood the top box – or other boxes.
It is good to mix different soil bloods.
This is the safest way as the soil blood can drain completely out of the growing box.
The disadvantage is the boxes have to be lifted at every irrigation – well actually not every irrigation. It is not a bad idea to irrigate with fresh water until the bottom box is full, but it must not be left standing for any length of time (e.g. over a week).
The other method is to use a swivel tube and just allow the growing box to drain.
This is really easy – nothing has to be moved. I use a 3-litre milk bottle to catch the soil blood and simply pull it away from the swivel tube, put my finger over the pipe, pour the soil blood into the top box and put the milk bottle back under the swivel tube – total time under a minute, no lifting or any hard work.
The only issue is that the soil blood does not drain from the growing box completely.
The easiest solution is just to wait until the plants have used all the soil blood remaining in the bottom of the box.
I have also tried flushing frequently so the soil blood in the bottom of the box is always moving. A bit more effort but it seems to work fine.
Growing
That is the end of the overview. You can find more details in the growing section here.
It is easy when growing Gbiota plants to become focused on the plants, which you can see, and forget that the real aim is to enhance the gut biota, which you cannot see.
Engineering problem
The key to the Gbiota system is the engineering problem of creating the right conditions to favour the beneficial microbes and out-breed the harmful microbes.
Beneficial microbes generally prefer aerobic conditions, while the harmful microbes breed in anaerobic conditions, except for fermentation which is anaerobic but can be beneficial.
But you still need some microbes and fungi to start the process and this is what inoculants are for – they are the starter microbes.
I am tempted to say they don’t appear out of thin air – but that is not true. I read that every time we breathe in we can suck in some fungal spores which are literally floating in thin air.
Microbes are everywhere
Microbes are just everywhere, but we don’t want to rely on random events – we need those starter microbes, the inoculant.
People have known about inoculants for ages. It has been standard practice for donkey’s years to save some old compost to get a new pile of compost going.
But we don’t want just any old bugs which will get a compost heap going – we need the sort of microbes which will enhance our gut biota and that is a bit more of a challenge.
Google inoculants
Just Google “inoculants” and see their long and glorious history.
Centuries ago farmers understood the benefit of legumes to capture nitrogen and had worked out that they needed to collect untouched soil from the roadside to mix with their legume seeds.
There are thousands of kilometres of country roads in Australia with a border between the road and the local farmland. I used to think this was provided by the local councils for the benefit of old men with a swollen prostate, but maybe it is in honour of those pioneering farmers.
Now of course legume seeds come pre-inoculated but you can readily buy a suitable inoculant if you want.
Inoculants are also widely used in preparing silage but this time the inoculant is some variant of the Lactobacillus family.
Then we have the mycorrhizal fungi inoculants which are sold on almost every street corner (well nearly, but they are so common).
So inoculants have a long history – but what sort of inoculant do we need to enhance our gut biota?
Starts simple and gets complicated
When I first started to understand that the gut brain is our control system and the gut brain was really important to health, I found only a limited number of species were of interest in the science community.
For example: Prevotella, Ruminococcus, Bacteroides, Firmicutes, Peptostreptococcus, Bifidobacterium, Lactobacillus, and Clostridium for gut health. The good news was that inoculants were readily available – maybe not as nice pills but as something you could poke in closer to the gut (e.g. up your bum).
So I deluded myself that this was going to be easy.
But then the number of species of interest grew up to a thousand and, to make life even more complicated, they all worked in some form of close organisation we like to call swarm intelligence.
This was beginning to look more than a little difficult.
Then, just as I was beginning to think it was impossible, a few leading-edge researchers began to say that a thousand species may be conservative and it could be in the tens of thousands of species and sub-species.
The idea that you could have a thousand little vats bubbling away producing a specific species is ridiculous – increase that to ten thousand and clearly this has gone way past being absurd.
Science and engineering
One of my favourite sayings is that science is the art of truth and engineering is the art of ignorance.
Think back to the time of the Romans: they did some totally spectacular engineering, particularly the aqueducts carrying thousands of tons of water across deep valleys.
And no – they did not have finite element stress analysis to calculate out all the loads and stresses. Instead they adopted a different, simpler and more brutal approach.
They built the aqueduct with the wooden structure holding up the arches, then they would sit the engineer under the central arch and remove the supports. If he got it wrong that was the end of him – an old-fashioned incentive scheme.
It sure made him use the best technology that was available to him at the time.
Do what you can then fill in the holes
So how does that help us resolve the problem of making a suitable inoculant?
There are some excellent inoculants already on the market made by brewing up minerals and microbes. We understand this well, so it makes an obvious starting point.
But how do we start filling in the hole caused by thousands or even tens of thousands of microbial species forming our gut biota? And just in case you are feeling brilliant, we have the issues of our DNA which is different for everyone and then there is epigenetics which switches our genes on and off.
Logically, starting with a clean sheet of paper, I would have to say it is impossible – but for one overriding factor.
Going back over a million years, the creatures we have evolved from have solved that problem and, certainly for the last two hundred thousand years, when modern humans emerged, we have been doing that highly successfully.
You want proof? We are here.
We have only had a real problem with our gut biota since we invented modern industrial chemical agriculture and started killing off that complex maze of beneficial microbes that live naturally in the soil – the bacteria, fungi, nematodes and that army of small and large creatures that inhabit the soil, each with their own gut biota contributing to the variety that exists in natural undisturbed soil.
So my approach is exactly the same as the poor Roman engineer – make the best use of the technology that is available at the time.
And that is simply to start with the inoculants that are available now, then use the principle of creating the right conditions that benefit the beneficial microbes.
We already have the technologies of flood and drain and recycling soil blood; using organic waste supplemented by additional minerals; growing green manure crops that are known to encourage microbial and fungal activity in the soil (like sunflowers and other deep-rooted plants); avoiding any toxic chemicals – and letting the microbes, fungi and creatures of the soil breed away.
So what happens next?
You simply have to order the inoculant. I supply in nominally 4 kg packs, often together with a seed pack of green manure, baby greens, diabetic plants etc.
I post on Mondays so you receive it before Friday and you then put the inoculant straight into a pre-prepared box with organic waste as per the video.
To find out the current availability and price of inoculants please email me at colin@gbiota.com.
Creating soil is the number two challenge facing humanity, after climate change.
We know exactly how to do it – it has been happening for billions of years, naturally covering much of the earth in a layer of fertile soil.
Then mankind had this idea that the only purpose of soil was to hold the plants upright and that we could supply all the nutrients the plants needed.
This idea is not just wrong, it is one of the biggest goofs mankind has ever made. We need the microbes in the soil and our use of inert chemicals is at the root cause of the modern epidemic of chronic diseases.
The snag is that the way nature created soil takes centuries – we need to do it in twelve weeks. This is not just a challenge for the chemists and microbiologists, it is an engineering problem of how to create the right conditions for the microbes to create the soil.
I am an engineer, so that is my job.
Soil – teaming with beneficial microbes and nutrients
The aim of Gbiota technology is to enhance gut health by growing plants in soil teaming with beneficial microbes and nutrients.
Creating soil is right at the centre, so I have written this post focusing on how we make soil in the Gbiota system.
Creating soil is about turning dirt into soil, and for that we need a combination of the fine particles in dirt and the creatures – from tiny to large – which live off organic matter.
Clay
Let us start with clay.
I have lived most of my life on yukky clay soil.
When it rains it turns into a super adhesive, grabbing hold of your boot, pulling it off so you are left standing on one foot, waving the other foot in the air while you try and extract your boot which is firmly stuck in the yukky clay.
When it stops raining it just holds onto the water, refusing to drain even on a slope.
But when it eventually dries out it turns into concrete, so hard you cannot get a fork into it.
The magic of carbon
Yet clay can be turned into one of the most productive soils.
Get the organic matter working as it should and the microscopic clay particles are coated in a thin film so the individual clay particles no longer cling together but form a loose aggregate with a friable texture.
Clay typically contains a good spectrum of nutrients but in their natural state they are firmly locked in so the plants cannot access them. But the soil creatures, particularly the fungi, can penetrate the particles, releasing the nutrients and making them bio-available so the plant can access them.
The clay, only suitable for making pots, has been turned into one of the most productive soils by the power of organic matter and the soil microbiology.
Food waste and the myth of surplus
I read estimates that between 30–40% of food grown is wasted (e.g. not eaten). Certainly there are vast quantities doing little more than create greenhouse gases.
If organic matter, meaning carbon based, is so wonderful, why not grow plants in this waste food? Nice idea, but there is a little problem of osmotic pressure which means that water will always move from a weak to a strong solution.
That is one mechanism that makes plants work. As the concentration, or strength, of the solution is higher in the roots of the plants than in the surrounding soil, water will flow into the root system.
If it did not, then we (and everything else) would be dead.
So if, for some reason, you wanted to kill a plant then putting a bunch of waste food into a blender to make a super strong solution and putting this around the root zone would kill off the plants by simply sucking the water out of the plants.
I have done this many times in my experiments with Wicking Beds by just letting the solution get too strong. We live in the era of fake news so if you don’t believe me just put a plant into concentrated chicken shit and watch it die.
Goldilocks got it right – not too strong and not too weak, just right.
Growth inhibitors
But, as the adverts say, there is more. As waste food decomposes, as it always will, it creates both liquids and gases which act as growth inhibitors. One of these gases is methane, a powerful greenhouse gas and growth inhibitor.
And if you are still not convinced, there is yet more.
Nitrogen
For organic matter to decompose it needs nitrogen which it sucks out from anywhere it can. You can see this as plants turn yellow from lack of nitrogen.
In my early Wicking Beds I used sawdust as it was readily available and pretty much free. I admit I am a bit OCD-ish about recycling, so I wanted to use this waste product, which I did very effectively by making sure there was plenty of chicken shit available to power this decomposition.
Recycling that works
There is a lot more to recycling waste food than tossing in a few composting worms and microbes to a box of food waste. I am not at all sure that we have found the best possible way – as yet – but I do know ways that work.
The religion of composting
Composting has become a virtual religion. Waste must be laminated with layers of green (nitrogen-containing material) and layers of brown (carbon-containing material) with an exact ratio of carbon to nitrogen and no foreign wastes like citrus skins, onions etc.
And have no doubt this works. The pile will start off with low-temperature microbes and gradually (and sometimes not so gradually) the temperature will build up as heat-loving microbes replace the cold-loving microbes and, when the materials get used up (releasing a lot of gases to the atmosphere), the temperature will drop and we have compost.
And let us face it, this is pretty good stuff even if it has lost a lot of its original nutrients and probably has the wrong sort of microbes for our gut brain.
Fungi, beetles and more
But let us get lazy and instead of this almost precision process of high-tech composting we just bury the food waste in the soil – what would happen?
Well first we would miss the nice smell of the compost. Well, I think it is nice but my wife does not, and neither of us are keen on the flies that it attracts.
But then a whole spectrum of life would move into the decomposing waste.
Fungi would come along, the citrus skins would go mouldy (that’s the fungi at work) and other creatures with teeth would also appear and chew on the hard bits.
Much as I love worms they don’t have teeth, they have a gizzard like a chicken which grinds up the food which needs to be broken down into a more digestible form.
So why bury rather than compost?
It is a bit slow and does not fit into our ideas of production line manufacture we have learned from the car industry – put the engine in at this station and the wheels at that station.
Continuous improvement
So how can we do this in the Gbiota system? The Japanese manufacturers popularised the idea of continuous improvement and this is my approach.
This is the way I do it now, and it works, but maybe tomorrow I will find a better way – who knows.
But I do have some preconceived ideas of what I want to achieve in developing this system.
Do it at home
The whole point of the Gbiota system is to breed the beneficial microbes which will form our gut brain.
But these microbes have a very short life so it is really much more practical to develop a system which people can do at home rather than a major centralised facility.
We now have a major food problem because we have a centralised food system which produces lots of food, but the food is not healthy food, so we have a major health epidemic.
The reason is that it is more economic to mass produce poor food rather than grow food which is healthy. We are suffering from a man-made food crisis – not of quantity but of quality.
The destruction of our soils and its effect on food production is only second to climate change as a threat to our species.
Some people care
But individual people care about their own health, so the aim of the Gbiota project is to enable people to grow their own food which is healthy for them rather than a centralised system which makes money for the mega corporations.
My aim is to give those people who actually care about their health, specifically gut health, an alternative that they can use for themselves and under their control.
We eat every day
It may seem easy to grow food but we both eat and collect food every day, so we need a system of continuous collection of waste and production of food.
It takes time to both create soil and grow plants so we must synchronise those together.
I think in terms of a twelve-week cycle. It takes about twelve weeks to process food waste until it can be used to grow plants and it also takes about twelve weeks to grow baby greens from seeds.
On the growing side – the number of boxes needed depends on the size of the family and the space available, but for a typical family we may be talking about six boxes, so we need to seed a new box every two weeks.
This is pretty simple. Every couple of weeks we just take a box that has finished its growing period, put a lid on it and flip it over. Load the base, no more than half full, with freshly processed soil, flip the previous soil back into the box, clean up and reseed.
Creating fresh soil
We now come to the big challenge – how to turn organic waste, particularly food waste, into soil teaming with beneficial microbes and nutrients.
Sounds simple, but it is not.
This is the best way I have found to date – it works and is pretty simple – but I spend my time trying to find an even better way.
That is what I do when I am not writing my posts.
As an engineer I would describe this as a dynamic problem as opposed to a static problem.
It would be a static problem if we just had a mountain of food waste and all we had to do was to turn it into a mountain of healthy soil.
But it is a dynamic problem with a steady stream of waste food being produced every day and us needing a supply of fresh soil to put into a fresh Gbiota box every couple of weeks or so.
Collecting the waste
Food waste is produced on a continuous basis – the remains of the apple we have just eaten, the coffee dregs that got us going this morning.
And that bit of chocolate that I could not finish in the evening – no, that is a lie – I am a pig and a chocoholic and would never leave a bit of chocolate. But you get the message.
What I do is to have a number of containers, typically old yoghurt containers, around the house to collect any food waste.
I empty these into a box which I keep on my patio. Actually I have two boxes because this is an ongoing process.
Initial decomposition – the first box
The first box is for the first initial stage in the decomposition process.
The last thing you want is a box of smelly rotting food on the patio – that will result in an earful from my wife (believe me, I know).
Food is a high-energy input – too high for growing plants – so I typically add a low-energy source like grass clippings or any vegetation that has been chopped up into little bits.
Nitrogen
Then I need to add a source of nitrogen – the decomposition process takes a lot of nitrogen. I use chicken manure partly because it is readily available and my boxes are outside on the patio so smell is not an issue for me.
It is possible to buy processed chicken manure but any microbes will be long dead, though there are other sources. Blood and bone is really good and can be bought in small packages with other additives.
Minerals
Now I add minerals in the form of crushed rock. The best rock dust is from volcanic rock which contains a broad spectrum of trace minerals and, if available, can be bought cheaply from a local quarry.
Bauxite, which contains magnesium – a critical mineral – is more widely available. The other two minerals commonly in deficit are iron and zinc. Trace minerals are available in retail packs but are expensive.
These are readily available in retail packs and can be stored and used when needed.
Inoculant
But now we come to the difficult one – the inoculant which contains a broad spectrum of soil creatures including microbes, fungi and worms and, more particularly, worm eggs which are less robust and less likely to die in transport.
I am looking to set up local breeders but at this moment I can supply directly in 4Kg packs which is enough for twelve weeks. At this moment these are only available in Australia and there are some quarantine restrictions in Western Australia and Tasmania.
I am looking for growers.
The best process is to set up the box and, when ready, order the inoculant (email me at colin@gbiota.com) which will be posted on the next Monday and will need to be emptied straight into the box.
Please note, and this is important, inoculant contains living creatures so cannot be stored.
I add trace minerals to my inoculant but I still recommend adding some bauxite-based rock dust which also adds texture to the mix, or failing that some regular garden soil or, yes, even clay which is actually nutrient rich.
It is important to keep the box moist. Hopefully you will have read the introductory article on Gbiota Triboxes and read the discussion between having a box with holes in the base feeding into a storage container and the swivel tube system.
For growing boxes I came out in favour of the swivel tube as it is so easy, but in this case I have a preference for the box with holes in the base as the last thing you want with labile (fresh) compost is it sitting in water and the holes in the base allow complete drainage.
Decomposition – the second box
The first box will get the decomposition process started but our aim is not to simply compost but to breed the beneficial microbes – a bit different.
Plants exude sugars from their roots which attract and feed beneficial microbes.
It is not really practical to grow plants in this first box, as we are regularly adding fresh food waste so it is not really suitable for growing plants.
But when the decomposition process has progressed, some material (maybe 15–25% of the box) can be taken out and placed into a second box with some soil. It is now possible to grow a green manure crop with plants like buckwheat, snap peas, alfalfa, mung beans, amaranth etc. in this semi-matured compost.
As the compost is taken out it is replaced by new food and organic waste. This is an ongoing regular process rather than a one-off.
There are pretty tough plants which can grow quite happily in this rather young, labile, toxic compost.
The breeding process will continue in this second box with the partially decomposed material feeding the worms.
Just make sure when you are transferring the material that you have a good supply of worms and don’t hurt them when transferring.
Worms may not appear to be aggressive but they have a long memory and will rip you to bits when you are buried – that’s bullshit of course – worms are very well mannered so wait until you die before they rip you to bits – very polite.
The growing box
Every couple of weeks or so some material is taken out from the second box and placed in the base of a growing box which is then re-filled with the existing soil.
The relay race
It is a bit like a backwards relay race.
A hole is made in the second box and the material used for a growing box.
The hole in the second box is then filled with material from the first box.
Then the hole in the first box is refilled with new fresh waste.
Difficult to explain but easy when you see it in action. Watch the video “The gut brain food cycle”:
https://youtu.be/ddlN47Hy2OY.
Not just baby greens
I have been promoting baby greens for the good reasons that they are the most nutritious and easy to grow without having to worry too much about the pesky insects.
But you are not limited to baby greens – any conventional plant can be grown even if it has a long life. I have a box of spinach which has been growing longer than I can remember.
But I am using the soil blood from the upstream boxes which both wets the soil and delivers valuable nutrients and microbes.
Great stuff this soil blood – one of the best things about the Gbiota system.
I am busy writing up the
latest manual
on how to make and manage the latest Gbiota boxes when I realised I needed to tell the Tribox story.
Tribox – the grandfather
The Tribox is the grandfather of the latest Gbiota boxes.
The top box is essentially a normal growing box, just like the millions of pots that are used across the globe.
It is filled with soil or, if no soil is available, commercial potting mix, and then seeded and watered on a regular basis.
Read more here – Gbiota intro
The growing and breeding boxes have a hole or multiple holes so that all the water can drain away.
Waterlogged soils not only kill the plants but allow harmful organisms like root-eating nematodes or E-Coli to breed.
We control the species of organisms in the soil by controlling the conditions – specifically the balance between
water, air and nutrients.
This is called Eco-balance and has been tested over millions of years.
Read a longer article about evolution
here.
The difference between a regular growing pot and the top Tribox is that a conventional pot is watered with fresh,
clean water, while the top Tribox is watered with a brown liquid full of nutrients and living microbes which we call
soil blood. It does the same job as our blood – circulating nutrients and living cells around the system.
The middle box in the Tribox tower is where the microbes breed. It is initially filled with organic waste,
typically kitchen waste, but it could be any organic waste – grass clippings are particularly useful as they are low
in nutrients and balance out the often over-rich food waste.
Plants don’t like too rich a soil – read
here
about how water moves, where I explain osmosis.
The middle box has holes in the base to drain any excess liquid away.
The bottom box is purely to catch the excess water that drains away.
Circulating soil blood
There are two absolutely essential features of the Gbiota system.
Read more here.
In a conventional growing pot the water is essentially stagnant; in a Gbiota box the soil blood is regularly flushed
and drained away, adding nutrients and microscopic life to the soil.
Flood and drain
Beneficial microbes need to breathe. If there is no oxygen then harmful microbes like root-eating nematodes or
E-Coli will breed.
In the Gbiota system the boxes are partially flooded, which expels any stale air, and then drained, sucking fresh air
back into the soil.
People are busy
The Tribox works fine but has one disadvantage – to add extra organic waste to the middle breeding box or to collect
the soil blood from the bottom box, the boxes in the tower have to be lifted off to allow access.
Honestly, not really a big deal, but people nowadays seem to be excessively busy and just don’t have any spare time –
even if the benefits are a longer, healthier life and avoiding all those horrible chronic diseases which occur because
our modern food system is not feeding our gut brain. The gut brain goes into emergency mode and makes us store the wrong
fat in the wrong places.
Read more here.
I want everyone to benefit from the Gbiota system and have a healthy gut, so I think: how can I make this system as
simple and easy to use as possible?
Merging the middle and top boxes
The first step was to merge the middle and top boxes so, instead of having a box for growing the plants and a separate
box for breeding the microbes, we just have one box with the bottom full of organic waste to breed the microbes.
NB: you don’t just throw a bunch of rubbish into the bottom of the box. You need an inoculant with starter microbes
and minerals to feed them (and you). This is all covered in our manuals. For direct help you can contact me at
colin@gbiota.com.
The top is to grow the plants which act as carriers for the microbes to our gut brain.
There are arguments for and against merging the boxes.
The argument for is that plants exude sugars from their roots which feed the microbes, which is clearly good.
The argument against is that labile or young compost produces both methane gas and other growth inhibitors.
The only way to tell is to do experiments – which I have done – and, if done properly, this system of a single box
with two layers works fine.
This reduces the number of boxes from three to two, but to circulate the soil blood the top box has to be lifted off,
the soil blood poured into another container, then the soil blood poured onto the top growing box.
Two down to one
But we can reduce the number of boxes to just one by fitting a swivel tube to the base of the box so we can drain
the soil blood and flood the growing box.
This makes operation extremely simple – just drain the soil blood out into a temporary container (I am using an old
3 litre milk bottle), twist the swivel tube into the upright position so it does not drain, then pour the soil blood
onto the growing box.
What could be simpler?
But the question is: will it work as we expect?
Again, there is only one way to find out – run some experiments.
The experiments
I did this and what did I find?
I had two sets of boxes in my experiments.
The first set of boxes had the two boxes, with the top box having holes in the base allowing the soil blood to flow
into the storage box below.
The second was just a single box with a swivel tube and a milk bottle to collect the drainage.
Some things in life you cannot miss
No one is fully in control of their lives and it just so happened that, at the end of the experiments, I had to take
an extended trip for a vital mission – actually to attend my granddaughter’s high school graduation.
As the boxes with the swivel tube were really little more than modified Wicking boxes I thought I would be smart and
flood the boxes and leave the swivel tube in the up position so there would be a reserve of water for the plants.
What did I learn?
At the start of the experiments I was at home so I could manage everything and it was just obvious that the swivel
tube system was the easiest to use.
I have been playing around with Wicking Beds for some three decades now and know the big danger is having the soil too
wet, so I was very careful to ensure I was not over-watering.
With the swivel tube system there is always some water left in the bottom of the box so I fitted a sight tube (just a
bit of ag pipe pushed into the soil) so I could check that the water had been used up before I watered again.
That put the swivel tube system in the lead over the two-box system and it was clearly the system I was going to promote.
But when I was away for the best part of a week I had been too clever by half in trying to use the swivel box as a normal
Wicking Bed with a built-in water supply.
When I returned the plants had started to turn brown – a sure sign that they were suffering from waterlogging.
However, the plants in the twin box system (which had a hole in the base so there was no possibility of them becoming
waterlogged) were fine.
The plants were showing signs of beginning to wilt after being left, but as soon as I watered them they sprang back into life.
So what is the action plan?
I had started to write the manual promoting the swivel tube system, but I have just put that on hold while I repeat
the experiments – making sure I twist the swivel tube into the drain position and allow time for the plants to use the
remaining water in the base of the boxes before re-watering.
I am pretty sure that as long as I don’t do silly clever-cloggy things and try and store excess water so the soil is
left saturated, this will work fine and will be my recommended system.
However, having been involved with supporting people using Wicking Beds for many years, I know that people so love their
plants that they cannot resist over-watering. So I will give them the option of using the twin box system with holes in
the base of the box which pretty much guarantees that the soil will never become saturated.
Today’s punch line
Use the swivel tube system – it is just so easy – but fit a sight tube so you can see the water level and don’t keep on
topping up with water unnecessarily, however much you love your plants. Waterlogged soil is no good for plants.
And if you want to ignore my advice – just grow watercress. It just loves water and it is full of iron anyway.
Next read About Gbiota.
The Gbiota Biobox system is about breeding beneficial microbes in organic waste to grow plants as powerful pre and probiotics for your gut–brain.
People will have different organic waste streams and also different food needs. This means I cannot write this post as a hard-and-fast instructional manual, so I am going to describe what I do – which I know works.
You may have to modify this to take into account your supply of organic waste and how many mouths you have to feed.
Rotating Boxes
Baby greens
My basic system is centred around baby greens and tipping. Basically, I am eating adolescent plants – between classic microgreens and mature plants.
I do this because I live in Bundaberg, Queensland, where insects are a major problem and I can beat the insects to the leaves. If I let them mature to full-grown plants, the insects will win without toxic chemicals – which I just don’t use, as the aim is to breed beneficial microbes.
I may use soapy water from the washing machine, which de-waxes the caterpillars so they dehydrate and die.
Queensland is pretty extreme with its insects and this may not be such an issue for you.
I grow a broad spectrum of plants in each box. Some, like rocket, can be harvested shortly after seeding, while others, like broccoli, take a lot longer.
I just cut the tips off the leaves and use these to make green smoothies, salads or just regular vegetables for cooking. I am harvesting the first plant leaves within four weeks and, if I keep on ‘tipping’, I will still be getting food as the plants simply regrow.
If I stop tipping (for example if I am away on a trip) the plants will just go to the mature stage.
I do have some boxes, outside the rotation, that I use for plants with a longer life, like berries and tomatoes.
Getting started
We start with the boxes – basically any box will do, but a typical storage container is readily available from the shops. We will need to lift the box so it is a good idea to use a size that will not be too heavy; about 20 litres is good.
To get a continuous supply of gut–brain food we will need several boxes – at least four, but six or more is better.
These will be rotated and, as we collect kitchen waste to make our soil, we will actually be making soil – but we will need some soil to get started.
We drill a hole near the base and, using a rubber grommet and fittings from most hardware or irrigation suppliers, fit a swivel tube which enables the box to be drained.
Now we start collecting kitchen waste, which we will probably do on a daily basis, so it is good to have a box with a tight fitting lid so we don’t get flies or smells.
The rotation
Using tipping, the life of a box is about twelve weeks, so I will use six boxes and start a new box every couple of weeks. This is more than enough for my wife and me, but a large family may need more boxes.
The major input is kitchen waste, which is produced daily, so I have a box with a fitting lid to collect the waste. This does not have to be a growing box – it could simply be a plastic bag which is emptied into a growing box – but it saves work to use a growing box to collect the waste and go straight to a growing box. It is not a big deal either way.
One reason why I start a new box every two weeks is that this is about as long as kitchen scraps can be stored before they get smelly and attract those cussed vinegar flies which are a real pain where I live, but may not be an issue for you.
Please note I am continuously improving the Gbiota system which makes documentation a bit of a challenge; there is an updated version in the more recent article at Gbiota soil.
I usually put a layer of grass clippings on the base of the empty box as this helps water flow across the base, but it works fine without. Vermiculite is even better than grass clippings, but grass clippings work fine and are free for me and I have to pay for Vermiculite.
Labile compost
As this food waste decomposes it will act as a growth inhibitor (labile or young compost is not good for growing) so I don’t want this affecting the growth of my seeds and plants in the top of the box.
So I cover the food waste with a layer of grass clippings and then a nitrogen-rich fertiliser. I use a mix of chicken manure, bauxite rock dust (which is full of magnesium – one of the critical minerals we are short of), some dolomite (to balance the pH but which also contains minerals), some blood and bone (which contains zinc – one of the other minerals we are short of) and the inoculant which contains the microbes as a starter, worm eggs and in my case other creatures, particularly soldier fly larvae (which just come) and a collection of other soil creatures.
Earth composting
People will tell you that you should not put things like citrus skins and onions etc. into compost. That may be true for high temperature composting and dedicated worm farms.
But we are earth composting (in the soil) so we have a broad spectrum of soil creatures and fungi that consume pretty much anything.
I get this mix straight from the Gbiota beds in my garden but, if you live in a flat, you will need a storage box to hold this mix.
I usually get a truck load of chicken manure and rock dust from my local garden supplier, but if you live in a flat you won’t be too popular having a ton of chicken manure delivered. You can, however, buy all the necessary ingredients in nice clean packages from your local hardware store, and a Gbiota grower (currently me) can supply the inoculant in small packages (4 kg).
This contains worms and, more importantly, their eggs, plus a broad spectrum of microbes. These have a short life so need to be put into the storage box with the nutrients and organic waste so they keep alive and keep on breeding.
Storage boxes
Normally the packages for commercial fertilisers (and our inoculant) are far more than needed for one box, so you can have one (or several) boxes to store these and organic waste until you are ready to start your next growing box.
This has a big advantage: the organic waste is decomposing while in storage mode.
If you like, you can accelerate this early decomposition by growing tough crops. Alfalfa is good, as it is also adding extra nitrogen which helps decomposition and is a good food.
One box works for storing for the typical twelve-week cycle, but this will still contain young compost. If you have the room it is really better to have two boxes – one to store the day-to-day collection of waste, and then a second box that can stand allowing the waste to decompose and also time for a quick crop. Plants exude sugars which feed the microbes and help soil formation.
Breeding the microbes
You don’t have to worry about the microbes – they are a randy lot and will breed without problems – but worms are actually quite delicate creatures which need the right conditions.
The box with the growing media (in my case soil from my Gbiota beds, but you can use potting mix if starting from scratch) is where we are making soil.
Later we will use soil from a box that has just finished being harvested.
Every couple of weeks a new box is started and an old box emptied – that is the soil-making cycle.
About organic waste
Before I started I thought I would have a plentiful supply of kitchen waste but it turned out that when I started reusing it, it suddenly became a valuable property which got to the point where I was fighting with my wife over banana skins.
But I did have a good supply of grass clippings – which are a grossly underestimated asset. My neighbours now dump their grass clippings onto the nature strip and I go and pick this up, and one neighbour uses a grass cutting service which he now brings to my house for the odd six pack.
If you live in a house with a garden you could probably do the same thing, but if you live in a flat you may not be so lucky – but you can probably chat up a few of your neighbours to give you their kitchen waste.
Also you can do what we do – collect coffee grounds from your local coffee shop and maybe food waste from your local restaurant, but that did not work for me as they just dumped it into a bin with all their other rubbish and I got fed up with sorting it out.
Local councils also vary a lot. Ours is not so progressive, but many councils have green waste services and there are companies who supply compost in bulk.
Not too strong
Kitchen waste is very concentrated, so we will need to dilute this with something like grass clippings if they are available (grass clippings are really great and, even if you don’t have a lawn, are readily available from a gardening service). There are plenty of alternatives readily available as potting mixes, bagged compost, blood and bone, rock dust etc.
You will also need to add some inoculant – this is soil full of trace minerals and living creatures, particularly worms. You are essentially setting up a temporary worm farm.
Inoculant is available online from Gbiota – email me at colin@gbiota.com for current status, or soon from a designated local grower.
After a couple of weeks or so (it all depends on the amount of food scraps and the number of people) your box will be about half full.
This is what we would call labile compost and is not suitable for growing plants in directly.
So we now move into stage two and take that box out of the kitchen and put it in the garden, on a balcony or at least on a windowsill with some sunlight, or at least artificial growing lights – but sunlight is free and we want to keep costs low.
If we are just starting with no filled boxes we will need to fill the box with some growing medium – garden soil if you have a garden or potting mix if you don’t.
This is also a good time to add some additional nutrients such as rock dust or blood and bone fertiliser which contains a spectrum of minerals.
Seeding
Now is the time to get the soil really wet ready for seeding. Everyone has their own pet version of seeding. I simply sprinkle the seeds on the wet surface and press the seeds into the wet soil, then cover with grass clippings.
Vermiculite is really good for this top layer but costs money. I often use grass clippings or simply soil.
Good and bad bugs
Breeding microbes is easy – they are a randy lot and will start breeding within twenty minutes of being created, so it is very easy to get dramatic exponential growth.
There are good bugs, which will keep us healthy, and bad bugs which will make us sick and even kill us.
The only real way to solve this is by the conditions. If you get the right conditions – essentially a combination of food, air and water – the good bugs will not only out-breed the bad bugs, they will simply dominate the food supply so the bad bugs just don’t stand a chance of getting established.
We all have bad bugs, like E-coli, in our gut but they do us no harm as there are so few of them because they have been out-competed by the good bugs.
Flood and drain
Water does not readily move through the soil as it attaches to the soil particles and does not move until the soil approaches saturation point – which is really too high for optimum growth.
The solution is to flood the soil so the water moves through the soil until it is totally saturated, which will expel any stale air in the soil. Then allow the water to drain away, which will suck fresh air back into the soil.
Now starts the critical process of flood and draining.
I will make the swivel pipe vertical (or at least at an angle) so the box does not drain.
I like to connect my swivel tube to an internal Ag pipe to the end of the box and use a simple Ag pipe as a filler pipe, but if I have young seedlings and it is very hot (I live in Bundaberg, Queensland, which is hot and dry) I will simply pour fluid directly onto the surface.
I will partially flood the box – I can either use a short swivel tube or just adjust the angle with a longer swivel tube.
The box must not be left in this flooded state for days on end. My preference is to partially flood all my boxes then go back to the first bed and let each bed drain. If I am home for a bit I will just drain the box into an old 3-litre milk container just after I have filled – this is real quick and easy.
I use a down pipe to view the water level which tells me if I need to water. That is typically two or three times a week.
If I am busy I may not be able to cycle (fill and drain) every day, but I will make sure I cycle at least once a week and then allow an hour or so after filling so the fluid has time to wick into the soil.
The rule is that the fluid must be regularly cycled so it never becomes stagnant and pongy – but sometimes rules can be broken and the plants still survive.
This partial flood and drain is a key part of the Gbiota system.
Soil blood
Another integral part is the circulation of what we call soil blood.
Think about our bodies. We have specialist organs like our lungs and digestive and immune systems, and everything is distributed about the body by our circulating blood.
It is similar with soil. The bottom of the boxes are full of decomposing organic waste with trillions of microbes and other soil creatures busily converting this organic waste into soluble nutrients – we call these bio-available, as the body can use them.
When we flood the base of the bed, these soluble nutrients and a broad spectrum of microbes mix with the water to become the equivalent of our human blood.
When we drain the bed we capture this nutrient- and biologically-active “soil blood”, which we then use to flood the root system of the plants.
This works incredibly well, but we must regularly cycle this soil blood so it does not become stagnant.
Again, this cycling is a key feature of the Gbiota system.
Next go to Gbiota soil.
The Gbiota Biobox is designed to do one simple but powerful thing: turn cheap, everyday organic waste into living soil that feeds your gut brain, not just your stomach.
In this post I want to show just how easy it is to grow gut–brain food. But before I start, let me explain why it is so important to have a healthy gut brain and how the food cycle works.
Energy, nutrients and gut food
We need food for energy, food to maintain and repair our bodies, and food to feed our gut brain. Go back in time and our food was naturally full of nutrients and microbes but low in energy, so we evolved to crave energy foods – sugars and fats.
Then, some fifty years ago, our food system changed. It became full of energy food but low in nutrients and microbes.
Our gut brain is intelligent. It sees that we are low in critical nutrients and microbes, so it sends out signals for us to eat more food – but we just eat more energy food, so we get fat and sick. This has led to the modern chronic diseases like heart attacks, strokes, dementia and, fastest growing of all, diabetes.
So we need to change our diet. We can still keep eating energy food, which is cheap and readily available, but we need to add food that contains the essential nutrients and, above all, food that feeds our gut brain – our control system.
Nutrients are easy to get; there are literally mountains of rocks full of minerals. But we cannot digest rocks. We need microbes in the soil to break them down and make them bio-available, and most importantly, we need to breed the microbes which will form our gut brain.
Breeding microbes
Breeding microbes is easy. They breed incredibly fast in soil with waste organic material – the stuff we generally consider waste and which is essentially free.
But there are beneficial microbes which make us healthy, and bad microbes – germs – which can make us sick or even kill us.
Generally, beneficial microbes need to breathe air and breed better in moist but aerated conditions, while the harmful microbes breed faster in anaerobic conditions without air.
If we eat plants grown in soils that are full of nutrients and living microbes, then we can expect to be healthy.
How water moves through the soil is actually a complex subject, but to grow plants that will keep you healthy, you don’t need to know that, or even the species of microbes in the soil. There are thousands of species, and even expert microbiologists don’t really understand how each specific species affects our health.
Breathing the soil – flood and drain
What we do need to understand is the principle of partial flood and drain, which is at the core of the Gbiota technology.
It is really very simple: we flood the base of the soil and, as we flood, we wet the soil and expel all the stale air in the soil. Then we let the soil drain and, as the water drains away, it sucks fresh air into the soil so it actually breathes.
Dirt to soil – composting
The other thing we really need to know is a bit about how dirt is turned into soil.
Take a lump of clay. When it is dry, it is like a lump of concrete and nothing can grow in it. When it is saturated with water it forms a sticky, gluey mess with no air, and only a few very specialist plants can grow in it – hardly any food plants.
Dirt is turned into soil by the living soil creatures, and it is essentially a two-stage process.
Stage 1 – in-soil composting (labile compost)
In the first stage, the soil creatures feed on organic material and produce sticky chemicals which make the soil particles stick together and form aggregates – small granules – so the clay behaves more like sand, with plenty of spaces for water and air to flow through the soil.
But this process of in-soil composting produces many toxic chemicals – growth inhibitors – which prevent plants from growing properly. We call this labile compost, meaning fresh and still “hot”, and it is not good for growing.
Stage 2 – mature soil
As the soil compost matures it becomes less toxic, so plants can readily grow. This is the second stage of composting. The plants then exude sugars from their roots which feed the beneficial microbes.
This creates the essential life cycle on which we all depend. The plants capture energy from the sun, which they use to create sugars that feed the soil life, and the soil life then breaks down the rock particles to make the nutrients that the plants – and we – really need.
The Gbiota process follows this two-stage process and is really very simple. The Biobox is just a convenient way to make that cycle happen on a balcony, in a backyard, or anywhere space is tight.
Gbiota is not about total self-sufficiency; it’s about filling the holes in our modern food system by growing the missing piece of our diet—fresh plants loaded with living microbes and bio-available minerals.
What should I grow?
“What should I grow?” sounds so simple, but it is not. Gbiota is about correcting deficiencies in our modern diet, not about being totally self-sufficient. I have tried full self-sufficiency and it is not easy – actually, it is just plain hard work and boring.
Gbiota is about filling in the holes left by our modern food system. That system is dominated by shelf life. We get food from all over the world via a highly complex distribution system which may be effective, but it takes time from harvest to table.
Microbe deficiencies – they breed and die fast
Modern growing involves a lot of chemicals, so even when plants are growing, the soil is often deficient in microbes. By the time that food reaches the table, any microbes that may have existed have long since died.
These are the very microbes that would naturally form our gut biome, the master regulator for our bodies. This is the number one deficiency in our food system.
Nutrient deficiencies
The second major problem is nutrients. Plants need a limited range of nutrients, but we, as animals, need a far bigger and more complex range.
There is simply no incentive for growers to ensure that the complete spectrum of nutrients is in our foods. Until shoppers carry a mass spectrometer in their shopping bags, they have no way of knowing what is actually in the food they are buying.
Inevitably, the profit motive results in growers ensuring that those nutrients essential to make the plants look healthy are added, but there is no financial incentive to add the nutrients essential for human health.
The net result is that our food is lacking critical nutrients.
Common deficiencies
The key nutrients commonly lacking are:
Magnesium – affects everyone.
Iron – particularly affects women.
Zinc – particularly affects men (at least those still enjoying a bit of hanky panky).
But just adding minerals to the soil is not enough – microbes are needed to break them down so they become bio-available.
Microbes first, minerals second
So the number one objective is to grow food full of beneficial microbes, and number two is to include those missing nutrients which we have evolved to need.
The two are not separate. Microbes in the soil are essential to breaking down the minerals that may exist in the soil so they become bio-available.
Just burying a galvanised roofing sheet into the soil is not enough. It may be full of iron and zinc – two of the critical minerals we are short of – but until they are broken down into complex chemicals that make them bio-available, they are useless.
Microbes are critical
Whichever way we look at it, getting the right microbes – which are naturally present in healthy soil – is critical for our health.
So maybe we should ask, “Where do these microbes come from?” That seems a perfectly good question to ask, but it is not the most critical.
Microbes are simply everywhere. I have just read that every breath we take typically has four fungal spores floating around in the air. Should they decide to set up home and breed, our immune system would soon sort them out. Our bodies are a quite remarkable machine, as you would expect after a few million years of evolution.
We do need to introduce microbes in the first place, which is not a major challenge, but the real question is how to encourage beneficial microbes to breed while discouraging harmful ones that may end up killing us.
Eco-balance
That is what Eco-balance (which is at the heart of the Gbiota technology) is all about.
Partly this is about conditions – particularly the moisture level – which is why I spend so much time talking about avoiding soils which are saturated for any length of time.
But to breed, microbes have to be fed. Partly that comes from decaying organic matter, but plants also exude sugars which are food for microbes.
Different species of plants exude different sugars which attract particular species of microbes – for example, sunflowers are particularly good at attracting and feeding mycorrhizal fungi.
We need a broad spectrum of microbes
The key message is that we need to be growing a broad spectrum of plants so we end up with the broad spectrum of gut biota needed for a healthy intelligent control system.
Companion planting
There is yet another reason for having multiple plants. Cruciferous vegetables, members of the cabbage family, are among the most nutritious vegetables – something well understood by the hordes of insects which devour them at astonishing speed.
We don’t want to use toxic chemicals; they will just kill off the microbes we are trying to breed. But by growing companion plants and harvesting at the baby green stage, it is possible to have a viable crop.
Harvest at the adolescent stage
Companion plants may provide some protection, but as soon as they are attacked by insects, their natural protection mechanism is to produce bitter chemicals so they don’t taste good.
However, if the entire crop is harvested at the baby green stage as a mixture, it will still taste sweet and be highly nutritious.
Ease of use – Ecobox and Tribox
The aim of the Ecobox system is to create a system where people who do not have gardens or gardening skills (my nominally fictitious character Mary, the single mum with three kids and three jobs) can have ready access to fresh vegetables full of beneficial microbes and nutrients.
Keen gardeners take a great deal of interest in the intricacies of gardening – the nutrients, the soil pH, the various species, etc. But the Marys of this world simply do not have the time, so we have to rethink how we can make this accessible.
Within the Gbiota movement we have growers who really enjoy these intricacies, so the plan is simple:
They set up Gbiota beds to breed beneficial microbes and worms.
They add minerals to grow the needed living, nutrient-rich soil.
They produce the variety of seeds needed for successful Gbiota Triboxes and make these available online.
This inoculant is highly concentrated, so a 4 kg pack is sufficient for up to four Tribox towers for three months.
While we are setting up local growers, I can supply these inoculant and seed packs – at least in Australia. (Contact me at colin@gbiota.com if you are interested in becoming a Gbiota grower breeding beneficial microbes.)
Steps in setting up an Ecobox
These are the main steps needed to set up a Gbiota Ecobox.
1. Select boxes
Select suitable nesting boxes from the local hardware store. Twenty litres is a good size, but a bigger box can be partially filled and used as a terrarium.
The exact boxes are not critical as long as they nest. One box is not enough; four to six towers may be needed for a continuous supply.
2. Drill holes
Drill holes in the bases and lids. I have been using multiple holes, but I am now trialling just one large central hole; it is easier and saves the bother of ensuring the holes line up between levels.
3. Order inoculant and seeds
The inoculant and seeds are then ordered online (from a local supplier or www.pickandeat.shop).
4. Collect organic waste
Collect organic waste. Typically this will be kitchen waste, which may take some time to accumulate, but to get started any waste such as grass clippings can be used. Failing that, commercial potting mix can be used.
5. Fill breeding (middle) box with organic waste
The middle breeding boxes are partially filled with whatever organic waste is available, while the growing boxes are filled with whatever growing mix is available.
6. Add inoculant to boxes
The inoculant is then divided up between the growing and breeding boxes. This inoculant contains both living microbes and worms (and worm eggs), so it needs to be placed in the boxes immediately on arrival.
A layer is first placed on the surface and thoroughly watered.
7. Seed, cover and water
The selected seeds are then spread over the surface. Generally, baby greens will be grown, which require a higher density of seeds than when growing specimen plants.
A light sprinkling of water is then applied and, possibly, a lid placed on the box to form a terrarium to keep the seeds moist and to stop birds eating the seeds, if that is a problem in your area.
8. Water regularly when needed
The boxes can be watered with clean water if needed, if the soil starts to dry between flushings.
9. Flush soil blood through both boxes
At least once a week the soil blood must be collected from the bottom water reservoir and poured onto the plants in the top growing box.
This is important, as the brownish-looking liquid (I call it soil blood) is full of living creatures and nutrients and will become anaerobic if left standing. It must be kept in circulation.
10. Start harvesting using tipping
The plants may be ready to start harvesting between two to four weeks after seeding.
Only the tips of the leaves are harvested, leaving the remaining leaves to power plant growth.
If they are regularly harvested the plants will remain in this adolescent state for quite some time, simply trying to regrow. Plants remain sweet and tender in this adolescent stage.
If they are not harvested regularly, they will move into the adult state, when they can become bitter – particularly if they are attacked by insects. Once they have moved from the adolescent to the adult stage there is no going back.
11. Reseed (partial or full)
To keep a continuous supply of vegetables, extra seeds can be planted in between existing plants.
12. Swap breeding and growing boxes
After a period of between eight to twelve weeks, the mix in the middle breeding box should be ready for growing.
The level will have dropped, so additional soil from the top box can be added. Then the boxes are swapped so the breeding box now becomes the growing box and the now partially emptied growing box becomes the new breeding box.
Plant groups
Below is a list of the various plant groups. They offer a wide choice, but there are three that really stand out:
Baby broccoli – one of the most nutritious plants and easy to grow.
Linseed – good for Omega-3, which is critical for heart conditions.
Alfalfa – the workhorse of baby greens and also improves soil quality.
The advantage of multi-crop planting is that there is always some plant that will flourish. Some plants seem invincible whatever happens. I always have some spinach, long leaf lettuce (an indestructible Chinese plant) and purple amaranth growing in my garden so I always have some veggies available.
Baby greens
Baby Broccoli
Chinese Broccoli
Alfalfa
Linseed
Purple Amaranth
Ruby Chard
Sorrel
Tatsoi
Mizuna
Salad veggies
Lettuce
Celery
Chervil
Cress
Watercress
Mustard
Radish
Rocket
Spring onion
Legumes
Adzuki Bean
Mung Bean
Cruciferous vegetables
Broccoli sprouting
Cabbage red
Cabbage green
Kale
Kale Red Russian
Bok Choy
Herbs
Basil sweet
Chicory
Coriander
Dill
Kohlrabi
Mustard
Shiso
Oregano
Parsley
Sage
Thyme
Lemon Balm
Diabetic-supporting plants
Fenugreek
Echinacea
Bitter Melon
Spinach
Silverbeet
Zucchini
Root crops
Carrot
Onion
Beetroot
Jicama
Ask for help if needed
This is a very simple system which is easy to learn, but if it all looks a bit complicated then do what I do with my mobile phone – get my granddaughters to sort it out for me. They really enjoy making us oldies look stupid.
Well, your granddaughters may be whiz kids on their mobile phones but they may not know too much about growing, so come to me at colin@gbiota.com for help – that is why it is a subscription site.
A Gbiota Tribox is a simple three-box system that lets you grow real, microbe-rich soil and baby greens
on a balcony or veranda, turning kitchen waste into gut-brain food even if you live in a flat.
In this post I show how to build and maintain a Gbiota Tribox.
Growing your own soil
Growing soil is the key to the Gbiota technology, so may I explain how it works.
Plants absorb energy from the sun. They use this energy to break down the bonds between carbon and oxygen
from the carbon dioxide which the plants absorb from the atmosphere, and hydrogen and oxygen from the water
which they absorb from the soil.
This takes a lot of energy which is then stored in the plants as complex hydrocarbons that go on to form
our energy food.
Modern agriculture produces large amounts of energy food and we are not in any danger of running out of
energy food in the near future.
But this process of photosynthesis requires certain chemicals to make it work. We have known how photosynthesis
works since it was first described by Jan Ingenhousz in 1779. It is certainly not a new discovery and we know
the precise chemicals needed to make it work. The modern fertiliser industry produces these chemicals on a grand
scale where they are widely used by modern agriculture, which can and does grow crops without using any soil at all.
Dirt
Dirt is just finely ground rock particles. If the particles are very fine we call it clay, a bit coarser is silt,
then sand and finally gravel.
The rock particles are inert; they are insoluble so by themselves they do not provide any nutrients to the plants.
However, they can attract liquids which contain soluble nutrients that attach to their surface.
This is how much of our current food is grown—in inert dirt—with chemical fertilisers attached to the surface of
the fine particles and readily available to the plants.
Soil
Soil is decidedly old fashioned—going back a few billion years—when microscopic organisms like bacteria and,
particularly, fungi began to break down the insoluble rocks to form soil that contains nutrients readily available
to the plants (bio-available).
The plants died, creating organic waste. Other creatures, animals and eventually us evolved, creating yet more
organic waste which was happily recycled by a complex array of microscopic organisms both in the soil and in
creatures like worms, beetles, ants and other re-generators.
Phyto-chemicals
This was a much more complex process than the relatively simple process of photosynthesis.
Plants became masters of chemistry, developing a whole range of chemicals to protect themselves from attack by
insects and animals, and to attract other animals and birds to eat their seeds and spread germination.
Human evolution and our gut brain
All this time, animals were evolving with this complex array of phyto-chemicals and microbes—and eventually us humans,
who became dependent on these phyto-chemicals and microbes.
Nowhere is this more evident than in our gut brain—a combination of the intelligence created by
trillions of cells communicating in our gut, just like in a supercomputer, and our head brain.
This gut brain is our control system which regulates our bodies. If it does not work, we get fat and sick, and this
is the root cause of the modern epidemic of non-infectious diseases.
The basic cause is that our modern chemical, industrial agricultural system is simply not feeding our gut brain.
The solution
So what is the solution? Simple—we go back, study our evolution, and see that we need to grow real soil full of
beneficial microbes and nutrients.
And how do we grow soil? Again simple. We collect up all the organic waste we can find—certainly food waste, which
is a major social problem both wasting resources and creating greenhouse gases—add minerals for the microbes to convert
into complex soil chemicals, and add microbes and soil creatures such as worms, which will breed continuously in the soil.
You then grow plants in this soil teaming with microbes and bio-available minerals and eat them shortly after picking
before the microbes die.
I live in a flat
Mary is not a farmer; she lives in a flat, works in the accounts department of a big company and has three kids, no time
and no growing experience.
That may be true—but she still has a gut brain which needs feeding and she still needs all those complex chemicals,
like the phyto-chemicals needed to replace her body parts as they age and wear.
That is why we developed the Gbiota Tribox. It may be a bit of a Do-It-Yourself project but it is very do-able.
This is what you need to do.
Social benefit
It is just a simple fact that humanity is going through a bad patch. We are putting far greater demands on the earth’s
resources than it can supply. We see this very dramatically with climate change—with floods, droughts and heat waves—
but technically these are problems we can resolve. We have the technology to prevent climate change and we have the
technology to solve that other big problem—degradation of our soils.
But a very present problem is those mega corporations who put short-term profits ahead of social benefit. It is my
opinion that all companies should have to provide a social benefit; that is certainly my objective with Gbiota.
The Gbiota Tribox is something that virtually everyone can benefit from, and the food actually costs less than buying
from a supermarket.
I understand that many people who read my posts are relatively affluent, have large gardens and take growing their own
food—which will make them healthy—very seriously. There are plenty of articles on this web site for them.
The Gbiota Tribox was developed to provide healthy food for virtually all people.
It is a social movement and I welcome people to adopt the technology and spread the word so it becomes a genuine
social movement.
Logistics
A Tribox goes through a natural cycle. Ideally, the middle box for growing soil is fully loaded with organic waste,
minerals, inoculants and worm eggs, then simply left for the natural breeding and decomposition process which will
take at least eight weeks.
The top box for growing plants will go through a similar process of germination, growing and harvesting.
I strongly advocate growing baby greens—that is, the stage beyond microgreens, when plants have immature leaves and
roots that are already extracting nutrients and microbes from the soil, but have not yet reached the stage where they
are under serious insect attack and start producing bitter chemicals to repel them.
Again this means a cycle of at least eight weeks.
Obviously a lot depends on the size of the family and the space available for growing, but I think in terms of having a
base of some four Triboxes, with a new box being set up every two weeks.
I expect most people will be using kitchen waste as their main supply of organic waste (grass clippings are great if you
have access).
It is possible to use the middle box to store the kitchen waste as it is produced; it just means lifting off the top box
and loading the middle box.
It just suits my life, but I prefer to collect the kitchen waste and store it in a sealed container for a couple of weeks,
by which time I have enough waste to pretty much fill the middle box and load it with the minerals and inoculants and then
never touch it again until the end of my eight-week cycle.
By this time the level has dropped significantly, so I now make this my top box for growing plants and take the mature top
soil out of the old top box to top it up.
This means I am seeding into mature soil and giving the soil at the bottom of the box more time for further decomposition.
I then use my old top box as my middle box so I am continuously swapping.
I will start off a new box every couple of weeks.
This is a system that works for me, but you can work out a system that works for you.
Choosing the box
You can buy suitable boxes from your local hardware store or supermarket.
I recommend the type that nest with a lid with a lip so the boxes can be nested.
You will need to lift these boxes, so they should not be too large. Twenty litres is a manageable size, but you can use
a bigger box and make it into a terrarium with just the base being filled.
The bottom box, which just holds the flushings, can be the same as the other boxes with a lid, but it is also practical
to use a smaller box with no lid. This does save a bit of time when watering, but it is not a big deal either way.
Terrariums are great as they need hardly any watering and they keep the flies, insects and birds away. The soil is always
moist so it makes germination very easy—often seeds just sprinkled on the soil surface will germinate in a terrarium.
Thirty litres is a good size for a terrarium box.
It is important that the flushing in the bottom box is not allowed to become stagnant. I aim to re-flush twice a week but
sometimes I get a bit hectic midweek, so I just water the top box with clean water and re-flush at the weekend.
Not perfect, but we don’t live in a perfect world.
Supplies
At this moment I am working out how to set up a supply system.
I am working with a seed company to produce seed mixes with a variety of varieties under different categories. The categories
I am looking at are coniferous vegetables (members of the cabbage family), diabetic plants (like Fenugreek), herbs and spices,
green smoothie mix (linseed, alfalfa), soil regeneration plants, etc.
I am also working with growers to produce a complete mix of minerals, inoculants and worm eggs.
At this moment I can supply limited volumes in Australia only. I suggest you email me at
colin@gbiota.com. You will need to tell me your location as some states have
restrictions on entry.
You may also like to look at a previous post on Gbiota TriBoxes called
Gbiota easy.
The Gbiota tribox is a simple three-box stacking system that breeds beneficial soil microbes in organic waste,
captures their “soil blood”, and uses it to grow baby greens that feed your gut-brain.
Gbiota easy
We have known about our intelligent control system for some seventy years—going back to when people who were
deprived of food during the war later became fat, as their control system had been trained to store any fat it could.
Years later we find ourselves in a health crisis that starts by people becoming overweight. The classic advice is to
cut calories which, although well intentioned, still trains our intelligent control system to store yet more fat.
I try to make people aware of the importance of feeding our gut-brain. This message seems well accepted by a dedicated
number of home gardeners but has little impact on the bulk of the population.
I tried persuading people to form groups where keen gardeners help less advantaged people living in flats who do not
have the time and skills to grow their own gut food.
Well, if you don’t try you will never succeed—and this was a bit of a damp squib. So I thought I must try a new
approach and see how easy I could make it for people with no time, space or even interest in growing their own gut food.
The Gbiota stacked bin (tribox) is my solution: a lazy-friendly way to turn kitchen waste into gut-brain food.
The basic principle behind the Gbiota system is common to all methods, but there are many ways of applying this in practice.
A living soil is created (yes, we make soil) by breeding microbes in organic waste and minerals with inoculants
such as worms, soldier fly larvae, and a starter of living microbes.
Initially, water is flushed through this soil to create what I call soil blood (because it does a similar
job to our blood)—a somewhat yukky-looking liquid which, under a microscope, is full of an array of creatures large and small.
This is then flushed again through soil in another zone where plants are grown.
We eat the plants, which are natural pre- and probiotics, and feed our gut-brain.
Pretty simple.
The flower pot method
The flower pot method, using 40-cent flower pots, I described in an earlier post:
how-to-gpots.
It is the cheapest way I know of applying this method.
The stacked boxes I describe here are even easier to use, but they do need $10 boxes rather than 40-cent flower pots
(though you only need about half as many).
Stacking boxes
To make one unit (you will probably need about four units to provide a continuous supply of gut-brain food) you need
three stacking storage boxes—boxes that can be stacked with the one above fitting into the lid of the box below.
All the boxes I have seen in my local stores are stacking boxes and vary in size and price from a few dollars per box
up to about $15 per box.
Modifying the stacking boxes
The bottom box you do nothing with—this is the reservoir to catch the soil blood.
The box above is the breeding box. You drill holes in the base of this box and in the lid of the box
below so the soil blood can drain into the bottom box.
You load the breeding box with any organic waste you can lay your hands on. Kitchen waste is the obvious choice, but any
organic waste will do, including:
your next-door neighbour’s cat which whinges on your windowsill at midnight,
his son who arrives back at 1 a.m. on his motorbike and revs it to full bore,
his daughter who insists on playing the latest Taylor Swift hit at 2 in the morning,
and maybe himself, who mows the lawn at 5:30 a.m.,
and let’s not forget his wife who screams continuously that she cannot think with all this noise.
Anyway, hopefully you get the message—any organic waste.
Then come the minerals—just dial up rent-a-volcano or buy a bag of rock dust if the volcano won’t fit in the empty house next door.
It pays to check that your rock dust has the right minerals. Most people are short on magnesium, women on iron and men on zinc
(one night of hanky-panky can exhaust a man’s store of zinc). Blood and bone is a good source of zinc and other minerals.
There are many articles on food and health on this web site.
Food and the gut biome
has a table showing minerals that are widely deficient.
Then add the decomposers. You can buy worm eggs; soldier fly larvae and other maggots just appear with household waste.
If you leave out some old slices of bread the local pigeons may supply you with some free pigeon manure—no credit cards needed—or
you can buy some professionally created inoculant for $2,000. But the pigeon manure has worked fine for the last two hundred thousand
years, so it can be classified as “showing promise”.
Again you drill holes in the base of the top box and in the lid of the box below. This top box is where you grow the actual plants.
You will need some soil for a starter. Most people, including me, hate clay—but it does have very fine particles that nutrients cling to,
and after a few cycles the organic matter will have created aggregates that give the soil a beautiful texture.
If all else fails you can buy a bag of potting mix from the supermarket, just to get you going.
Whatever else, this soil must be free draining. Trust me—if the soil does not drain freely you will end up with a
squelchy, horrible, pongy mess that will breed the wrong sort of microbes, like E. coli, which will test your immune system. So:
free draining it is.
After a while, the organic matter from the breeding box below should give you adequate drainage. If not, some fine driveway gravel may
do the trick (though it is really heavy), while Vermiculite or Perlite are very light and improve the soil texture.
But the most important aerator of the soil is our friendly worms.
Seeding
Now you need to seed. The whole point is to breed microbes, and different plant species emit different sugars to attract
different species of microbes.
As the name of the game is to create as diverse a range of beneficial microbes as possible, I make a mix of multiple species.
Currently my magic seed mix has some 26 species of compatible plants which create an excellent mix of baby greens—really the end product.
Cycling
A typical cycle, from harvest to harvest for a box, is about eight weeks. With four boxes you will be restarting a box every couple of weeks.
This is where the beauty of stacked boxes comes in. Whenever you have kitchen scraps you just lift off the top box and the breeding box lid
and toss in the scraps.
By the time it comes to rotate the box after eight weeks, you simply tip the old soil from the top box onto the decomposed waste, make that
box the new top box, and use what was the top box as the breeding box.
But don’t forget to move the worms back to the lower box—it is amazing how they will have bred up. You will need the kids to help you think
of names for them all—they are now your pets.
[vdo id="d26af4c8113c4466939f0105697754b7"]
The best way I have found of watering is to collect up the soil blood from some or all of the box stacks and measure roughly how much fluid
you will need for the liquid to saturate the growing and breeding boxes so a reasonable amount actually flows down to the bottom water
reservoir box.
This soil blood will be used on the next cycle and will flush the root zone with fresh microbes and minerals suspended in it.
Gently pour this onto the soil in the top box so it floods. This will soak down through the growing and breeding boxes, mimicking the
flood-and-drain cycle.
This will expel the stale air, and when the soil blood flows down to the bottom water reservoir it will suck in fresh air.
I prefer to push a short piece of Ag pipe into the soil and fill through that so the soil blood fills from the base upwards.
It is basically breathing the soil.
This is not quite as good as a proper flood-and-drain system where the soil is totally flooded from underneath, but it is a lot quicker
and seems to work pretty well.
As long as you apply enough soil blood so it goes right down to the bottom water container, they all seem to work pretty well.
In the attached video I am reseeding and covering the surface with grass clippings in a vain attempt to fool the local pigeons who have now
learned my boxes are a good source of seeds. But they do leave a calling card of fresh inoculants, commonly known as pigeon manure.
Have fun flipping
[vdo id="6a1e057338574953805c6bbfaa42cde8"]
Alternatives
There are some alternatives to this three-box stack system that some people may prefer.
The growing and breeding boxes can be combined into one large box. This has the advantage that the plants have a bigger root area.
The disadvantage is that kitchen waste is normally generated daily, but this cannot be put straight into the breeding area and must be
stored separately in some compost box or bag until the box is refurbished.
When the crop is finished and the box is being replenished, it is simply emptied and reloaded with compost on the bottom and the growing
soil on top. This is best if the box is flooded from below like in a normal wicking bed.
The best way is to have a long swivel tube so the box can be completely flooded from the filler tube, then the swivel tube twisted to let
the box completely drain.
[vdo id="a01a1f03819942779dbb71625fb972dc"]
A compost tube can also be used. Organic waste can be placed in the tube and the box filled by watering through the compost tube.
The tube can be moved to refurbish the soil and increase the time between full refurbishments of the box.
I have many boxes using this system and it is a good way of growing, but more complicated than the simple three-box stack.
If you want more details just email me at
colin@gbiota.com.
Gbiota is a practical way to grow “gut food” at home—plants rich in beneficial microbes and key minerals like zinc that support our immune system and help prevent chronic, non-infectious diseases.
I have written a lot about the theoretical aspect of growing gut food—now it is time to get down to the nitty-gritties of setting up a Gbiota system.
But just bear with me for a couple of paragraphs while I set the scene.
Be pragmatic
In developing the Gbiota growing system I have had to consider ease of use and strike a balance between what is technically best and what people are actually willing to do in today’s high-pressure lifestyle.
Let us be clear on what we are trying to do: prevent non-infectious diseases.
To do that we must:
Breed the beneficial microbes that will end up in our gut, and
Ensure there is a good supply of minerals—like zinc, which powers our immune system.
The heart of Gbiota is simple: grow food that carries living microbes and minerals our body has evolved to depend on.
Randy lot
There is no problem about breeding microbes—they are a randy lot and breed within about 20 minutes of creation, growing exponentially.
There are just two problems.
If I can demonstrate my knowledge of microbiology—there are just three sorts of bugs:
Good bugs – keep us healthy
Dozy bugs – hang out and don’t do much
Bad bugs – make us sick and can even kill us
Now, being equally knowledgeable on microbiology, you will have worked out that what we want is the good bugs and not the bad bugs.
There is no real way of killing off the bad bugs without killing off the good bugs, so we come to the real essence of the Gbiota system:
Create conditions where the good bugs outcompete the bad bugs so the bad bugs never become a serious hazard.
The second problem is that the good bugs, which we so carefully breed like a prize pet, not only breed very rapidly but also die very rapidly—so the plants must be eaten shortly after harvesting.
Right now the only way you can do this is to grow gut food yourself. In the future I would like to see a local gut-brain food industry, but for now it is up to you.
The basics
I see three levels of Gbiota growing:
Gbiota pots – regular flower pots stacked to create separate zones, light enough to be easily handled.
Gbiota boxes – really wicking beds in box form, too heavy to manhandle.
Gbiota beds – raised beds which require a proper system for managing the water.
All Gbiota systems work on the same principle, but there are many ways this can be applied in practice.
In this article I focus on the simplest system I can imagine—Gbiota pots—to illustrate the core principles. I plan to cover the alternative systems in later posts.
The three zones of a Gbiota pot
They all have three zones:
1. Growing zone
The top zone is where the plants grow. It contains soil loaded with mature organic compost, teaming with microbes, nutrients and minerals.
In my example I use a regular flower pot, which I load with mature Gbiota mix.
Apart from having some of the best soil in the business, this is just regular growing.
I do put some organic waste at the very bottom of the pot, but this is well away from the early root zone and will have pretty much decomposed by the time the roots reach it.
2. Breeding zone
The breeding zone is exactly what it says—the zone where we breed the beneficial microbes that will end up powering our gut-brain.
I use a second flower pot below the growing pot and load it with a combination of kitchen waste and any other organic waste I can lay my hands on—typically a mix of grass clippings and chicken manure.
One practical problem is how to collect and store kitchen waste, which is produced daily and, if left lying about, attracts the blowies and other flies.
I keep a bag of Gbiota soil mix to sprinkle on the surface so it gives a nice, clean cover.
In my locality we have soldier flies which lay eggs that produce soldier fly larvae—excellent decomposers.
We also need worms, which we can easily add as worm eggs; they soon breed up.
I have compost bins in my garden, but people in flats may not have that luxury. Using two pots, it is simple: just lift up the top pot and load today’s kitchen waste into the breeding pot.
It is important to get the nitrogen levels up, so I use fresh chicken manure. That may not be so attractive for flat dwellers, so another trick is to put today’s kitchen waste on a tray with some waste bread or bird seed. Local birds will happily visit and provide a free manure delivery service—no credit card needed.
It is also important to add minerals. I use:
Crushed rock (cracker dust) used for driveways which, in my area, is largely Bauxite—cheap and rich in magnesium, one of our commonly deficient minerals.
Biomin, which contains a spectrum of trace elements (including some zinc) but is more expensive.
Blood and bone is good for zinc, which is critical for a healthy immune system (I bet you have forgotten about Covid, but the flu is still here) and it satisfies my obsession with recycling.
This breeding zone will need topping up with fresh organic waste. Using separate pots means all you have to do is lift off the growing pot, make a small hole, and add extra kitchen or organic waste as needed.
3. Catching the run-off
We need to catch the run-off, so we use a third container—a $2 bucket is fine.
Fluid drains down from the top pot, through the second pot, and is caught in the bucket.
Soil blood
You may be tempted to dismiss the water you catch as just dirty water. But look at it under a microscope and you will see it is full of weird and wonderful creatures wriggling away.
Healthy soil is full of life—from the larger creatures we can easily see, like worms and soldier fly maggots, to smaller creatures we need a microscope for, right down to the most minute—the viruses.
These creatures have guts like us, doing the same job our guts do.
This life is what turns dirt into soil, forming aggregates, giving soil its structure and, ultimately, keeping us healthy.
Technically, I suppose I should call this “compost tea”, but that does not do this magic liquid justice, so I call it soil blood.
In our bodies we have blood carrying sugars for energy, minerals and complex nutrients, as well as the cells that make up our immune system, keeping the baddies at bay.
Plants also have an immune system and a system of making complex chemicals we call phyto-chemicals. This yukky-looking brown fluid is just as valuable to the plant world as blood is to us.
So we want to catch it and reuse it.
We can even boost it by adding blood and bone or Biomin minerals to make it even more potent.
Breathe the soil
[vdo id="518c7568bf354ad79537d8fc7b2be159"]
The key to getting air into the soil (and avoiding a pongy mess) is to let the soil breathe. We achieve this with flood and drain.
We flood the soil, which expels toxic gases like methane that accumulate during decomposition and act as growth inhibitors. Then we let the soil drain, and as the water drains away it automatically sucks fresh air back into the soil.
Dunk or flush
[vdo id="1833202504af4fc1a62f3c55c129be5b"]
With a small flower pot, like I am using in this example, it is easy to lift the pot out, dunk it into a container, and let it saturate. It is best to do this slowly so the air has time to escape—if you do it quickly, you will see air bubbling to the surface.
But when you are using bigger boxes, like the basket I will write about shortly, they can get really heavy to lift.
I am a great believer in the phrase “perfection is the enemy of progress”, and I want people to use the Gbiota system, so I must make it as easy to use as possible.
So I have tried simply catching this soil blood, putting it into a watering can (without the rose) and flooding the soil surface so a wave of water flows down through the soil and ends up in the catchment bucket.
This may not be as good technically as the dunk-and-drain method, but it works. And it is easy.
The key is to have a big enough slug of soil blood and apply it fast enough so it totally saturates the surface and reaches the catchment bucket below.
What to grow
Now let us get real here—one bucket is not going to feed an entire family. (The basket, being rectangular, is more productive—see the next post.)
But we are not trying to grow all our food. Despite the howls of protest from dietitians, there is really not that much wrong with supplying our energy needs from Hungry Jacks. But Hungry Jack will not feed our gut-brain—that is what the Gbiota system is all about.
We only need to supply about 5% of our total food intake as Gbiota food.
Growing plants to full maturity can take several months, so you get much more food by growing baby greens, which are often more nutritious and tastier anyway.
I make up a mix of seeds from fast-growing plants like rocket and radish to slower-growing plants like baby broccoli. It may take up to four weeks from germination to first harvest, but then I will have a continuous supply of food for four or more weeks.
We still need more than one bucket. How many depends on the season (how fast plants are growing) and how much organic waste you generate.
As the time from seeding to seeding will be about eight weeks, and most people will want to empty their kitchen waste every week, we are talking about having around eight sets of pots—which will set you back about $24, so a single finger up to the bank manager (do they still exist? Not for much longer with AI).
Here is a cartoon series for the process.
We live in a world of rapid climate change, pandemics, political polarisation and widening inequality. As an innovator, I can design better ways to grow food, but the real challenge is making these ideas simple, practical and accessible so ordinary people can use them in their own backyards and balconies.
The information paradox
The world is changing at an incredible rate. Climate change, the virus and the polarisation of the political system are immense problems. New technologies like artificial intelligence may seem beneficial, but whatever the benefits, they increase inequality between the haves and have-nots.
Innovators like me ask how we can develop technologies to help mitigate these problems. Often, that is the easy bit. A bigger problem is how to make that technology widely available with clear, relevant documentation.
It’s not enough to invent better systems—we have to make them simple enough for everyday people to use and maintain.
It is tempting to focus on the new developments, but at times an overview is needed to keep things in perspective. This is such a time, so I start with an overview.
The birth of Wicking beds
It is approaching thirty years since I was invited to go to Ethiopia to see if there was anything I could do to help feed people during one of those terrible droughts.
I could see the two main issues were lack of water and lack of nutrients. Nutrients were the easy bit. Weeds may be a pain, but they are incredibly effective at extracting the last bit of nutrients from the soil and can then be used as fertiliser.
Water was a bigger problem, but I had travelled extensively in the Australian deserts and seen a natural phenomenon: water being collected in clay basins, flowing to the lowest point then wicking up to feed luxuriant vegetation in the middle of a dry desert.
That was the birth of what I named Wicking beds—dig a trench, line it with a waterproof layer (clay or plastic film), load the base with weeds, then backfill with soil.
There was no question of the weeds going putrid by soaking in stagnant water—this was in the middle of a severe drought.
Publicity vs technology
On my return to Australia I wrote about this and the idea caught on. But some bright spark decided they could “improve” on this by replacing the weeds with stones and adding a cloth layer to prevent the soil and roots entering the water zone.
This actually works fine as a self-watering bed, but it does little to improve nutrients or soil biology.
We live in an era where publicity often beats good science. Stone-filled “wicking beds” became popular not because they were biologically superior, but because they were well-promoted.
We live in an era where skills in publicity are often more important than being technically correct, so wicking beds with stones caught the public imagination.
Sponge beds
I had yet another idea: the sponge bed. This was even simpler than a wicking bed. Take off the topsoil and level the ground. Fill with any organic material that is available, then replace the topsoil.
This gives three layers: the underlying earth, a layer of soft, spongy material with very high water-holding capacity, and a layer of regular soil on top.
Plants could be germinated in the top layer, then put down their roots into the moist, nutrient-rich layer below.
There was no attempt to contain the water. These systems relied on surface tension in the sponge layer to hold water in place.
Have no doubt—this was a great system, but it just did not catch people’s imagination and it went the way of many other good innovations: just a dot in the history books.
The bugs arrive
We seem to have suddenly “discovered” microbes. Bugs (or more politely, microbes) arrived well before any other living creature. They were the first, and they made all other life forms possible by making soil and nutrients available so plants could grow.
For a long time humans thought bugs were bad and had to be killed off. Then, in a flash of inspiration, we realised there were good bugs and bad bugs—and that our very lives depended on the good bugs.
We spent time and money trying to work out how to kill the bad bugs without killing the good ones, with limited success. Then we discovered another truth: if we manage the conditions in favour of the good bugs, they simply outbreed the bad bugs.
Gbiota beds are not about killing microbes, but about creating conditions where the good microbes win the breeding race.
That is what Gbiota beds are all about: creating the conditions where the good bugs outcompete and outbreed the bad bugs—a concept nature worked out a few million years ago. But we got there in the end.
Flood and drain
Plants need nutrients, water and air. We can achieve this with flood and drain. The basic principle has been known for years.
Lower a container into water and it will expel the stale air.
Let the water drain out and it sucks fresh air into the soil. This cycle of flood and drain means the soil is actually breathing, expelling stale air and taking in fresh air.
Making it work in practice
Of course, we cannot just raise and lower a complete paddock. Instead we use a pump to flood the base of the bed, purge the air, and then let the water drain away to suck in fresh air.
This works well, but a snag appeared.
KISS – Keep It Simple, Stupid
I have been writing articles about breeding beneficial microbes in Gbiota beds and people tell me it all sounds too complicated. So I have been experimenting to find the simplest possible way.
To explain this, I introduce a few made-up characters—George and Mary. The crux is for George to grow Wickimix, the soil that goes into Gbiota Wicking boxes. He is willing to make and sell Wickimix to extend his retirement funds, and he is also happy to help Mary by giving advice and encouragement on what to grow in the various seasons.
Randy bugs
Microbes breed incredibly fast—it is classic exponential growth. Breeding is not the problem; the real problem is that bad bugs grow equally fast. So the name of the game is to create conditions where the good bugs outbreed the bad bugs.
That is the key to the Gbiota system, and moisture level is the critical factor.
Most readers know the basic principle of Gbiota beds: flood from underneath for a short period to expel stale air, then drain to suck in fresh air.
And the rains came
I had a wake-up experience with all the heavy rains and flooding we have been experiencing in my neck of the woods. This is a global phenomenon we have to learn to live with.
Yes, I am one of those “nutters” who thinks that climate change is real and that the biggest threat will be to our food supply. That’s why I write all this.
It is not just climate change. We have been destroying our topsoil by using toxic chemicals which kill off the natural living microbes that create soil in the first place.
I am now a great-grandad and I want the generations that follow to have a decent life.
Experiments with Gbiota beds
My latest experiments started when my garden was flooded. There are two main types of flood:
Fast water coming from upstream, washing over everything in its path
Back-flooding from downstream, when water cannot escape and rises more slowly
My original beds were in-ground beds at the same level as the parent soil. They suffered from fast-flowing water washing over the top. The first big change was to fully raised beds.
At first I used conventional raised beds in rows, but I realised it could be made much simpler.
Basically, take whatever ground you have and lay Ag pipes (the common corrugated pipes with holes you buy at any hardware store). These are used as both drainage and irrigation pipes.
Previously I made my beds with a plastic liner to avoid wasting water as it soaked into the ground. But I live on a duplex soil with a layer of heavy clay under silt, so I experimented with no liner. It may use a bit more water, but not that much.
On sandy soils this won’t work well, but we can copy the canal builders of old and import a layer of clay.
In the past I was fanatical about making the entire bed totally level. Now I just make sure the pipes themselves are level so they can run along a contour line.
Making the raised bed
My first experiment was a conventional raised bed with a filler-cum-drain pipe.
Then I realised there was a better way. Rather than multiple narrow beds with furrows, I now make one wide bed with multiple drainage pipes.
In simple terms:
Take any piece of ground—if it’s sandy, add a layer of clay.
Lay a series of Ag pipes along the contour line.
On my block, I use about 1.5 m spacing between pipes.
Filling and drainage pipe
The ends of the pipes need to be raised: the inlet above the bed surface for filling, and the outlet at least one pipe diameter higher, to create pressure so water flows into the surrounding soil.
The pipe is raised by pushing some soil underneath it. That soil must be porous so that after flooding, the water can slowly drain away.
This “leaky dam” allows a short-term flood and then a drain—partial flood and drain.
Organic waste
Next, cover the whole bed with organic waste.
We need lots of organic waste. It sounds simple and sustainable, but getting clean organic waste is more difficult than it seems. A huge percentage of food grown is wasted and dumped into landfill to make methane.
Setting up large-scale systems to recycle organic waste is something humans need to learn to do. The Gbiota team can’t fix that alone—it needs government action—but we can at least demonstrate how to use it well in soil building.
I have found grass clippings are one of the easiest waste sources to access.
High-temperature composters rightly focus on precise carbon-to-nitrogen ratios. But our stomachs don’t run at 60°C, and we are trying to breed the microbes that will end up in our gut. With in-ground systems, lower temperatures and longer timeframes work fine.
There are many soil creatures that help break down organic material—worms, soldier fly larvae and countless small organisms. Much of the composting happens inside the gut of these animals, not just in the soil itself.
Books say you should avoid citrus, onions and so on in compost. In my in-ground systems, something always appears to eat everything. Come back after a few months, dig down, and you’ll find beautiful soil and no trace of orange peel or onion.
Nitrogen
If there is not enough nitrogen, woody material in organic waste never seems to decompose. Adding extra nitrogen in soil-based composting doesn’t seem to cause problems.
I therefore make sure to add plenty of nitrogen. For me, that’s free-range chicken manure—again, it depends on availability and quality.
Manures, especially chicken manure, can be quite acidic, so I add Dolomite. It helps buffer acidity and adds calcium and magnesium.
Human manure
I used to live on an eco village and used human manure to grow plants in special beds not used for food. I then used those plants as compost material, so I was not using human manure directly—and I am still alive.
Minerals
After organic waste and manure, we need minerals. Typically we are short of magnesium and zinc.
Basalt (a volcanic rock) is rich in magnesium plus a broad spectrum of trace minerals, including iron. Volcanic rock dusts usually supply most trace elements, perhaps except zinc.
My local supplier sells “cracker dust” for driveways. As far as I know, it is essentially basalt. I can buy it by the tonne for a fraction of the cost of small “garden” bags.
I also buy 20 kg bags of calibrated rock dust (Biomin) to ensure the trace element balance, including some zinc.
I notice that adding minerals markedly improves the structure of the final soil (Wickimix).
Zinc
At the home gardener level, blood and bone fertiliser contains plenty of zinc. On a global scale, zinc supply is a bigger issue—along with the elephant in the room: phosphorus.
As most of our waste ends up in the sea, it may be time to buy shares in a seaweed company.
Ratios
It is difficult to give precise numbers when dealing with variable organic waste. What matters is the final result, but here is a typical mix, using organic waste as the reference:
1,000 kg organic waste (largely green material)
500 kg chicken manure
100 kg basalt (cracker dust)
10 kg premium rock dust (Biomin)
10 kg organic fertiliser containing zinc
Soil creatures
Now we need the creatures of the soil—from viruses and bacteria to worms, soldier fly larvae, geckos, lizards and birds. They may seem like a nuisance, but they play critical roles in the ecosystem.
You will notice I’ve left out cane toads. I’m not sure what role they play in a balanced eco system, but if you want some, you are welcome to visit my place and take as many as you like.
In an open garden bed, most creatures will arrive naturally once conditions are right.
There are two possible exceptions:
Heavily cultivated soil may lack essential microbes—this can be fixed by adding small amounts of soil from natural bush.
Compost worms may need to be introduced, even if you already have some earthworms.
Once worms are present and well-fed, they will multiply quickly.
It’s the plants that feed the microbes that make the soil
This is my Gbiota bed for making Wickimix. It looks a total mess, doesn’t it? If you read anything about gut biology, you’ll see the word diversity over and over. The wider the range of microbe species, the better.
Each plant attracts different species of soil microbes, so I plant a whole range of species. I also use the bed for seed collection.
So yes, it’s a bit of a jungle, but that’s what you need in your gut.
Just say to yourself one hundred times: I need diversity.
If you were a few million years old (which is nearly as old as me), you would have observed the first creation of soil. It may have started with microbes breaking down rocks, but that was incredibly slow because there was no external energy source.
As soon as a bit of soil formed, plants began to grow. They captured energy from the sun and used it to create simple and complex chemicals, particularly sugars, which they exude from their roots to attract specific microbe species.
For example, sunflowers are particularly good at attracting mycorrhizal fungi. You can’t see the fungi themselves, but you can see the soil turning white from the network of hyphae.
I did buy mycorrhizal fungi powder once, but now I just plant sunflowers.
I don’t know exactly which microbes each plant attracts, so I use a mix of about 26 different plant species to get a good balance of microbes in the soil.
Magical water and air
Plants and most living creatures need a specific combination of air and water. Some plants like rice and watercress can survive and flourish when submerged, while others like cacti rot easily if waterlogged.
The great challenge is to get the optimum ratio of water and oxygen. Even liquid water contains dissolved oxygen—fish rely on it just as we rely on air.
A good understanding of how water moves through soil is essential, so I recommend my short article on water.
Water has a particular attraction to most soils and is at the heart of growing anything. Wicking beds are one way of exploiting this.
Types of wicking beds
There are three main types of wicking beds:
Twin-container beds – One container holds the soil and plants, and another below holds water. Wicks transfer water upward. All space in the lower container can be used for water storage. These are efficient and have few issues with stagnant water if well-managed.
Stone-based beds with a cloth barrier – The lower layer holds water among stones and is covered by cloth to keep soil out. These rely mostly on evaporation and condensation rather than true wicking. They work as self-watering systems but don’t do much for soil biology.
Sponge beds – These have a lower layer of organic material with very high water-holding capacity. There is no cloth barrier; roots are encouraged to enter the sponge layer to take up water before it can go putrid.
In terms of water storage, sponge beds sit between twin-container systems and rock-based systems. But they have a major advantage: they create a zone with an ideal mix of air and water for breeding beneficial microbes.
These microbes are drawn into plants and become part of what we eat—natural pre- and probiotics.
Sponge-style Gbiota beds are, in effect, microbial nurseries that grow the gut-friendly organisms we need for long-term health.
Where are we up to?
To summarise the process:
Remove and temporarily store the topsoil (or bring in new topsoil).
Lay irrigation/drainage pipes along the contour line.
Create a 300 mm layer of the best organic material you can access.
Replace the topsoil and plant a diverse range of species.
Then:
Make a sump, fit a pump with a manifold to each pipe.
Fill the sump with water and let the float switch run the pump until water returns to the sump.
This works well, but some people don’t want pumps or don’t have electricity.
Nature’s solar pump
I use solar pumps and they work well, but there is another solar pump—plants.
A large tree has a pumping capacity comparable to a high-powered fire pump. So why not use plants as pumps?
At the end of the leaky dam, plant water-hungry species. I like spinach—it is tough and keeps growing year-round—but tomatoes and many other plants also work (just not cacti).
To irrigate, push a hose with running water into either end of the Ag pipe (past the leaky dam if at that end) and leave it until water flows out. Then move on to the next pipe.
It is simple and effective, but not automated like an electric pump. As they say—horses for courses.
Maintenance
The prime purpose of the Gbiota bed is to make Wickimix (see the stories about George and Mary in the Gbiota news section).
The key point about microbes is that they breed like crazy but die quickly. So think “keep it fresh”.
Work the bed in sections: dig out Wickimix to put into Mary’s Gbiota box while it is fresh, and bury available organic waste (she may even bring you some).
This way the Wickimix is always renewed.
When you re-seed, surface watering is needed until roots reach the moist zone. The surface of a wicking bed should be dry to reduce evaporation losses, so early surface watering is essential for germination.
With a flood-and-drain system, some irrigation control is still needed—such as switching off during heavy rain. With a manual system you must regularly check moisture. Flash moisture meters are available, but I use a cheap auger—I can see and feel the moisture distribution.
Gbiota boxes
This is a simple, effective system for making Wickimix, and it works really well.
Wouldn’t it be nice to have a similarly simple system for wicking boxes? I’ve been experimenting with that too. It is a bit more challenging, as Mary has no time for fiddling around growing things, but I hope to share that story in my next post.
I will also introduce you to Sue, who has only a small garden but is fanatical about recycling and wants to reuse all her waste herself in a wicking box.
Gbiota beds were first developed in the early 2010s to deal with drought and dry conditions. After years of experimentation, the system has evolved to manage not only moisture efficiency but also extreme weather, soil biology, and food resilience. This update explains how the bed design has progressed and why it matters today.
You may like to begin by watching a short video I made in 2020:
https://youtu.be/xccG5Zq3CNQ
The challenge has shifted: from drought-proofing beds to building systems that survive intense rain, flooding, and massive shifts in climate patterns.
Sump and Pump System — The Original Design
The early Gbiota beds were simple: dig a trench, add a plastic liner, and place Ag pipe in the base. A raised “leaky dam” at the end forced water upward through the perforations in the pipe, distributing moisture through the soil.
Water was pumped from a sump, over the leaky dam, and back into the sump in a continuous loop. When the pump switched off, water drained back naturally.
In my early beds I used a plastic liner. Later I experimented with simple soil compaction instead, which worked surprisingly well—but results will vary depending on your soil type and water access.
Scheduling irrigation was easy: a simple timer controlled the pump. Multiple beds could share a manifold, with water returning to a common sump.
Manual System — Simplifying the Design
Many people felt pumps and timers were too complex, so I developed a fully manual version of the bed.
The leaky dam was replaced with a simple inspection tube. You insert a hose into the Ag pipe and watch the water rise inside the inspection tube until it reaches the correct height.
I later discovered it was easier to lift the pipe end to the surface. This makes it simple to flush and clean with a hose. Raising the pipe is essential to create upward water flow into the soil.
The manual system is practical and effective—but it requires human attention. The gardener must check moisture levels and stop watering at the right moment.
Drought… Then Floods
These beds performed brilliantly for years during drought. But then came a series of extreme rain events—true “monster floods.”
My block sits on a gentle slope. Water from neighbouring properties upstream accumulated and swept across my land as a mass of moving floodwater, saturating everything for days.
This caused significant plant damage and encouraged anaerobic microbes to flourish—exactly what we do not want in a Gbiota bed.
The solution was to modify the landscape itself: digging trenches around the beds to divert external floodwater.
Converting to Raised Beds — A New Approach
Once external water was redirected, the next challenge was rain falling directly onto the beds.
The first step was to dig trenches alongside the beds, connected below parent soil level to allow excess water to drain away.
The excavated soil was used to raise the beds, improving drainage and resilience.
In some beds I placed the Ag pipe directly on the surface and covered it with a dome of organic waste, manure, and minerals. In others, the pipe sat in a shallow trench surrounded by soil.
I originally used the trenches as pathways, but this was awkward, so I filled them with grass clippings. This:
Improved walking comfort
Stopped weeds growing in the trenches
Still allowed effective drainage
At first, water leaked from pipes placed directly on the soil. Filling the trenches with organic waste helped absorb runoff, and over time worms converted the material into vermicast, reducing leakage naturally.
Experience suggests surrounding the Ag pipe with soil gives the most reliable result.
Testing the New System
Testing flood resistance takes patience—you have to wait for actual floods.
We’ve had one substantial downpour (120mm) since upgrading the beds. There were no signs of waterlogging, so I’m confident the system will withstand far heavier rains. But real proof will arrive with the summer cyclones.
Beds, Boxes, and Soil
Freshly picked food is one of the keys to health and wellbeing. Gbiota beds make this possible, but not everyone has land or gardening experience.
That’s where the bed–box system comes in. Gardeners create high-microbe Wickimix soil in beds, then fill Gbiota boxes so apartment dwellers can grow gut-health food on balconies or indoors.
Wickimix is made by adding food waste, garden material, manure, and mineral-rich rock dust to a trench just above the Ag pipe.
Rock dusts add essential minerals such as magnesium and zinc—both widely deficient in modern diets.
Inoculants introduce the soil microbes needed to kickstart biological activity. Once established, the microbial community continues growing indefinitely.
The key to good Wickimix is moisture: not too wet, not too dry. The Ag pipe provides controlled bottom-up watering so moisture stays in the ideal zone for microbial life.
Goldilocks moisture—not saturated, not dry—is what makes Gbiota beds uniquely suited for breeding beneficial microbes.
Latest Methods
I now use the side trenches to grow Wickimix. I fill them with organic waste, add manure and mineral rock dust, and cover with soil or recycled Wickimix.
This layer becomes an active composting zone. Grass clippings, food waste, and garden prunings all break down with the help of worms.
Worms are essential—their castings are packed with beneficial microbes that ultimately feed our gut ecosystem.
Interested in Becoming a Grower?
If you think you may be interested in becoming a grower, please contact me:
colin@gbiota.com
Gbiota boxes, as their name suggests, are enclosed and separate from any parent soil.
They do not have the benefit of access to the life forms which live naturally in soil and they are also limited in size.
They do have a theoretical advantage that there is no loss of water to the surrounding soil as is inevitable in an in-ground bed, but that is largely just a theoretical advantage as it is easy to plant around an in-ground bed to use up any water which does wick out from the main bed.
If you have a garden and want to grow a reasonable quantity of food then in-ground beds are really the way to go – if you are not convinced by the technical arguments they are simply a lot cheaper and easier to build.
But it is just a reality that in the conventional scene wicking boxes are far more popular than beds.
But Gbiota boxes definitely have advantages – the outstanding advantages are that you can grow plants for gut food even if you live in a flat with no garden and, if you use a small box, you can bring it inside in the winter and either put it near a window or use growing lights.
Beds and boxes are complimentary
Everyone does their own thing but I use both together for different jobs. I use the in-ground beds to grow the nutrient-rich soil (Wickimix) teaming with microbes and other weird creatures. I can then use this soil in the boxes.
I live in the subtropics and our best growing season is actually in the winter while the summer is too hot and dry with masses of insects.
But the boxes are really useful to me for trialling different plant varieties I may want to experiment with and it is just much more practical to grow some herbs – like Fenugreek – which requires specialist treatment.
Baby greens
They are also an excellent way of growing baby greens – that is plants which have passed the microgreen stage (which are essentially using the nutrients from the seeds). They have put down a root system so they are taking up the microbes and nutrients from the soil.
With some plants you can use tipping – just cutting off the tips of the plants and letting them regrow. This is an incredibly effective way of having a steady supply of fresh greens.
See video ‘food for health’ in videos.
They are often more nutritious than mature plants and many plants are soft, tender and digestible as baby greens but are just not edible when mature – the grasses (like oat grass) are classic examples and are the easiest plants in the world to grow – just sprinkle on the seed, wait a couple of weeks then nip out with the scissors and cut off the tips – again and again.
Nip down the road
If you don’t have a garden then by far the easiest way of getting into baby greens in Gbiota boxes is to find someone down the road who has a garden and can set up the Biobox for you. You can grow a lot of baby greens in a small box which is light enough to carry so just buy a box from your local grower, water and pick and when the plants are getting a bit old just swap for another box.
I expect at some point in time this will become a flourishing industry but we need more growers – but it will come and we are pushing for it.
Setting up a Gbiota box
Gbiota boxes are set up in a similar way to Gbiota beds.
A simple irrigation fitting is installed at the base of the bed with a swivel tube to act as a variable drain.
I used to just bend the ag pipe up to the surface but now I use a separate large pipe; this allows me to check the moisture level at the base just by looking or poking my hand down. I have also used the pipe as a compost tube.
The very bottom layer is filled with some porous material. Vermiculite is really good for this as it is so light and cuts down the overall weight of the box. I also use grass cuttings as the bottom layer, then a layer of manure with a top layer of Wickimix for the bulk of the root zone.
[vdo id="f9af392c5f434d87a484552a08b8fc07"]
If you are buying from a local Gbiota grower they will probably fill the box with soil from their in-ground bed (Wickimix) and plant the seeds.
Wickimix is already loaded with the microbes, worms and general soil life plus the trace minerals essential for health.
You add the layer of organic waste – followed by the layer of manure and rock dust and Wickimix from your local grower.
Then just seed and pick and eat.
But what happens at the end of that cycle?
Refurbishing a Gbiota box
You can’t keep on taking goodness out of the box without replacing it.
I use boxes which are small enough to manhandle and just empty them and refill with fresh mix. It is so simple and only takes about 20 minutes to refill and the soil seems to benefit from the aeration as the plants grow really well.
But if you don’t want to do that – possibly because you have a box which is too big to manhandle – then you will need a way of refurbishing the soil.
The simplest (and a bit crude) way is when you come to replant just dig a hole down to the base of the bed, reload with the classic organic waste, manure and soil mix and spread the soil you have dug out over the bed.
You can dig a hole in different areas at each reload. As I say, a bit crude but it works and is real easy.
You can get a bit more sophisticated and install a compost bin – this is just a container with holes that you fill with food waste and let the worms do the work of distributing the nutrients around the box. Works fine – the only disadvantage is that the bin takes up quite a bit of room in a small box.
The other method is to use the fill tube as a compost bin and pour the water through the mix.
In a bed I use the fill tube to inspect the moisture level in the base but in a Gbiota box you can alternatively simply use the swivel tube to check the water level. I prefer to use the fill tube as there may be plenty of moisture in the soil but no liquid moisture. A day or two without liquid water will kill off all those pesky anaerobic microbes.
Quick and dirty
I know many people go to great lengths to use their boxes to recycle waste organics using waste bins etc. If you only have boxes then there is not much option but I like to use a combination of beds and boxes. Just grow Wickimix in the beds then simply tip the boxes upside down so they are completely empty, then refill the boxes with organics, manure, rock dust and Wickimix.
It only takes a few minutes and the plants really grow well in the fresh soil.
Note this is not a formal post as yet – I am still working on it, but my readers seem to like to hear what I am up to and often make good suggestions which I can incorporate before I finally publish. You can comment publicly below or just email me at colin@gbiota.com.
Food and floods
The greatest challenge of our era
Wherever you look the headlines are about the floods and how they are creating food shortages and escalating prices.
My interest is in how to grow plants for a healthy gut brain which requires very careful management of the moisture level but I accept that this is a minority interest. But everyone has to eat so these floods and the food shortage are everyone's problem. How to feed 8 billion people the right sort of food in the midst of a climate crisis is among the greatest challenges of our era. I talk about this more in my article on the global food crisis.
What can I do?
So the question is what could I do about it?
I can’t stop the floods, that is for the Climate Change movement – I have solar panels and batteries, and walk and bike rather than use the car wherever I can, but I am just one person, so what can I do to mitigate these floods?
The first thing is to understand why we get these floods – and it is a bit more complicated than too much rain.
Two types of floods – upstream
There are two types of flood which is well illustrated in my home town of Bundaberg based on the Burnett River which starts at Mt Gaeta and flows 435k to the entrance at Burnett Heads.
Floods occur with rainfalls above 100mm over a period of hours or even days. That amounts to 1,000 tonnes of water per hectare and the Burnett basin has an area of 32,220 square kilometres; let’s not get bogged down in calculations but you can see that is a huge volume of water that has to get out to the sea at the narrow Burnett Heads.
Unfortunately the river at Burnett Heads enters the ocean through a narrow channel and it simply cannot handle that volume of water so the flood builds up back from the head, flooding further and further inland.
I know, I have done my stint in my rubber ducky ferrying people from their upper storey windows.
OK, you are looking for a solution so what can I offer? For this type of flood sadly not much. I know that the Incas had floating gardens which are now becoming widely adopted in flood-prone countries like Bangladesh.
Two types of flooding – local inadequate drainage
But there is a much more common type of flood which is even closer to my home, actually right in my backyard. Looking at my backyard it seems almost flat but there is actually a slight slope with water falling on blocks just uphill and flowing through my block. Again no calculation, but at 1,000 tonnes of water per hectare you can see it would soon add up to a lot of water flowing through my block.
Gbiota beds in the drought
It was in 2015 that I set up my flood-and-drain Gbiota beds. At that time we were more worried about drought than floods and we are in that belt of land where the great deserts form. Just start walking west and you would end up in the Simpson Desert.
These beds worked great until about three years ago when La Niña came and we started to have seriously heavy rains. My Gbiota beds became waterlogged for short periods of time.
Not good, as the whole point of a Gbiota bed is to breed beneficial gut biota in the soil and that means the soil must be nicely moist but not too wet – Goldilocks moisture.
Flood proofing experiments
I needed to rework the entire beds to make them more flood-resistant and this was a great opportunity to experiment.
In the first two beds I ran an experiment with one bed having a plastic liner and the second bed just relying on soil compaction. This is described in my article on Wicking Soaker beds so I won’t go into details here.
50 year floods every five weeks
But by the time I had got around to reworking the third bed we had already had three 50-year rains which now seem to occur every five weeks. Great for testing flood-resistant beds, lousy for growing plants.
There is a bit of slope on my block and I had built the levels up so the Ag pipe, which acts as both a filler and drainage pipe, was pretty much at the parent soil level so to be honest I had not given much thought to the water flow from my neighbours’ properties – I am human.
Science and serendipity
Now for those of you who think science is a nicely planned and organised operation – let me disillusion you – serendipity plays an important role.
And serendipity came in the form of 190mm rain in 30 hours.
Water came from all the blocks uphill, straight through my shed onto my beds.
Time for a cup of tea and a bit of a think.
Rethinking beds
It is clear that just trying to design a bed so it does not get flooded and waterlogged is not enough – we have to ensure that the inevitable floodwater is adequately diverted before it reaches the beds.
And it is not sufficient to just think in simple terms of drainage and gradients. I did not talk about the 1,000 tonnes of water per hectare for fun – we must think about water like an express train; water is heavy stuff and has a lot of inertia even if only flowing at a few kilometres per hour. If there is some obstacle it will simply keep on going up and over, what engineers like to talk about as converting kinetic energy into potential energy.
I learned all about this during that thirty hours of rain and had to go out in the pouring rain and dig channels and diversions to stop the water getting onto my beds in the first place. It worked then but now I have to wait for the next fifty-year flood which at the current state will be in about five weeks to see if it has really worked.
If it really does work again in the next flood, as it did in this flood, I then only have to consider getting the water that falls on my beds away.
Farmers of old
When I was a toddler (a very long time ago) I had uncles who worked on farms and they spent a lot of time on what they called hedging and ditching. Doing precisely what I am doing now, trying to protect the fields from water flowing onto them.
Now of course we have ripped up all those hedges and ditches to make monster fields.
Whatever would Dr Who say about the wisdom of that?
Avoiding water logging
It is inevitable that with that amount of rain, beds not designed for water flow will become waterlogged – there is just too much rain. But what we can aim for is to get that water away as quickly as possible.
Plants will survive quite happily for a few days even if their roots are totally immersed but then most plants will just die, unless you are living off watercress or mangroves.
The lower roots will die if they are immersed in water but if the upper roots are not flooded the plant will survive and quickly regrow the lower root system. Our minimum aim should be to ensure the top layer of soil can drain easily, but ideally we should ensure the whole root system drains.
Soil ain't software
I used to earn my daily bread writing software which is great. If you screw up just hit the delete button and start again.
Growing plants is not that easy. You have to move on from where you are and not some theoretical ideal position.
If I was building new beds from scratch and had a supply of soil I would certainly consider building the entire bed above ground level but in the real world I am halfway through modifying an existing bed – so that is my starting point whether I like it or not.
Making drainage trenches
So I dug up the existing ag pipe which was over 300mm below the current surface and filled the trench up so the base was only 50mm below the parent soil level. I then made a ridge with my classic mixture of grass clippings and organic waste followed by chicken manure and rock dust.
I then dug a trench either side using the soil to cover this ridge and smoothed it all out.
I made sure this trench extended beyond the beds themselves to an area where the parent soil was low enough to provide effective drainage.
Speculative research or just plain daft
The peak of the ridge is some 300mm above the base of the trench which I am sure would provide adequate drainage to get any water that falls on the bed away fast enough.
On the previous two beds (which were above the parent soil) I had partially filled in the trench with whatever organic waste I could lay my hands on but largely grass clippings.
I am not that keen on putting organic waste directly into my beds as labile (young) compost often contains pathogens and growth inhibitors. By partially filling in the trench with this waste I had made a really nice and convenient composting area so when I had to remake the bed (as is essential to keep that highly porous layer above the pipe) all I would have to do is to dig down to the pipe (which I like to remove and clean out) and rake the compost to cover the pipe.
Getting the water away in practise
I had noticed that in beds one and two that even though I had partially filled in the trench with this organic material it was still adequately porous to let the water drain through.
On the basis of ‘try before you die’ I am therefore filling this new trench with fresh organic waste. (It makes a nice mud-free path to walk on to work on the beds).
I will let you know if it drains properly after the next fifty-year flood which I am expecting in about five weeks according to the current weather pattern.
The punch line
We live in the internet age – the virtual world – but treacherous. If the virtual world on the internet is different to the real world then the consensus is that the virtual world is right and the real world is wrong.
I believe in experiments but how do I test if my design will work? I can’t just go online and order a flood – I just have to wait for that fifty-year flood to come – maybe this week, next week, next year or most unlikely in fifty years.
But let us just look at some flow calculations. Consider a 10 metre long 1 metre wide bed. In a 100mm rain storm that gives 1,000 litres. Most of that will flow straight off the bed and into the side trenches. Without getting my slide rule out the trench would easily handle that flow. (PS if there is any reader out there who knows what a slide rule is please email me – there are only a few of us left).
Some water will soak into the bed but the Wicking Soaker bed has a natural drainage, so even if the soil does become temporarily waterlogged it will soon drain away.
If I am right and my bed does not become waterlogged, time for a celebration.
But I have been in the innovation business long enough to know that you may think you know something but you don’t actually know you know something until you have tested it and know for sure.
So the punch line is we can be pretty confident that if you can stop water entering the bed area from outside that the bed area itself is going to be able to cope with the rain that actually falls on the bed.
Although I feel confident that is a valid conclusion, if I have missed something my plan is I can easily fit a drainage pipe to take the water from the Ag pipe straight into the drainage trench. Yet another day digging away in the pouring rain – all so we can eat.
What a hassle food is
Why does not someone invent mobile phones we can eat when we have finished with them so we don’t have to bother with food. Apple pie anyone?
I developed the original Gbiota beds to grow plants which act as natural pre and pro biotics by having a moist, not wet soil. It is very easy to make soil wet, just hump on the water which will breed up the harmful microbes. It is much more difficult get the soil just moist which the beneficial microbes prefer.
I developed the original system using a system of pumps, timers and drains in about 2015 when weather conditions were very dry and they worked fine. But I learned two things.
Many people do not want the bother of installing and maintaining pumps, timers and sumps.
Freak weather
Then in 2020 the weather changed dumping massive amounts of water - multiple rains of over 100mm in a few hours. It is not just the water falling on my block - it is all that water falling on blocks higher than mine which create a torrential flow over my block which the then Gbiota beds just could not handle.
The Ag pipe act as a natural drain but they can only handle so much water - no where near what we have in these monster downpours.
This is thousands of tonnes of water moving at speed across my block, working out how to grow food with these extreme weather events is one of the key challenges facing us all.
My experiments
Dimensions
My first action was to build the beds as high above the ground as possible with drainage channels down the side.
I decided to space each bed at one metre with a channel of around 200mm on each side of the bed for a flood channels and foot path.
Most plants roots (and hence the plant) will simply die if they are left submerged for any length of time (with a few exceptions like cress and mangroves. But is if I can keep the top part of the roots free from water logging those roots will survive and the plant will survive and will rapidly regrow the lower roots.
The level on my beds was already about 100mm above the parent soil so I dug down a depth of 200mm.
For this installation I made my trench 400mm wide leaving an undisturbed zone of about 200mm on each side.
I am not saying these are ideal - just what I did as my estimate of what is best - and they worked pretty good.
Setting up the bed
The diagram shows how I made the bed. In essence I simply dug a bath tub shaped trench, some 300mm deep,and 400mm wide into the parent soil.
Along the sides and ends I left the soil in place.
I filled this trench in the normal way I make Gbiota beds.
I checked the bed was level. Laid Ag pipe flat along the base then added two sight tube for filling and inspecting moisture level. Then filled with a layer of organic waste, in this case grass clipping with all the food waste I could muster. Then a layer of manure with minerals, Dolomite to reduce acidity and Bauxite (local rock dust) which adds Magnesium plus blended rock dust (Biomin) to add trace minerals.
Finally I load some top soil, seed and surface water to germinate.
Filling
I then used a hose to partially fill the highly porous centre layer. There is a bit of trial and error here, I needed to fill with enough water so it would wick out to the surrounding soaker layers.
But I did not want to overfill and be left with stagnant water sitting in the base for any length of time.
I used an auger to check the moisture levels in the soaker layer. It turned out to be pretty simple to find out just how much water to add so there was enough to wet the whole area without leaving stagnant water.
I now had to wait until most of the water was used up which is obviously highly variable depending on weather and plant types.
This is a bit more tricky as there is no magic rules to say when the moisture level has dropped enough to need refilling - it is just a question of checking the soil with the auger and watching the plants for any sign of drooping.
To breed the beneficial microbes we need the soil moist but not wet.
Plastic film or compaction
On all my previous beds I had used a plastic film to stop water leaking away. My soil is a duplex with a layer or real heavy clay underneath and a layer of silt on top.
I decided to make two experimental rows. The first row would use a plastic film.
[vdo id="204a0d49750346049d47741e3fc7f39b"]
While on the second row I compacted the soil with a sledge hammer.
Compacted trench
To be honest - now I am growing crops I cannot really tell the difference and if anything the compaction bed is growing better but there is always a degree of randomness in growing experiments.
I have no idea if compaction would work on a sandy soil - somethings in life you just have to try and see.
My trench stopped about a metre from the end of the bed - this is part of what I call the soaker zone.
I test the trench was level with water and scraped and dug until it was level (important, I think I may treat myself to a laser levelling tool).
I laid a length of Ag drainage pipe along the base of the bed and used a couple of inspections tubes at either end. These were large enough (100mm for me to put my hand down and feel the wetness of the soil - ac critical part of the experiment.
On the inlet side I did put a piece of plastic file under the inspection cum filler tube to stop the water soaking into the ground at the start - no idea whether it is necessary or not after all my banging.
I back filled with several layers, the first was organic waste - I really wanted food waste but I have found we jut do not produce enough at home and I have exhausted the friendly local restaurants - so I made do with grass clippings which are abundant.
Previously I have used sticks I have chopped up with my slasher - a sort of micro HugelKultur - works great but takes a long time to decompose and this was an experimental bed I expected to rework.
The next layer is manure - I used chicken manure because, like with most things I use what is readily available (and cheap). I mixed this rock dust (basically Bauxite - full of magnesium) and Dolomite to reduce the acidity of the manure and add calcium. I also use a rock dust mix which is significantly more expensive but has a range of trace minerals.
My soil is already full of micro-biota but is needed I would add some local inoculant.
Again I have been using this soil for some time and it already has a plenty of worms - both native garden and red wrigglers but again I would add worm eggs if needed.
The top layer is just the soil I have already dug out and is in good condition with a nice texture from years of feeding.
Then I just seed and give an initial surface watering in the normal way.
Watering
Now comes the critical bit - making the soil moist but not wet, which is what Gbiota beds are all about.
You simply do not get significant water movement until the soil is saturated (even in drip systems). So I put a hose into the inlet tube and keep on filling until I see water has partially filled the end sight tube.
I now have liquid water along the trench. This will start to flow sideways under hydraulic flow to the zone alongside the trench where it will start to wick upwards. It will also flow into the soaker zones at either end of the trench.
This is the difference between the sump and pump system where any excess water drains back to the sump for recycling while in the soaker beds we are aiming to fill the trench with enough water to flow and wick into the soaker zones but with no excess which would give us saturated soil.
As i already have a pump system I have connected the beds to the old manifold but this is just because it is there, a hand held hose works perfectly well.
I expected getting this right to be a bit of an issue but having filled the trench to a depth of 50mm the water had moved with no saturated soil remaining. Filling does not appear to pose any problems (unless you leave the hose running while you have a cup of tea).
Knowing when to re-irrigate is a bit more of an issue. I was hoping that I could just feel the soil at the bottom of the sight tube but having tried this I am not convinced as yet that just because the soil is still moisture in the sight that this means there is moisture throughout the remainder of the bed.
In this case I resort to my friend the auger and just take samples at various point in the bed until I feel the moisture level is getting low. This is the big danger with all Wicking beds - just keep on topping up with water when it is simply not needed - that's when the soil starts to go putrid which means we are breeding the bad bugs.
For a quicker check I have planted some water sensitive plants like tomatoes and Chinese Cabbage which show serious signs of wilting when they lack water but spring back as soon as water is available.
Maintenance
The whole point of Gbiota beds is to breed the beneficial bugs that will eventually form part of our gut biota. In addition to the soil micro-biota we need to feed the macro-biota - specifically the worms.
There is a lack of critical research studying how the soil microbes move from the soil and become established on our gut. My hunch is that worms (and other macro creatures) play a critical role in this as they have a gut just like us so I am anxious to keep them well fed.
I have three basic strategies which all have the common requirement for avoiding those trillions of flies which love to visit when anything pongy is on offer.
In the first system I simple dig down to the base of the bed and reload - but I don’t like overworking the soil so I just dig a 200mm trench to one side of the ag pipe this time and the other side next time.
This won’t harm the bacteria and will only cause minor damage to the fungi with long hyphae but they the hyphae will soon regrow as the body itself has not been damaged.
The second approach is just to use those small compost bins which can be placed appropriately on the surface and just let the worms come by on their evening wriggle and take the compost down to the depths.
The third approach is to use the pathways as composting zones. I am simply laying down any suitable organic waste (eg food waste) and covering with my abundant supply of grass clippings.
This of course will block the paths as flow channels when we get these extreme weather events. The idea is that when one is forecast I will rake up all the semi rotted material onto the beds themselves as a mulch leaving a clear flow path to the flooding water. Only time will tell.
Sump beds were the first in-ground Gbiota beds developed to take advantage of the partial flood and drain cycle. They are automated with pumps and timers and are well suited to commercial or larger-scale growers.
Many home growers, however, are put off by pumps, timers and wiring. To make Gbiota beds more accessible, we developed basic in-ground beds. These are extremely simple, very effective, and only need a manual check on water levels. For most home growers, the “tool kit” is just a spade, some Ag pipe, clay or plastic film, and a bit of energy to dig a shallow trench.
Basic in-ground beds are almost embarrassingly simple, which is why they’re ideal for home and small-scale growers. They can even be partially automated later if needed. Understanding the drainage principles is important so you don’t end up with a soggy bed that favours harmful microbes.
Early Sump Beds
I started promoting wicking beds in 1995 to improve water efficiency and reduce watering frequency. Many of these early wicking beds effectively became self-watering pots.
In 2015 I learned more about gut biota and its impact on health span. It became clear that the same wicking principles could be used to breed beneficial microbes by maintaining “Goldilocks” moisture levels in the soil – consistently moist but never saturated.
These early Gbiota sump beds were built during a dry period and used the partial flood and drain principle. The entire bed was raised above the parent soil and any excess water drained back to a sump. Beds were about two metres wide, lined with plastic sheet and hidden under the soil, so they appeared as large raised beds. The system was fully automatic, with overflow returning to the sump.
The main challenge then was supplying enough water under very high evaporation and minimal rainfall. Over-saturation simply wasn’t an issue. In recent years, with heavy and more frequent rain events, beds needed redesigning to handle extreme rainfall and avoid prolonged saturation.
Sump and Pump In-Ground Beds
In-ground Gbiota beds have several advantages:
They stay connected to the existing soil life.
They can be built large enough to feed a family.
They can be automated and scaled.
I have built beds up to 50 metres long, but many growers will be happy with beds around 10 metres. Multiple rows can easily give you 50 m² of productive area.
With current climate conditions and frequent storms, I now build all in-ground beds as raised ridges. Even in heavy rain, the top of the ridge stays above saturation so roots can survive and plants can regrow after flooding.
The layout uses:
A sump or micro dam to collect drainage water.
Channels that collect drainage from multiple rows.
A pump on a timer that periodically feeds a manifold at the top of the beds.
Ag pipe along each row to distribute water and support the partial flood and drain cycle.
Earlier systems simply bent the Ag pipe up to the surface and used it as a fill point. With more intense rainfall, I now use a larger inspection/fill pipe sitting over the Ag pipe so I can see and feel the moisture level in the base of the bed.
How to Make an In-Ground Gbiota Bed
1. Dig the Trench
Dig a trench no deeper than about 300 mm. With heavy rains, a depth of about 200 mm or less is often enough when combined with a raised ridge.
Plan for the bed surface to finish above the parent soil level to improve drainage.
2. Create the Impervious Layer
Install a base layer to hold water long enough for it to wick:
Most commonly, use plastic film about 1 m wide with a 100 mm lip on each side, giving an 800 mm wet “channel” down the centre.
Alternatively, dig down to a heavy clay layer and line the trench with clay. This works but over time the clay may convert to more porous soil, so the bed may need rebuilding later.
The base must be flat and level. Test this by partially filling with water and checking for even depth.
3. Fit Ag Pipe and Inspection Tube
Lay Ag pipe along the base of the trench so it is level.
At the inlet end, fit a larger vertical filler/inspection pipe over the Ag pipe and cut the bottom at an angle. This should be wide enough for you to reach down and feel soil moisture.
At the outlet end, build a leaky soil dam at least 50 mm high so water must flood the base before it can escape.
The plastic film typically covers an 800 mm wide central base section. Wicking will lift water up and over the ridge and into adjacent soil, giving an effective productive width of around 1.5 metres, which is convenient for access.
4. Leaky Dam and Irrigation Cycle
The Ag pipe runs along the base, then up and over the leaky soil dam. The dam:
Holds water back until the base of the bed is flooded to about 50 mm.
Allows excess water to flow back into the sump once the level reaches the top of the dam.
With an automatic sump and pump, the bed is usually flooded once early in the day. This gives time for the water to wick up into the root zone and drain back to the sump during the heat of the day when evaporation is highest.
Filling the Bed with Growing Media
After the base and pipework are in place, fill the trench in layers:
Bottom organic layer: about 200 mm of organic waste (green waste, shredded plant material, food waste).
Manure and minerals layer: about 100 mm of manure, often blended with rock dust for additional minerals and improved structure.
Topsoil/growing layer: about 100 mm of good soil and/or finished compost for seed germination and root growth.
The finished surface should be raised above the original soil level to ensure good drainage during heavy rains.
Inspection Tubes and Moisture Management
In addition to the main fill tube, you can add one or more inspection tubes mid-row. These allow you to check whether water has drained away properly after irrigation or heavy rain.
In wet periods, these tubes are useful for confirming that the base is not staying waterlogged. In practice, you can also use indicator plants (such as tomatoes) at key points in the bed: wilting suggests the soil is drying and irrigation is needed.
Feeding Worms and Soil Life
Worms are central to Gbiota beds. They:
Feed on organic matter and produce vermicast, a highly fertile soil.
Help shape soil structure and improve aeration.
Ways to feed them include:
Placing open-bottom compost bins on the bed so worms can access the compost.
Burying perforated containers filled with compost.
Periodically digging a narrow trench down to the base, refilling it with organic waste, manure and minerals, as when the bed was first made.
This trench method both feeds the biology and produces excellent structured soil. The excavated soil is valuable and can be reused in Gbiota boxes for growers who don’t have access to in-ground beds.
Water will also wick up and over the edge of the plastic film into surrounding soil. This zone can be used for deep-rooted crops such as alfalfa to make full use of water and nutrients. Paths on either side of the bed can be mulched with lawn clippings to suppress weeds and feed worms.
Growing Soil for Gbiota Boxes
In-ground beds are not only for producing vegetables; they are also a way of growing soil for Gbiota boxes.
You can periodically:
Dig out the soil in a narrow trench above the Ag pipe, or lift the pipe and dig to the base.
Refill the trench with fresh organic waste, manure and mineral-rich material.
This buried material decomposes naturally and is processed by soil life, creating a deep layer of vermicast and biologically active soil. This approach avoids fly problems common in open compost systems and keeps nutrients cycling within the bed.
Basic In-Ground Gbiota Beds (No Sump)
Many people don’t want the expense or maintenance of pumps, timers and sumps. Basic in-ground beds offer a simpler option that still uses partial flood and drain cycles, but with manual watering and no sump.
Instead of returning water to a sump, basic beds use soaker or capture zones at one or both ends of the bed to make use of overflow water.
Layout of a Basic In-Ground Bed
In the test bed layout:
A central filler/inspection tube is installed over the Ag pipe.
The plastic film runs to the very end of the bed, with one or both ends open so water can escape into the soaker zones.
The Ag pipe stops about 1 metre before each end and is curled up to the surface.
The last metre on each end is filled with soil to form soaker beds that capture overflow water.
The soaker beds are ideal for water-loving plants such as lettuce, tomato, spinach or linseed, so excess water is not wasted.
To check drainage, you can:
Feel the soil at the bottom of the inspection tube.
Observe the soaker-bed plants – wilting or stress can indicate dry soil.
Manual Watering and Moisture Cycles
If you are happy to water most days, a simple method is:
Trickle water into the inspection tube until about 50 mm of water has accumulated in the base. This is usually enough for a full hot day.
On days when you want longer intervals between watering, you can fill to around 100 mm, as long as you allow water to drain or be used by plants before watering again.
The essential rule is to maintain a deep wet–dry cycle:
Flood the base, let water wick up and feed the plants.
Allow liquid water to drain or be used so the bed is not waterlogged for more than a few days.
Even after liquid drains away, moisture held in the soil by surface tension will keep plants growing for several days, depending on climate and crop type.
Feeding Soil Organisms in Basic Beds
Feeding and maintaining biology in basic in-ground beds is very similar to sump beds. You can:
Use small compost bins on the surface.
Bury perforated containers of compost.
Dig narrow trenches down to the base and refill them with layers of organic waste, manure and growing medium.
This narrow-trench approach is very effective for keeping soil structure, biology and nutrient levels high, and for continuously growing high-quality soil for Gbiota boxes.
Gbiota beds and Gbiota boxes are based on wicking-bed principles but are specifically designed to breed beneficial soil biology and support gut-healthy food.
Conventional wicking beds are often used as self-watering pots. Many have a base filled with inert material such as stones. The water in this lower reservoir is intended to stay relatively clean and can stand for long periods without going putrid, as long as it remains inert.
Gbiota beds are different. They are filled with organic material that feeds beneficial microbes and soil creatures. This biology-rich zone must not stay saturated for long periods, or it will favour harmful microbes and lead to anaerobic, smelly conditions.
In Gbiota boxes, drainage is controlled by a swivel tube at the very base. This allows the water to be fully drained after irrigation so the bed can return to a moist but aerated state. The goal is to keep the soil at what we call Goldilocks moisture – not too wet and not too dry.
In Gbiota beds this Goldilocks moisture is achieved using a leaky dam. The dam holds water back just long enough for it to wick evenly through the bed before the excess drains away. In newer soaker beds, the design uses zones where water can spread and wick into special areas, again followed by drainage.
This cycle of partial flooding and draining is critical. During the flood phase, stale air and gases (such as ethylene from decomposition) are pushed out of the soil. As the water drains away, fresh air is drawn in, giving the soil biology the oxygen it needs to thrive.
Hydraulic Flow – Spreading Water Evenly
To spread water along the length of a bed we rely on hydraulic flow. The base of the bed must include a layer that is largely impervious to water so it can build up and move sideways.
This base can be created by:
A plastic liner or membrane
A natural clay layer
A compacted soil layer
Most Gbiota beds are long, so we use an Ag pipe (or similar perforated pipe) along the base to move water quickly along the bed. Water then flows a shorter distance sideways through the soil to irrigate the full width.
Traditionally the Ag pipe was bent up to the surface to act as a fill point. In newer designs we often add a larger vertical fill/inspection pipe so you can see the water level when filling manually.
The lowest layer around the pipe is a coarse, porous zone that helps distribute water. This can be made from:
Wood chips or shredded branches (a micro hugelkultur layer)
Vermicast or coarse compost
Channels made and maintained by worms and other soil creatures
We do not want to saturate the full depth of the bed for long periods. Excess water should either drain away via an outlet or be monitored through the fill pipe so you can stop filling at the right level. The water needs to stay in the base long enough to wick upwards to the root zone (often several hours), but not long enough to become stagnant and encourage harmful biology.
Food for Soil Biology and People
To breed soil biology we must feed the bugs as well as the plants. A new Gbiota bed is usually built in layers:
Bottom layer – porous base: Coarse material such as wood chips, shredded branches or coarse vermicast to create air-filled pores and water pathways.
Middle layer – organic waste: Food scraps and green organic waste that break down to feed microbes, worms and other soil life.
Manure layer: Animal manures (e.g. from chickens) to add nitrogen and accelerate decomposition.
Top layer – growing media: Finished compost and good-quality soil for seed germination and root growth.
In practice this structure is only temporary. Once the bed is operating, worms and other creatures quickly mix everything into a biologically active, crumbly soil—essentially vermicast-rich topsoil with a strong microbial population.
As crops grow, you will need to re-feed the bed from time to time with new organic materials, manures and minerals. The exact timing and quantity depend on the type of bed, climate and crops, but the principle is the same: keep the biology well fed so it can keep feeding you.
The Gbiota Bed Toolkit – Principles, Not a Single Design
Gbiota beds are a way to make living soil that supports gut-healthy food. There is no single design that works everywhere – a bed in the mountains of Colorado needs a different approach to one in the Queensland tropics – but the fundamental principles are the same.
Over the years I have worked with:
Contour beds fed by a creek and small dam in wet, windy Melbourne
Large wicking beds up to 50 m long in dry Gin Gin using all household grey and black water
Gbiota beds in Bundaberg using mains water and community dams, surrounded by wildlife
Different climates, soils and crops (deep-rooted alfalfa versus shallow baby greens) all require tweaks – but they share the same core: breed beneficial soil biology and manage moisture correctly.
Basic Principles of Gbiota Soil Making
Breeding Beneficial Biology
The main purpose of a Gbiota bed is to breed beneficial biology – for both the soil and our gut. We deliberately create conditions where “good bugs” out-compete harmful biology.
Key points:
Do not rely on inert potting mix alone – it doesn’t feed biology.
Soil life needs real food: organic matter, minerals, moisture and oxygen.
If you don’t feed the friendly bugs, they die and problem biology takes over.
Raw Materials – What to Add
To breed soil biology you need a balanced “menu” for microbes and worms.
Core ingredients:
Buffer (e.g. dolomite) – balances acidity from manures
Mineral mix / rock dust – broad spectrum minerals and trace elements for plants and people
Filler soil or clay – helps moderate nutrient strength and improve texture
Avoid Killing Plants with Osmosis
If nutrient levels in the soil are too concentrated, osmosis works against you: instead of water moving into plant roots, it is sucked out of them and the plants die.
Build rich mixes – but always balance them with soil, clay or other fillers.
When in doubt, dilute – you can always add more nutrition later.
Inoculants – Starter Biology
Food and minerals are not enough – you also need starter biology (inoculants):
Virgin, undisturbed soils often already contain diverse beneficial microbes and fungi.
Degraded soils usually need help: compost, vermicast, worm eggs, quality microbial products.
Once established, biology will continue breeding as long as you keep feeding and watering correctly.
Moisture and Air – Controlling the Bug Environment
Most soil life is very sensitive to moisture and oxygen. Too wet and you get smelly anaerobic conditions; too dry and biology slows or dies.
Gbiota beds aim for “Goldilocks moisture”: not too wet, not too dry, just right for aerobic life.
Moisture Level is Critical
Different creatures thrive at different moisture levels – ants and beetles in hot dry soils, frogs in damp locations. Microbes are similar: some prefer wet, some moderate, some dry.
Conventional wicking beds often run too wet, growing slimy, smelly algae and encouraging the wrong biology. A well-managed Gbiota bed maintains a moderately moist, well-aerated zone where beneficial biology can dominate.
How Water Moves in Soil – Why It Matters
Understanding how water moves helps you design beds that stay in the healthy moisture zone.
Gravity & Hydraulic Flow
Water flows down under gravity and sideways when it meets resistance – this sideways movement is hydraulic flow.
Water applied at the top moves down until it hits a barrier (clay layer, liner, compacted zone).
It then spreads sideways, filling pores until it finds a path down or out.
Wicking
Wicking occurs when water climbs into hydrophilic (water-loving) soil particles. Moisture rises from a saturated zone up into drier soil above until it reaches a maximum height, then stops.
Important points:
Fine, well-aggregated soils wick better than coarse gravels.
There is always a moisture gradient – saturated below, progressively drier above.
Wicking does not go on forever; it reaches a limit.
Evaporation and Condensation
In many “stone-filled wicking beds”, moisture above the stone layer is actually supplied by evaporation and condensation, not true wicking. Water evaporates from the surface, condenses on cooler surfaces above and re-enters the soil.
This can work, but it is less efficient and harder to control than a true wicking system with fine soil or media.
Osmosis
Osmosis is the movement of water from a weaker solution to a stronger one across a semi-permeable membrane – the basic mechanism plants use to take up water.
If the soil solution is too strong (over-fertilised), water moves out of roots and the plants wilt and die.
Balanced mixes keep osmotic pressure in the right range for plant uptake.
Tensile Strength of Water
Water can transmit tension like a rope. In trees, evaporation from leaves literally pulls water up from the roots, thanks to water’s tensile strength.
In soil, this means moisture is constantly in motion – pulled by plants, evaporation and pressure differences.
The takeaway: none of these mechanisms on their own guarantee “Goldilocks moisture”. For that, we use partial flood and drain.
Compost Tea, Flood and Drain – The Goldilocks Trick
As a child, my job was to dunk pots into a tank of “chicken-manure tea”. Each pot was:
Fully saturated in the brew
Then lifted out and allowed to drain, pulling in fresh air
The result was soil that was evenly moist and well aerated – exactly what biology loves. That experience underpins Gbiota bed design today.
Partial Flood and Drain with a Leaky Dam
Modern Gbiota beds use the same principle, but automated:
A sump tank sits below bed level, filled with compost tea or nutrient-rich water.
A pump on a timer pushes water into an Ag pipe along the base of the bed.
A soil dam in the pipe prevents immediate drainage, so the base of the bed floods up to dam height.
Once the level reaches the dam, water flows out through the drain and returns to the sump.
When the pump stops, water drains back, leaving the soil moist but not waterlogged and drawing in air.
This pulsing flood-and-drain cycle creates:
Even moisture through the root zone
Regular oxygen renewal for soil biology
Minimal waterlogging and reduced risk of “pongy” anaerobic slime
Example: Bundaberg Gbiota Bed System
Climate and Water Strategy
I now live in Bundaberg, in the dry tropics. We can have months without rain, then heavy falls from cyclones. On a normal suburban block, there isn’t room for a tank large enough to cover the whole dry season, so I use a hybrid rain + mains water system.
Daily Supply Tank
My Gbiota beds cover about 50 m². In this climate, they need roughly 200 L per day. To manage this safely:
A 200 L tank is filled daily using a mains water timer (runs ~20 minutes).
A float valve stops filling if rainwater has already filled the tank.
Because the valve only runs briefly each day, a failure while I’m away can’t flood the whole yard.
Dealing with “Mr Murphy” and Magpies
Murphy’s Law always applies. In my case, a local magpie learned to peck the timer button, randomly changing the settings. A simple bag over the controller fixed that. A fly-swatter cable-tied to the float valve acts as a damper to stop oscillation.
Experimental Beds and Sump Size
I set up multiple bed types linked to a common sump and pump:
1.7 m wide beds with a single pipe across the full width
Narrow beds under 1 m wide with individual pipes
One bed without a plastic liner (pipe buried directly in soil)
Growth was similar, but the unlined bed returned less water, suggesting lower water efficiency for shallow-rooted crops. My soil is duplex – silty clay over heavy clay – which naturally holds water deeper.
Initial sump sizing used a simple rule of thumb: 1 L of water per m² of bed. For a 50 m bed, I chose a 60 L tote box. In practice:
The pump’s built-in float and stand meant not all 60 L were usable.
The sump was too small for a full pulse, so I added extra pumps on staggered schedules.
Later designs use about 6 L per m² of bed, allowing a single daily pulse with comfortable margin.
Using Gbiota Beds to Grow Soil
Switching from “Growing Vegetables” to “Growing Soil”
Originally these beds grew vegetables (especially baby greens). With the development of Gbiota boxes, my main aim became growing soil – turning organic waste into rich, biologically active topsoil to fill the boxes.
Separating Hard and Soft Organics
I split compost inputs into:
Hard organics – branches, coarse prunings (slow to break down, 6+ months)
Soft organics – kitchen scraps, green waste, restaurant waste (decompose in weeks)
Both go into compost bins initially. Hard material hosts worms, soldier fly larvae, beetles and more – all unpaid workers creating structure and biology.
Trench Method – Feeding the Bed
I prefer open beds connected to the surrounding soil so soil life can freely move in and out.
To feed the bed:
Dig a trench down to the Ag pipe, leaving undisturbed soil on each side.
Add manure and mineral mix to the trench base.
Backfill to soil level.
Spread soft organics (food waste) on top to form a ridge.
This ridge decomposes quickly, feeding microbes and worms while the harder material below breaks down over months.
Plants as Soil Makers
Plants are essential partners in soil building:
Roots exude sugars that feed microbes and mycorrhizal fungi.
Roots physically push through soil and, when they die, leave channels and pores.
On top of the organic ridge I spread a thin layer of good quality soil (from previous cycles) and seed a cover crop or food crop.
Germination Strategy
Germination in wicking or Gbiota beds can be tricky – too wet and seeds rot, too dry and seedlings die. What works best for me is:
Use a fine germination mix: sieved soil + well-rotted compost + minerals.
Cover seeds lightly and water frequently until roots reach the moist zone below.
Once roots reach the active zone, growth is rapid. Self-seeding plants like lettuce and amaranth often prove how well the system works.
Filling Gbiota Boxes
The goal is to harvest topsoil from the ridge once it has transformed into rich, crumbly, microbe-rich soil. I use this to fill Gbiota boxes.
Soil from used Gbiota boxes eventually becomes denser. I return it to the bed ridges as a top layer, where biology and roots refresh its structure. The soil cycles through bed and box repeatedly.
High-Tech vs Natural Composting
There are sophisticated composting systems with tightly controlled biology and temperatures. These are useful, but my preference is to copy nature:
Use organic waste as raw material.
Rely on the full soil community – worms, insects, microbes, fungi – to process it in situ.
Let plants, roots and soil life build deep, stable structure over time.
Technical Support
There is no single “1–2–3” manual that fits all climates, soils and crops. This article explains the principles and patterns behind Gbiota beds so you can adapt them to your own conditions.
If you are setting up Gbiota beds and want help tailoring them to your site, I offer technical support and am happy to comment on specific situations.
Healthy soil grows healthy plants, and healthy plants help build healthy bodies. Soil and water are fundamental to life. Even “soilless” growing systems still depend on nutrients that originally came from soil.
We have slowly but steadily degraded the world’s soils. This is not only a problem for individual health – it is a global food crisis issue. Without living soil we cannot feed a growing population.
So how do we make healthy soil? That part is actually straightforward – this is what Gbiota technology is designed to do.
You can see how simple it is to make a basic Gbiota bed here: Making Soil 101.
The difficult part is changing our mindset: from a throw-away society to a circular society based on recycling.
Soil – more precisely, the biology in soil – is the world’s great recycler. Organic waste can be turned into living soil that grows nutrient-dense food. We add trace minerals for human health and control moisture so beneficial soil life can breed. Not too wet, not too dry – “Goldilocks moisture”.
It is all about breeding beneficial soil biology.
Profit or Grandkids?
Humans are the dominant species on earth: intelligent and generally cooperative.
I am an innovator. I was selected as one of the top one hundred innovators by the Institute of Engineers for my pioneering work in computer-aided engineering. Yet I believe that learning how to make and regenerate soil is one of the most important challenges facing humanity.
We now know how to create soil that grows healthy plants and supports human health. That is what this site is about – practical ways to make and regenerate soil.
The “Growing” section explains how to build healthy soil in simple steps. Anyone can do it, and it is often cheaper to grow food in living soil than to rely on artificial fertilisers and toxic chemicals – which are expensive but profitable for manufacturers.
So why are we, the most intelligent creature on the planet, still destroying soils that took billions of years to form?
Our Attitude to Soil
The biggest challenge is our attitude.
Politicians tend to focus on power and economic growth. Companies focus on profits. Meanwhile, soil – which is essential for the future of life on earth – is treated as expendable.
Healthy soil can also absorb large amounts of atmospheric carbon. Soil health and climate stability are tightly linked.
We know how to make and regenerate soil, yet we continue to degrade it. Changing our attitude to soil is one of the greatest tasks humanity faces.
Soil – the Ultimate Recycler
Soil is the ultimate recycler – or more accurately, soil that is alive with beneficial biology.
Soil life:
Breaks down organic waste
Builds structure and stores water
Makes minerals available to plants
Supports the nutrient density we need for health
Soil is essential for the future of life on earth. Learning how to make and regenerate soil is one of the key challenges of our time. That is what this website is about.
I have made the challenge of “how to make soil” my obsession for many years.
Gbiota beds make it simple to create healthy, living soil that grows “gut food” – vegetables rich in beneficial biology and minerals that support the gut–brain system.
I wrote this article to show how easy it is to make a basic Gbiota bed and turn ordinary soil and waste into high-quality growing media.
Anyone can do this using soil biology, organic waste, rock dust, and worms. Here I focus on a simple box system, but the same principles scale up to larger commercial beds. See more articles under the “Growing” section on the site.
Gbiota beds are not just a watering system to grow cabbages. They are designed to breed beneficial soil biology so plants act as natural prebiotics and probiotics for our gut.
To breed beneficial soil microbes (“good bugs”), you must feed them. They thrive on organic waste, manure, and a broad spectrum of minerals. Mycorrhizal fungi and worms are especially important for breaking down minerals and building long-term soil structure.
The Growing Box, Pipes and Soil Dam
Start with a basic storage box you can buy at any hardware store. It needs to be strong enough to hold wet soil and have a way to connect a drain and filler pipe.
Drill a hole and install a fitting for the drain outlet. Cut a length of agricultural (Ag) pipe to run along the bottom of the box and up one side. This pipe serves two purposes:
Acts as the fill point for water
Distributes water evenly along the base of the box
Raise the pipe slightly just before the drain to form a “soil dam”. For a small box, a dam height of about 25 mm is enough. This sets the maximum water level in the base of the bed.
Fill the bottom half of the box with organic waste and manure. This is the food and breeding ground for soil biology.
Then fill almost to the top with a mix of local soil and well-rotted compost. This is the main root zone.
Finally, add a thin layer of fine soil on top for germination, plus a light sprinkle of rock dust (which can also help deter slugs and snails). That completes the basic growing box.
The Water Reservoir
You could run this purely by hand – pouring water into the fill tube and letting the excess drain. But most people eventually forget or get busy, so automating the system is more reliable.
Use a second box as a water reservoir. Fit it with:
A float valve to maintain water level
A small pump (a pond pump is fine for a single box)
You can also connect several growing boxes in a row. For multiple boxes, use a larger pump such as a sump pump. In Colin’s garden, one sump pump feeds eight boxes plus several in-ground beds from a single in-ground sump.
Height and Layout Decisions
The top of the water reservoir must sit below the base of the growing box so water can drain back under gravity.
You have two options:
Raise the growing box on a stand and leave the reservoir on the ground.
Dig a hole for the reservoir and leave the growing box at ground level.
Connect the pump outlet to the filler end of the Ag pipe. When the pump runs, water flows along the pipe until it hits the soil dam, then floods the base of the box.
Water will not exit the drain until the water level reaches the top of the dam. At that point, water flows out of the drain and returns to the reservoir at roughly the same rate as the pump delivers it.
You must ensure the drain can handle the pump flow. If the flow is too high, the bed will flood and suffocate the biology you are trying to grow.
When commissioning the system, run the pump and check the drain flow. For larger setups with a sump pump, use a small irrigation nozzle or fitting (e.g. 2 mm) to restrict and balance the flows.
Partial Flood and Drain
Gbiota beds are designed for partial flood and drain. The goal is “Goldilocks moisture” – not too wet, not too dry.
You can use a cheap moisture sensor just to detect when water reaches the root zone, or you can dig a small observation hole to watch the water level rise and fall.
Check that the water level:
Rises quickly to the dam height when the pump runs
Flows out of the drain and returns to the reservoir
Then falls steadily when the pump stops
The bed should not fully saturate or stay waterlogged. Stagnant water encourages “bad bugs” and putrefaction. Moving, oxygenated water supports beneficial biology.
You can also time how long it takes for water to appear at the drain. That timing is useful when setting up a pump timer.
Timer and Automation
While you can switch the pump manually, a timer makes things much easier.
Set the runtime slightly longer than the time it takes for water to reach the drain.
In hot, dry climates, run short pulses several times a day.
In cooler seasons, once a day may be enough.
If mains power is not available, you can use a solar pump and control it simply by shading the panel to create one or two watering events per day.
Feeding the Bugs (and You)
Beneficial microbes, insects, and worms need food. Fortunately, they thrive on what we call “waste” – food scraps, grass clippings, prunings, and other organic material.
Good soil biology also requires a wide range of minerals. Rock dust provides these minerals and helps maintain soil structure. Read more about trace minerals here: Adapting to the food crisis.
Quarry crusher dust can improve soil texture and help deter slugs and snails when sprinkled on the surface. However, it is not formulated for trace mineral balance.
For trace minerals, I recommend Biomin – a prepared rock dust containing a broad spectrum of minerals and beneficial microbes. Sprinkle it on the surface when seeding.
I don’t sell products myself; my goal is to build a food system for future generations. I work with a company that produces Biomin to an agreed specification.
I have a similar arrangement for worm eggs, which are a critical part of Gbiota technology. Adult worms are delicate, but eggs transport well and explode into a healthy population under good conditions.
Labile Compost, Mature Compost, and Vermicast
Plants and soil organisms have evolved complex chemical defences. Young (“labile”) compost can contain compounds that inhibit growth, which is why it’s not ideal for the seed zone.
When you built your Gbiota bed, you placed labile compost in the lower layer. Over time, biology and worms break this down into stable, fertile soil, often enriched with vermicast (worm castings).
As the labile compost decomposes, the surface level may drop slightly, but what remains is excellent material for the root zone and for future seeding.
Two Ways to Use Compost as the Bed Matures
Option 1 – Minimal disturbance
Make mature compost or vermicast separately and use it as mulch over the surface when seeding. Worms will gradually distribute it through the bed.
Option 2 – Trench feeding
Dig a small trench down to the lower layer and add kitchen waste or young compost there. This is one of the best ways to recycle organic waste – soil organisms process it and build fertility.
Be mindful of:
Soil structure – avoid digging the entire bed; disturb only small areas at a time.
Practicality – many people use a compost bin and empty semi-mature material into trenches when seeding or transplanting.
This is the simplest way to grow Gbiota food at home. It works extremely well, even though it does not include the automated flood-and-drain features of a full Gbiota bed. It is the best starting point for new growers.
What Gbiota Food Is About
Gbiota food focuses on beneficial soil biology and the nutrients needed to support a healthy gut microbiome. The goal is to breed good soil microbes, grow plants that act as both prebiotics and probiotics, and strengthen human gut biology.
To breed beneficial microbes, you must feed them the organic material they thrive on. They break down this material for energy and outcompete harmful organisms. This microbial cycling has sustained life on earth for millions of years.
How to Make a Simple Gbiota Bed
This method uses basic materials and works in nearly any backyard.
1. Choose a Box or Crate
Use any crate, wooden box, polystyrene box, or tote. Ensure there are holes in the base for drainage.
2. Collect Labile Organic Waste
Gather young, partially decomposed organic waste or equivalent material. This provides food for beneficial soil microbes.
3. Measure the Compost Volume
Fill the crate once with labile compost to measure the quantity needed, then tip it out onto the ground. Alternatively, dig a hole the size of the crate and fill it with labile compost. This is especially effective when using food scraps, as it reduces odour and insect issues.
4. Add a Compost Slurry
Create a slurry using mature compost or a mix of compost and soil (at least 50% compost). Worm castings or mushroom compost work very well. Fill the box with this slurry.
5. Sow Seeds
Spread seeds densely across the surface of the wet slurry. Dense planting works well for baby greens and fast-growing crops.
6. Apply Gbiota Mix
Apply approximately 3 litres of Gbiota Mix per square metre. Gbiota Mix contains:
A full spectrum of minerals, including trace elements essential for human health
Specific microbial organisms that break down minerals and feed plants
Lightly water if needed to ensure contact between mix and seeds.
Why Worms Matter
Healthy soil biology and healthy gut biology are linked. Soil contains beneficial organisms that help break down organic matter. Worms play a major role: they rely on microbes to release nutrients, just as humans rely on gut microbes to digest food.
In a well-fed Gbiota bed, worms often appear naturally. If not, they can be added manually. Keep feeding them with organic waste by lifting the box and adding more material to the compost layer beneath. This creates a closed system without attracting excessive flies.
Harvesting by Tipping
Baby greens are ideal for this system. When shoots reach around 50 mm, cut the growing tips. Cutting early encourages multiple regrowth cycles.
Leave the lower leaves (“mother leaves”) intact—these power the plant’s regrowth. If you cut too low, the plant may not recover.
Tipped greens can be used in salads, wraps, or blended into smoothies with fruits, extra virgin olive oil, milk, water, and spices such as turmeric, cinnamon, and black pepper.
Plant Life Cycle and Timing
Growth is slow during germination because the plant is using nutrients stored in the seed. As roots and leaves develop, the plant begins drawing nutrients from the soil and growth accelerates.
Start tipping before the plant reaches maturity. Mature plants do not regrow well. Ensure mother leaves remain to continue photosynthesis and energy production.
The Floating Water Table Principle
This simple Gbiota system uses the floating water table effect. Water naturally moves toward finer particles, helping the bed retain moisture without flooding the coarse compost beneath. This allows worms to move freely while keeping the top layer consistently moist.
Modern technology can influence how we think and eat, but every individual can still choose real food grown in living soil.
Living in an Age of Digital Power
We live in a time of extraordinary technological sophistication. Massive data systems now give political and commercial interests the ability to influence public behaviour in ways that were unimaginable only a few years ago. At the same time, industrial food production has drifted away from soil and biology. Instead of nutrient cycling and living ecosystems, modern systems depend heavily on chemistry to produce food that is convenient, attractive, and low-cost.
A Small Virus, a Global Disruption
Despite our advanced technology, a tiny virus from an unidentified animal was able to disrupt the entire world. This reminded us that biology—not technology—is still the foundation of human life and survival. We cannot control digital systems or global events, but we can control how we grow and eat our food.
Two Approaches to Food
Many people accept industrial chemical farming without question. The power of marketing shapes public perception and drives consumption of food that is fast to produce but often low in essential nutrients. However, a growing number of people prefer food grown in living soil—food that aligns with the biological systems humans evolved with over millions of years. These people recognise that soil biology directly affects human gut biology and long-term health.
Why Soil Biology Matters
This post explains why choosing soil-based, biologically active growing methods makes sense and how these methods fit into our technologically advanced world. On a practical level, it also covers how to prepare soil for both Wicking Beds and Gbiota Beds. But the goal is not just to give instructions—it is to explain the deeper “why” behind these approaches.
Gbiota beds combine the best of wicking systems and living compost tea to grow nutrient-dense food that supports gut biology and immune health.
Germination, Wicking and Gbiota Beds
I explained that one of the best ways we can defend ourselves is by strengthening the immune system. Gbiota beds were developed to enhance gut biology. Throughout 2020 I simplified the design so anyone can install a Gbiota bed in their backyard. This article answers common questions about germination, wicking beds, and why Gbiota beds are different.
Early Wicking Beds: Simple and Water-Efficient
Around twenty years ago I pioneered wicking beds using a very simple concept: - A lined hole in the ground to form a watertight bed - A pipe at the base to distribute water - A reservoir under the root zone, with water wicking up into the soil These beds were highly productive and extremely water efficient because the soil surface stayed dry, minimising evaporation and deep seepage. Almost all the water applied was used by the plants. However, wicking beds had two key problems: 1. Poor germination on a dry surface 2. Reservoir water turning stagnant and putrid
Germination Problems and a Simple Fix
Because the surface of a wicking bed is dry, germination is usually poor unless you add water at the surface until roots reach the reservoir. With COVID, people wanted fast crops—baby greens and continuous planting—so reliable germination became critical. A simple solution is a surface “leaky pipe”: - Take standard polypipe and cut slots with an angle grinder. - Lay or bury it just under the surface so it sits firmly in the soil. - Block the end of the pipe by folding and tying it. When water flows through, it spreads across the bed, giving even moisture and strong germination. In a pumped Gbiota bed, switching between bottom irrigation and surface irrigation takes seconds. This gives two operating modes: - **Bottom watering (flood and drain)** for maximum water efficiency - **Surface watering** for germination, accepting some evaporation loss
Nutrients and Putrid Reservoirs
My original work on wicking beds began during droughts in Africa, where people were short of both water and nutrients. The solution was simple: - Collect weeds that grow vigorously even in poor soil. - Place them in a lined hole and backfill with soil. - As weeds decompose, they release nutrients as a basic compost system. Water was so scarce that plants drew the reservoir dry. Roots grew directly into the nutrient-rich water and there was no chance for the lower zone to turn stagnant. It was simple, cheap, and effective.
How Wicking Beds Got Over-Complicated
Over time, designs became more complex. Clean stones were added to the reservoir and a cloth barrier placed above to stop roots getting into the water. Stones do not wick, so the system then relies on evaporation and condensation inside the closed space. Moisture condenses on the surface and is absorbed by the soil above. This can work—as long as the reservoir holds clean water, not compost tea. Once nutrient-rich compost tea is added and left sitting still, the reservoir is likely to turn stagnant and putrid. That’s not suitable if your aim is to grow food that supports gut health.
Gut Biology and Compost Tea
My current focus is gut biology because it is central to defending against modern processed foods and infections like the Corona virus. In https://www.gbiota.com/2020/03/29/quick-gbiota-beds/ I explain that: - A healthy gut microbiome needs living biology and nutrient-rich compost tea. - Good gut bugs “love” compost tea in the same way many of us love cheesecake. However, any system that allows compost tea to sit stagnant in a reservoir will quickly go bad. Wicking beds with sealed stone-filled reservoirs and no circulation are not compatible with continuously active compost tea. This is where Gbiota beds differ.
What Makes a Gbiota Bed Different?
Gbiota beds are built on one critical rule: Never let compost tea become stagnant — keep it moving. Technically, this is simple: - Use a small pump to circulate compost tea automatically, or - Move water manually if you have the time or willing helpers. Continuous movement keeps compost tea oxygenated and biologically alive instead of putrid.
The Practical Snag: Drainage
Every good idea has a snag. For Gbiota beds, the snag is drainage. Compost tea needs somewhere to drain before it is circulated again: - For in-ground beds, you simply dig a small sump to collect the outflow. - For boxes sitting on soil, you can still dig a sump next to or beneath the bed. - For beds on hard surfaces (concrete, pavers, decks), the bed must be raised so there is enough fall for the compost tea to drain and recirculate. In my quick Gbiota bed article, I focus on in-ground beds because they are the fastest way to grow large volumes of food. They are also the simplest way to manage drainage.
Choosing Between Wicking Beds and Gbiota Beds
If your goal is simply to grow vegetables and you are not concerned about compost tea or gut biology, a traditional wicking bed may be enough. You can place it almost anywhere and enjoy efficient watering. If your goal is to grow vegetables rich in beneficial microbiology to support gut health and immunity, then Gbiota beds are the better option. Use this checklist: - Can you grow in-ground? - Yes → a Gbiota bed with a simple sump is straightforward. - Are you growing in a box on soil? - Yes → you can still dig a sump. - Are you growing in a box on a hard surface? - Yes → you must raise the bed to create drainage height, unless you use steps or a split-level design.
Gbiota Beds and Fighting the Corona Virus
The aim is to get as many people as possible growing fresh vegetables at home. A population with strong immune systems is far better equipped to handle viruses. Growing Gbiota food: - Builds soil biology - Supports gut health - Strengthens the immune system The more people build Gbiota beds and eat biologically active vegetables, the stronger the community’s overall resilience.
Spread the Word
If you found this explanation useful, please: - Tell your friends and online contacts about Gbiota beds - Encourage them to register on the site - Help them build a Gbiota bed in their backyard Stay healthy, Colin Austin
Healthy soil is the foundation of human health. When soil biology collapses, food quality drops and chronic disease rises.
Soil Destruction
Modern agriculture has increased global food production through chemical fertilisers, pesticides, and heavy mechanisation. While this technology boosts yield, it also damages the biological processes that create healthy soil. Soil is built by microbes, fungi, and organic matter — not chemicals. Continuous chemical use breaks down this living system, reducing nutrient density and long-term productivity.
Why Soil Health Matters
Healthy soil supports nutrient-rich crops. When soil biology declines, food may still look good but contains fewer minerals essential for human health. Regenerative farming restores soil microbes, increases organic matter, and improves long-term productivity. A growing number of farmers recognise this and are shifting to regenerative farming. However, regenerative methods require time and resources, placing financial pressure on growers during the transition phase.
The Link Between Soil and Chronic Disease
Diabetes and obesity have reached epidemic levels. The real danger lies in the consequences: blindness, amputations, heart attacks, strokes, and dementia. The underlying root cause is biological. Our gut microbiome — trillions of microbial cells that communicate with the brain — regulates appetite, fat storage, immunity, and metabolic health. People do not become overweight simply by overeating. When the gut microbiome lacks essential nutrients or is exposed to toxic chemicals, it sends incorrect signals, causing the body to store excess fat and drive hunger. Healthy soil → nutrient-dense food → balanced gut microbiome → healthy metabolism.
Human health depends on beneficial microbes in the soil and in our gut. Without them, our food system and our biology fail.
Healthy soil contains microbes that release minerals plants need. When we eat food grown in biologically active soil, those living microbes support our gut microbiome, improve digestion, regulate appetite, and protect us from harmful organisms. Modern industrial farming and processed foods have broken this relationship.
Why We Need Good Bugs
Beneficial soil microbes unlock essential trace minerals such as magnesium, selenium, and iodine. These minerals do not matter to the plant’s appearance but are essential for human health. Plants grown in living soil deliver these minerals and support a balanced gut microbiome.
Harmful microbes thrive when the gut microbiome is damaged by high-sugar, highly processed diets.
The earliest diets were nutrient-dense and gut-supportive, but low in energy.
Human Behaviour and Food Manipulation
Technology, data collection, and targeted advertising have allowed a small number of companies to influence how people eat. Ordinary people everywhere want safe, healthy food, yet modern food systems promote addictive, nutrient-poor products because they generate profit—not health.
The Body’s Natural Appetite Control System
The gut and head brain work together to regulate hunger and fat storage. Modern foods override this natural control system. High-sugar and high-fat diets change the gut microbiome and drive cravings.
Fresh vegetables grown in nutrient-rich soil help restore gut biology and reduce cravings within weeks.
Food Industry Deception
Packaged foods are marketed as “healthy” or “energy-rich,” but they are typically depleted of essential nutrients. Occasional treats are harmless, but regular consumption restructures gut biology toward addiction. This benefits manufacturers but harms long-term health.
Globalisation, Technology and Chronic Disease
Although global food production has increased, nutrient density has dropped. Modern diets contribute to diabetes, obesity, and dementia—conditions linked to excess fat stored in the wrong places. These issues arise when gut biology is compromised.
How Farming Affects Human Health
Industrial farming focuses on plant yield and visual appeal, not nutrient density. Regenerative farming restores soil biology and produces nutrient-dense vegetables that support gut health.
Kale, celery, or lettuce grown in living soil are nutritionally superior to the same crops grown in chemically dependent soils.
Technology as an Enabler
Online tools allow consumers to buy directly from regenerative farmers, increasing transparency and reducing reliance on supermarkets. Fresh produce can be ordered while still in the ground and harvested to order.
Barriers to Dietary Change
1. Gut Biology Overrides Willpower
A person with sugar-dominated gut microbes will crave sugar regardless of knowledge or discipline. Early childhood food experiences also shape lifelong preferences.
2. No Universal Diet
People respond differently to fats, sugars, and restrictive diets. Highly restrictive diets often trigger fat storage as the body enters “survival mode.”
3. Convenience Culture
Time pressure makes packaged foods attractive, despite healthier options often being equally fast.
4. Commercial Incentives
Chemical farming and supplement industries profit from poor diet quality. Few companies promote dietary solutions that reduce long-term dependence on their products.
5. Medical System Limitations
Doctors follow strict guidelines. Diabetes drugs increase insulin and fat storage but do not reverse the condition. Although many patients would benefit from dietary strategies, practitioners risk losing their licence if they deviate from protocol.
How to Overcome These Barriers
Education is essential. Writers like Michael Mosley and numerous scientific sources confirm the importance of nutrient-dense food and a healthy gut microbiome.
Farmers are increasingly adopting regenerative practices but need evidence of consumer demand before committing to biologically intensive farming methods. Consumers can demonstrate this demand through online groups, buyer cooperatives, and community-supported agriculture programs.
Testing Gbiota Beds at Home
Gbiota beds allow home gardeners to grow nutrient-dense food in living soil using compost and volcanic rock dust. Because gut microbes have short life cycles, improvements in cravings, digestion, and overall health can be observed within weeks of eating biologically active vegetables.
Colin provides free technical support and asks gardeners to share their results to help drive broader social change.
Group Action for Local Food Systems
Sustainable change requires groups—not individuals. Buying cooperatives and local food communities can guarantee growers a market for nutrient-dense crops.
To start a local group or micro farm initiative, contact:
colinaustin@bigpond.com
Micro Farms and Fresh, Local Nutrition
Gbiota beds produce high yields in small areas, making micro farms viable.
Gbiota provides the technology and growing system. The community decides whether it wants a food supply built on living soil, regenerative farming, and real nutrition.
Gbiota beds were developed to help restore gut biology which is really the control centre for our bodies. Trillions of cells communicate with each other to provide intelligence which determines, with our head brain, our appetite and how much food we store.
They work on the flood and drain principle in which a compost tea floods the root zone on a regular basis. Minerals in the soil are broken down by the soil biology so they are readily available to the plants. We have a nutrient rich biologically active soil and health starts in the soil.
They were developed from Wicking Beds, which are still a very viable system for the home gardener, but Gbiota beds are better suited for larger commercial style growing for health conscious people.
Open beds - e.g. beds made directly in the soil, are suitable for larger areas while closed bed, e.g in closed boxes which may be more suitable for green or shade houses for insect and climate protection.
The principles are the same for both systems. Clean waste can be placed in the compost area or if there is a danger of contamination the compost can be pre-fermented or if there is a health risk from contamination even used to grow compost crops which are harvested for compost.
A pump is place in a sump below the bed levels and a timer (or from a solar panel with shade panels for timing) used to flood the base of the beds flooding the root zone with the nutrient rich tea and the beds then allowed to drain.
This article is a summary of Colin Austin’s 2014 Shanghai–Wuhan talk on wicking beds and why “more food” is not the same as “better food.” Modern agriculture can supply abundant calories, yet many diets remain short of minerals, vitamins, and plant compounds that support long-term health. The result is “hidden hunger” and the rise of obesity, diabetes, heart disease, and stroke. The practical response is simple: grow a small but steady stream of mineral- and biology-rich plants at home, even in high-density cities, using wicking-bed style systems adapted for balconies and rooftops.
What this talk is really about
This was presented as a talk about wicking beds, but the deeper point is diet and health. Many people think wicking beds are just a convenience: less watering, fewer failures, better growth. That is true, but it is not the main story here. The main story is that our food system now produces a surplus of energy (calories), yet is often short of essential micronutrients: minerals, trace elements, vitamins, and plant-produced chemicals (phytochemicals). This imbalance can drive the “diseases of affluence” such as obesity, type 2 diabetes, heart disease, strokes, and related chronic problems.
The talk also recognises a modern constraint: more people live in cities, often in apartments, with limited space to grow food. The practical question becomes: how can urban families create a reliable stream of nutrient-dense, biologically active plants without needing a farm, a large garden, or specialist tools?
The “three sorts of people” opening
The talk begins with a light warm-up, then a simple framework: there are people who think everything is heading to disaster (the “Armageddonists”), people who believe we have never had it so good (the naïve optimists), and a third group who says both are partly right. The threats are real, but humans can be clever enough to respond—if we focus on practical solutions rather than despair or denial.
This practical mindset runs through the whole talk: avoid magical thinking, avoid expensive “silver bullets”, and look for systems people can actually adopt.
Is water the key problem?
Colin explains he once believed water was the most critical resource, especially irrigation water for food production. That work led to wicking beds: a way to reduce water loss and prevent nutrients washing below the root zone. But he later concluded that water, while often mismanaged, is still a renewable resource. The technology to use water better exists. The deeper problem is not just whether we can grow plants—it is whether the plants we grow (and the foods we buy) contain what humans need for health.
Hidden hunger and the diseases of affluence
The key claim is blunt: we do not have a global shortage of food energy. Modern agriculture can produce enormous quantities of calories. The crisis is quality. Diets can be “ample in calories but insufficient in nutrients and micronutrients”. This is what is meant by “hidden hunger”. It is closely linked to the modern rise in chronic diseases.
The talk points out that China, like many countries undergoing rapid lifestyle change, has experienced a sharp rise in diabetes. Colin describes visiting China decades earlier and remembering widespread bicycle use and slim, fit people. Later visits showed more motor transport, more convenience foods, and more metabolic disease. The pattern is familiar: prosperity increases calories, but often reduces food diversity and micronutrient density.
How do we make sense of diet advice?
One of the most frustrating things about nutrition is the noise: experts disagree, diets conflict, and marketing fills the gaps with claims, pills, and “miracles”. The talk describes using ongoing reading (including daily updates) and trying to find mechanisms, not just statistics. People are not identical machines. A diet that helps one person may fail another. So broad averages can mislead individuals who want clear, personal outcomes.
The most important shift in this section is the rejection of the “dumb machine” model. The body is not a simple engine where you pour in fuel and get energy out. The body produces neurochemicals and signals that shape appetite and cravings. In other words, humans are controlled by an internal system that tries to protect us, and it reacts strongly when it senses deficiency.
Agriculture, the green revolution, and the calorie surplus
Agriculture transformed human life, and the green revolution transformed agriculture again. Our staple food supply now comes from a limited range of highly productive crops—especially grains—and modern systems can produce huge quantities of energy food. The talk notes that hunger still exists, but much of it is driven by politics, conflict, and distribution problems rather than a pure inability to produce calories.
Modern production is also tied to fertilisers and irrigation. We have become very good at supplying the nutrients plants need in bulk: primary nutrients (like nitrogen, phosphorus, potassium) and secondary elements (like calcium, magnesium, sulphur). This raises yields. But humans need more than “healthy plants”. We need a wider range of micronutrients—some of which plants do not require in large amounts.
We need more than plants: micronutrients and bioavailability
The talk presents a simple but powerful point: farmers have strong incentives to add what improves yield, not necessarily what improves human health. A plant can look healthy even when certain trace elements in the soil are low. But humans may still be short of those elements. Examples mentioned include selenium and iodine, and other trace minerals that matter for human biology.
There is also a warning about simplistic supplement thinking. Nutrition is interactive. “Bioavailability” matters: absorption depends on context, combinations, and overall diet diversity. You cannot always fix a complex deficiency by adding a single pill. Variety supports internal complexity. This is why the talk keeps coming back to “real food” grown in mineral- and biology-rich conditions.
The “hungry beast”: why diets often fail
The core behavioural mechanism described is this: the body senses deficiency and sends strong signals—eat more, eat more, eat more. But modern food often provides more of the same (more calories) without supplying the missing micronutrients. So appetite can remain high, cravings persist, and “willpower” loses over time. This is presented as a major reason why many diets work briefly, then collapse.
In this framing, the goal is not simply to reduce calories. The goal is to satisfy the body’s true requirements with mineral- and nutrient-dense foods so the internal signals calm down. When that happens, overeating becomes less compulsive because the body is no longer “chasing” what it cannot find.
“Holy Grail” cures vs practical food solutions
The talk is sceptical of miracle cures. It describes encountering plants and pills promoted as magic answers. Some claims work by “fooling” the body’s signalling system—creating a sense of fullness without actually fixing the deficiency problem. The critique is direct: treating symptoms without addressing mineral and nutrient balance is not a true solution.
In contrast, there are many real plants that act as “converters”: they take up minerals and participate in producing beneficial plant compounds. But there is no shortcut. Minerals must exist in the soil. Soil biology (fungi, bacteria, worms) must help make those minerals available to plants. Then plants feed us. It is a chain: minerals feed biology, biology feeds plants, plants feed humans.
Several common responses are assessed. Supplements are widely used but can be expensive, can be poorly balanced, and may not replicate the complex interactions of nutrients in food. Organic produce can reduce certain chemical exposures, but “organic” does not automatically mean mineral-rich. Unless the grower manages minerals and soil biology, the nutrient density may still be limited.
Permaculture and self-sufficiency are admirable, but the talk argues they are difficult to scale to the majority of people. Most people want variety and year-round access, and modern food supply chains dominate. Rather than trying to overthrow the entire system, the talk proposes a “work with the system” strategy: keep the convenience of modern calories, but supplement with a steady stream of high-quality, nutrient-dense plants grown locally.
Finding a practical solution: minerals, biology, plants, and a small space
The practical recipe is described in plain steps. First, ensure a supply of required minerals (in small quantities). Second, ensure soil biology capable of making those minerals available (mycorrhizal fungi, worms, and other soil life). Third, grow a range of vegetables and herbs that can contribute to dietary diversity and plant compounds. None of this requires fantasy. It requires a simple growing system that is reliable and low-effort in small spaces.
This is where wicking beds come in. In Australia, wicking beds helped many people grow food, partly because they reduce watering demands. In cities, communal gardens can also support this, but the talk recognises that China’s population density changes the design constraints. Many people live in apartments, but still have balconies (Yangtai), rooftops, or access to small shared areas.
Wicking bed technology: the basic idea
The wicking bed principle is simple: a waterproof base stores water, a distribution pipe helps spread moisture, and a soil layer supports plant roots. Water moves upward by capillary action (wicking), keeping the root zone consistently moist. The talk compares it to a flood-and-drain breathing effect: when water levels cycle down, air is drawn back into the soil. Drainage holes are critical to prevent saturation and keep the system healthy.
Wicking beds can be very simple (even made from basic containers). Larger beds can be built in-ground by trenching, lining, adding distribution, filling with organic material, and backfilling with soil—while ensuring final soil level supports drainage.
Soils: porosity, moisture-holding, nutrients, and worms
Soil is treated as a core technology, not an afterthought. The talk emphasises a soil that is porous, moisture-holding (hydroscopic), and contains a broad range of nutrients including trace elements. Worms are described as integral because they help release nutrients and create channels that improve structure and water storage. Soil biology, including fungi, is part of the mechanism that makes minerals available to plants.
A specific warning is included: some designs use stones or sand separated by porous film, but if you use the right soil you can store plenty of water and allow roots to occupy the full volume of the bed. In that view, soil choice can outperform “clever” structural tricks.
The YingYang He “fertility box” idea for China
To adapt the concept for apartment life, the talk proposes a very simple container-based system: essentially a large bucket paired with a simple household sieve or internal bucket concept (as an experiment to separate water and nutrient zones for added storage). The key operational warning is repeated: drainage holes are essential. The system starts simple, with the intention of later adding the minerals, worms, and biology as the design matures.
Social reality: appearance, sprays, compost, and trust
The talk does not pretend this is only technical. It raises a practical marketing problem: if you reduce spraying and focus on soil health, your vegetables may look less “perfect” than heavily protected produce. How do you convince people that less photogenic food can be healthier? A comparison is made with wine: appearance alone does not explain value, yet people will pay more when they believe quality is higher.
Compost is also raised as a social barrier. Soil biology needs feeding, and compost is a natural input, but some households may resist composting due to smell, mess, or space. The talk includes an anecdote: attempts to assemble a system on a family balcony were rejected and moved to the roof. This is treated as a real design constraint: successful adoption must fit the culture and the home.
Production in tiny spaces: “chop and chew” and “swap and go”
A key challenge in apartment growing is production volume. The talk proposes growing methods that maximise output in limited area. One idea is “chop and chew”: harvest outer leaves and allow plants to regrow, keeping plants productive for longer and maintaining a “young plant” character in the regrowth. Another idea is a distribution model: instead of every family raising plants from seed, professional growers can mature baskets or containers of ready-to-harvest plants, then deliver them to apartments or local stalls.
The customer swaps the used basket for a fresh one (a “swap and go” cycle). This increases productivity and reduces complexity for households. It may also reduce the compost barrier if growing media and inputs are managed upstream by the grower. The talk notes that many consumers strongly prefer vegetables that are extremely fresh, sometimes sold with roots attached, which fits well with a live-plant distribution model.
Conclusion: what an adoption system would need
The talk ends with a practical list of what would be required to support adoption at scale. The system is not just containers and soil. It would likely require an organisation (or network) that can: provide education on diet and micronutrients; teach people how to build and manage a simple wicking-style system; locate and distribute specialist minerals in small quantities; propagate and distribute key soil biology (including fungi and appropriate worms); and coordinate growers who can raise “ready baskets” for distribution through retail outlets or direct delivery.
The overall position is pragmatic: chronic disease is rising, and waiting for perfect understanding or perfect institutions is not a plan. Urban agriculture, done intelligently, can be a practical supplement to modern diets by restoring some of what has been lost: mineral density, plant diversity, and the living biology that supports both soil function and human health.
This update shares a practical rebuild of a Gbiota bed after I noticed uneven water spread between rows. The core lesson is simple: the liner shape matters more than expected. A “saucer” profile gives too little contact area for wicking when water is only trickling through the pipe. A flatter base with a small lip dramatically improves lateral wetting. I also share two clear checks you can do before building: use stable compost in the base and test your slope using water, not your eye.
Why I’m rebuilding
I had some problems with my Gbiota beds and decided to rebuild one line so I can compare designs under similar conditions. I drafted an earlier version of this update to warn members about poor water movement across rows. Since then, a small change to the liner profile has made a substantial improvement, and it is important you hear this before you start digging.
The good news is the soil biology looks strong. I have never seen so many worms in a garden bed, which suggests we are heading in the right direction biologically. Some plants have flourished—especially the more aggressive, water-hunting types—while others have struggled.
In my beds, plants like Purple Amaranth, Kang Kong, Spinach, Okra, and Comfrey have done very well. Others, like lettuce and radish, went to seed quickly, and Chinese cabbages were decimated by insects. These can be normal Queensland summer issues, but the symptom that really worried me was poor germination and weak growth between rows. That pointed to a basic engineering problem: poor water distribution across the bed width.
What I was trying to achieve
Wicking beds are excellent for small areas. They are a reliable, well-tested system for home production. But the scale of chronic disease, especially diabetes, is enormous. The intention here is to produce food that is rich in minerals and phytonutrients, with active plant-associated biology that can help improve human gut biology. To do that at scale, the growing system must be low cost, simple, and able to operate with automation.
The idea was to use multiple rows of modified open wicking beds, potentially up to 100 metres long, supplied by an external reservoir. Water delivery would be automatic using a pulsed cycle, and the same loop would allow compost tea (with mineral additions) to be introduced to the root zone.
In theory the system is straightforward: create a gentle slope, dig a narrow channel, line it with plastic film, lay in a perforated pipe, and connect it to a reservoir and return path. Add a pump, a manifold, and a drainage system so excess water returns to the reservoir. Then provide a method to introduce compost tea into that loop.
Practical realities: slope, soil, and water flow
For pumping, I wanted to use a pond pump because they are cheap and have an open impeller, so they can tolerate a fair amount of dirt. They do not have much head—about a metre or so—but that is adequate for this type of distribution. The most convenient placement was near my shed where power is available. A commercial system would likely use solar, which is generally sufficient.
In my case, the shed location forced me to reverse the slope direction compared to what I first wanted. I do not have hard experimental data on the ideal gradient, but from flood irrigation experience I guessed a slope of about 1 in 100 would be fine. In a 7 metre bed, that is around 70 mm of fall.
I also needed soil to create that gradient. My existing soil is poor—essentially a silt layer sitting above clay—and I wanted to inoculate the system with a very active biology. That led me to bring in biologically active material for earthworks and soil building.
Two essential build lessons
After watching what happened over time, two practical lessons became very clear:
Use well-composted material in the base. Fresh, labile compost settles, and its open structure does not wick well. Wicking depends on a finer, compacted structure with small pores.
Measure your slope with water, not your eye. If you do not have laser levelling, lay out plastic and do a water-flow test. A small gradient is difficult to judge visually, but water will tell you immediately whether the slope is uniform.
The world’s most effective soil moisture monitor
In a previous life I ran a company making electronic soil moisture monitors. These days I use a simple wood auger I bought at the market for $8 because it gives me the information I actually need.
I could see the surface soil between rows was dry, but the auger showed moisture underneath. To test properly, I planted radish seeds across the rows, gave one watering, and waited. The result was unambiguous: the radish grew well over and near the pipes, but between the pipes there was almost nothing. The problem was not “maybe.” It was water distribution.
I explored the obvious suspects. I wondered if the soil was not wicking laterally, so I trialled a strip of rotted grass clippings in one place and a cotton cloth in another to improve capillary continuity. Those spots looked moist, but overall the improvement was not enough to solve the pattern.
I also tried a second pipe above the ag pipe, like a homemade dripper tube. Water use increased, but there was no strong sign it improved lateral wetting across the bed. The patches were starting to look like “patch after patch,” and that is often a warning sign: the basic geometry might be wrong.
Finding the real cause
I eventually accepted I needed to pull the bed apart and watch what was actually happening. Replacing liners is hard work—shovelling soil out and back in again—so I do not say this lightly. But it was monsoon season, and digging in wet conditions made it easier to see how water behaved.
Once I exposed the pipe and watched the flow, the mistake became obvious. Water flowing down the pipe was only a trickle—about a litre per minute—so the water depth in the pipe was only around a millimetre. Wicking is not a strong force. It needs the right conditions, and it needs contact area.
I had shaped the liner channel like a saucer and placed the ag pipe at the bottom. That meant there was only a tiny contact area between the soil and the water. With such a small contact strip, not enough water could move out of the pipe and into the surrounding soil to wet laterally.
The fix: a flatter base and a small lip
The solution was to change the channel profile. Instead of a saucer, I formed a flatter base with only a shallow lip at the edges. That creates a meaningful flat area where water can spread, increasing the soil-to-water contact zone. The difference was dramatic.
This change worked so well that I was tempted to trial a simple flat sheet on another bed. It felt like a silly idea at first, but sometimes a “simple” idea is exactly what the physics needs. In this case, it worked.
From here, the next refinement is to reduce the lip as much as possible while still preventing leakage. The goal is enough containment to guide flow, but not so much shaping that you lose effective contact area.
Following the water: a quick system walk-through
It helps to follow the water path as a complete loop. Water starts in the main tank, which catches rainwater from the shed. In Bundaberg, we either have too much rain or too little, so I use a float valve to top up when needed. That also gives me a simple way to estimate how much water I am using.
From there, water goes into a feeder tank (in my case about 40 litres). It is small, but it does the job. The pond pump sits in this feeder tank. Water then travels through a pipe to the distribution point at the top of the block, where a tap adjusts flow.
The flow is set so the header tank does not empty during a 10-minute irrigation cycle. That gives roughly 40 litres, plus whatever comes in from the main tank during the run. In my layout, that is just over 1 mm of water per cycle—if the soil is already wet, the excess simply returns to the header tank.
I irrigate on a pulse cycle (every two hours in this setup), which gives capacity for around 12 mm per day. Evaporation can be around 10 mm per day in hot conditions. Vegetable crop factors are generally under 1, but I also have trees pulling extra water, so overall the net demand can be near that 1:1 range. In practice, this level of delivery should be adequate, provided the bed actually distributes the water laterally—hence the importance of the liner geometry.
Key dimensions and planting test
In the revised bed, each lined channel is around 200 mm wide, and the plastic liner width is about 270 mm. The base of the channel sits roughly 150 mm below the soil surface. I would prefer deeper pipes, but depth is constrained by the header channel level.
To confirm wetting, I plant across the rows. This is a simple visual test: if seedlings are uniform across the bed width, water distribution is working. If growth repeats in stripes, distribution is still failing somewhere.
Compost tea flushing and next improvements
I am still using a regular compost bin for household compost and flushing manually at the moment. The intention is to automate compost tea flushing so the biology and nutrients can be delivered consistently through the root zone. Automation is the goal, but it needs to be built on top of a distribution system that works reliably first.
If you are about to build beds, especially in wet season, watch for updates and do not hesitate to check your slope and liner profile before you commit to filling and planting. A small geometry change now can save a huge amount of labour later.


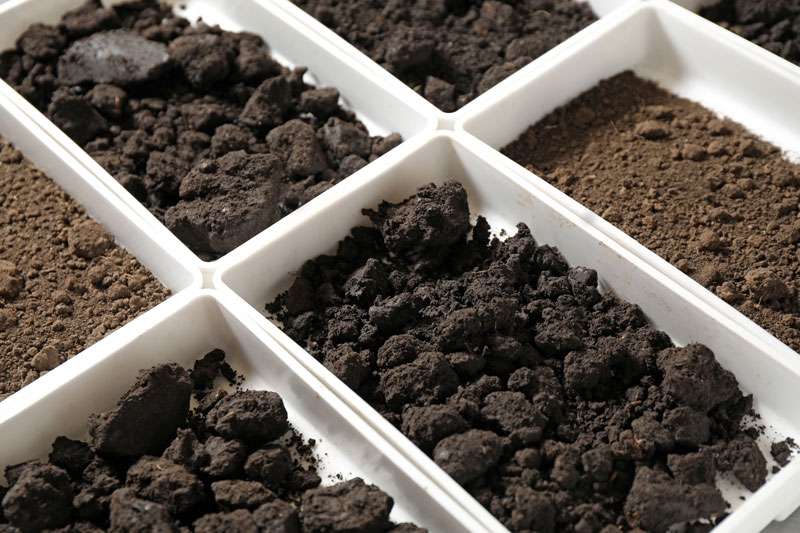

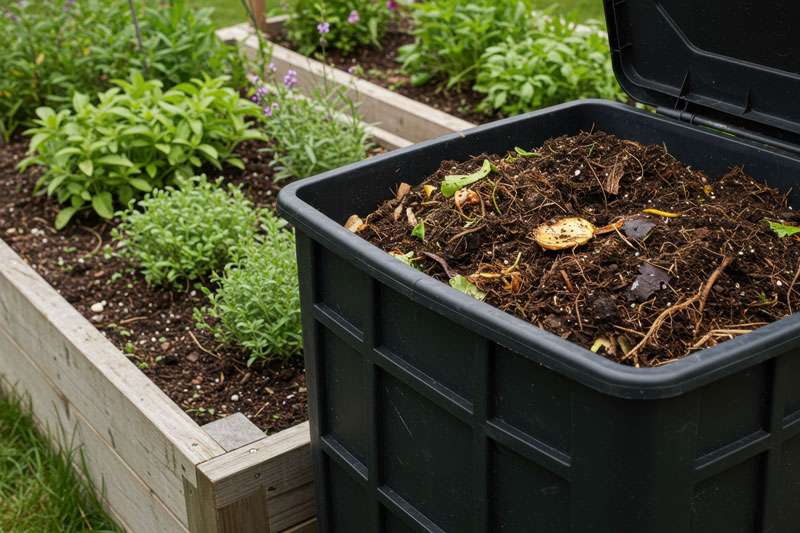


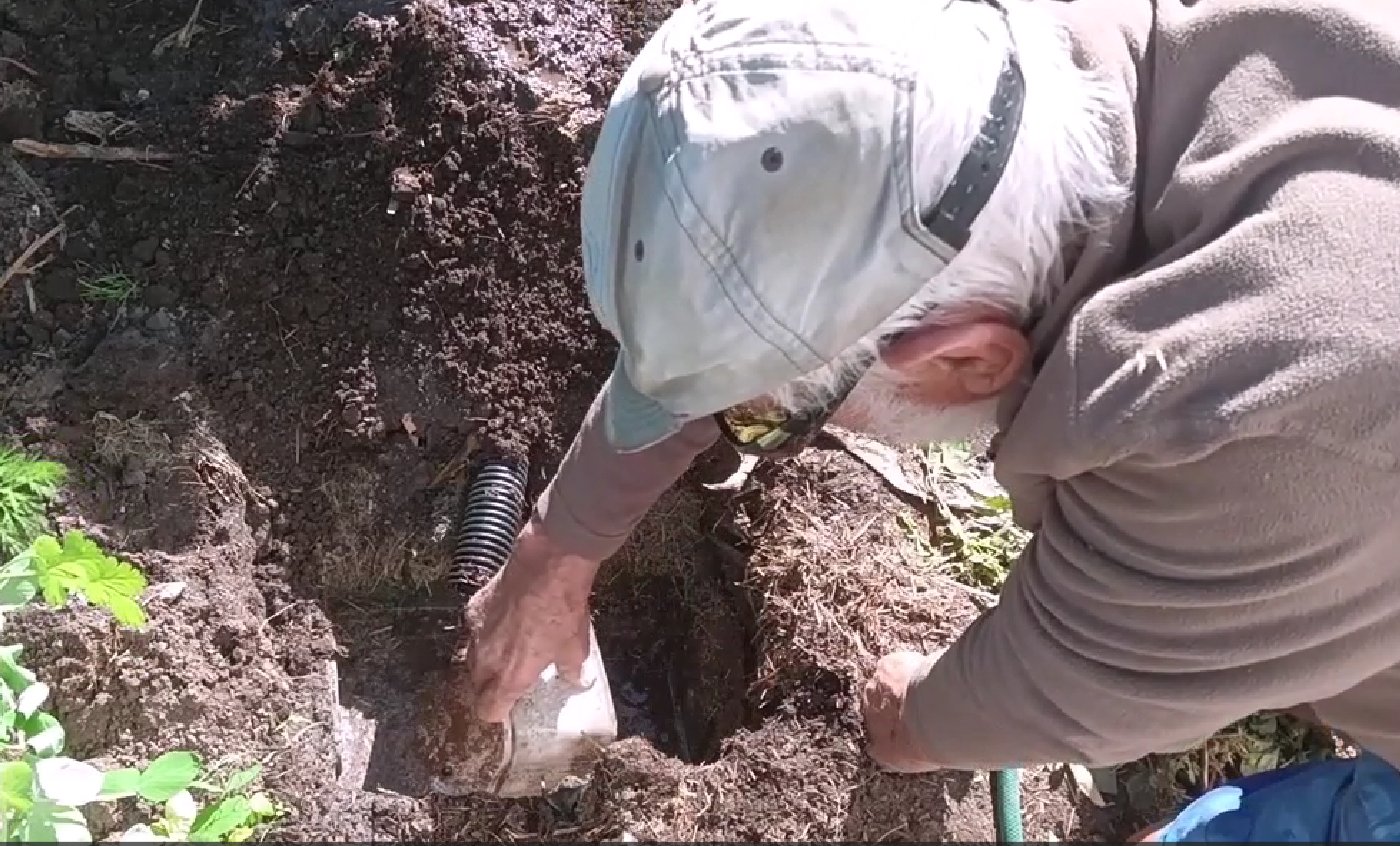
 It is now just a question of irrigating and waiting for three months or so for the worms, creatures of the soil and the fungi and microbes to do their thing and bingo you will have some beautiful Wickimix full of beneficial creatures and nutrients to grow plants that will keep you healthy.
I have to add more to the post to show how you can make Wickimix in a Gbiota box. I will do that as soon as get a round tuit. But in the mean time you can email me at
It is now just a question of irrigating and waiting for three months or so for the worms, creatures of the soil and the fungi and microbes to do their thing and bingo you will have some beautiful Wickimix full of beneficial creatures and nutrients to grow plants that will keep you healthy.
I have to add more to the post to show how you can make Wickimix in a Gbiota box. I will do that as soon as get a round tuit. But in the mean time you can email me at 
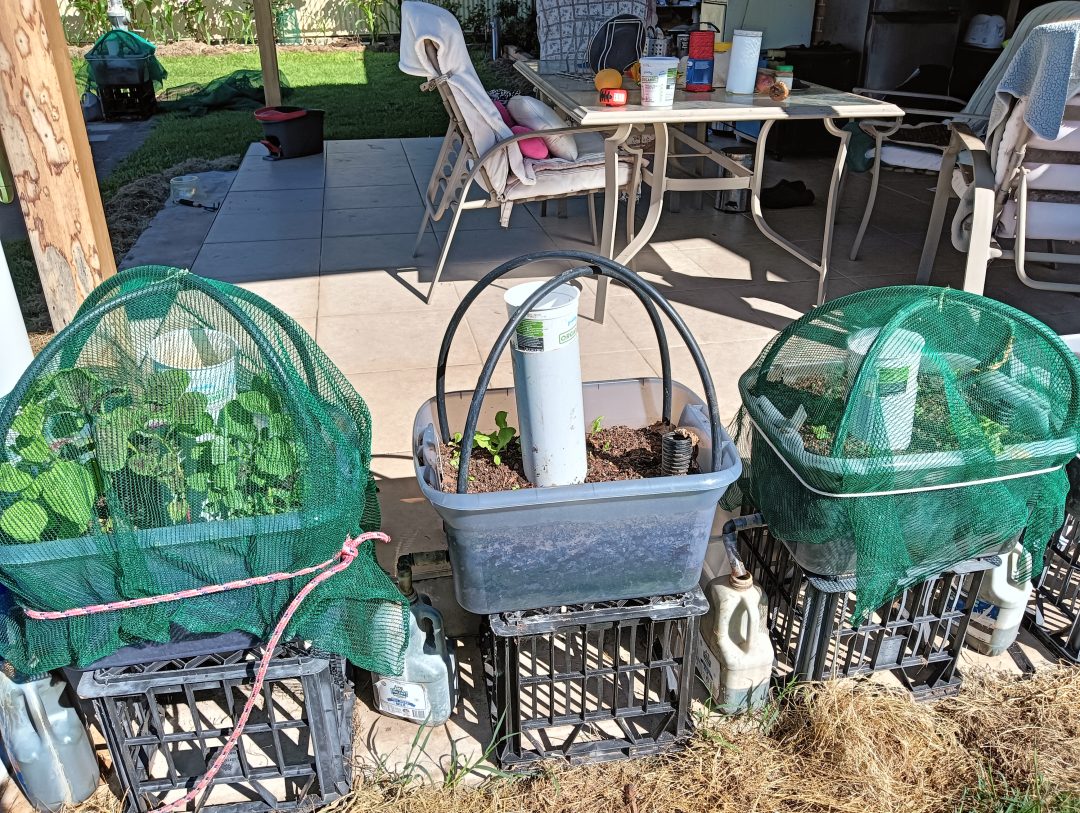


 I drill a hole in the side as low as I can, then use a rubber grommet and connector to make a swivel tube outlet.
 I cut a piece of slotted ag pipe to fit neatly into the base.
I used to just bend the ag pipe to make a filler, but now I either cut the pipe at 45° (and do the same with the vertical pipe) or just drill a large hole in the base pipe.
Either way allows me to view the water level in the base of the box, which is an important part of managing the system.
I cut a piece of slotted ag pipe to fit neatly into the base.
I used to just bend the ag pipe to make a filler, but now I either cut the pipe at 45° (and do the same with the vertical pipe) or just drill a large hole in the base pipe.
Either way allows me to view the water level in the base of the box, which is an important part of managing the system.
 I then fill the base of the box to about a third of the height (about 100 mm) with organic waste. Grass clippings are great, but use whatever you can lay your hands on.
On top of this I add a nutrient mix containing minerals, manure and trace minerals (typically available in blood and bone), and of course worms to process the organic waste.
In the ideal situation I will then fill the box with soil created in a Gbiota bed (Wickimix), but if that’s not available, any good soil or potting mix can be used as a starter.
I wet the box from above and then seed as normal.
Nothing much new here – it is the way we operate the box that is important.
I then fill the base of the box to about a third of the height (about 100 mm) with organic waste. Grass clippings are great, but use whatever you can lay your hands on.
On top of this I add a nutrient mix containing minerals, manure and trace minerals (typically available in blood and bone), and of course worms to process the organic waste.
In the ideal situation I will then fill the box with soil created in a Gbiota bed (Wickimix), but if that’s not available, any good soil or potting mix can be used as a starter.
I wet the box from above and then seed as normal.
Nothing much new here – it is the way we operate the box that is important.
 I set the swivel tube to the vertical (up) position and fill the box to the top of the swivel tube through the filler pipe.
This has to fit around normal living, so I typically do this over the weekend.
After the seeds have germinated and put down roots, I water from underneath.
I leave the swivel tube in the up position and allow the water (soil blood) to wick up to the roots of the growing plants. I do not top-water, but if the boxes are outside and it rains, the surface will be wetted.
I set the swivel tube to the vertical (up) position and fill the box to the top of the swivel tube through the filler pipe.
This has to fit around normal living, so I typically do this over the weekend.
After the seeds have germinated and put down roots, I water from underneath.
I leave the swivel tube in the up position and allow the water (soil blood) to wick up to the roots of the growing plants. I do not top-water, but if the boxes are outside and it rains, the surface will be wetted.
 By mid-week – which is the maximum length of time I want the soil blood to be stagnant – I twist the swivel tube down and catch the soil blood in a suitable container (e.g. a recycled milk bottle) for reuse on the next cycle.
Most of the soil blood will drain out, but there will still be some left in the base. I wait until that has all been used up before refilling. This is why I like to be able to view the water level through the filler pipe (or now, via the compost tube system).
By mid-week – which is the maximum length of time I want the soil blood to be stagnant – I twist the swivel tube down and catch the soil blood in a suitable container (e.g. a recycled milk bottle) for reuse on the next cycle.
Most of the soil blood will drain out, but there will still be some left in the base. I wait until that has all been used up before refilling. This is why I like to be able to view the water level through the filler pipe (or now, via the compost tube system).
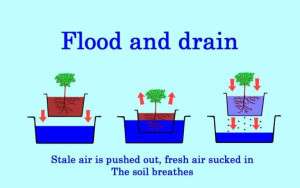
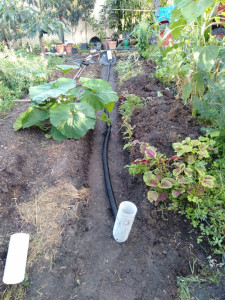
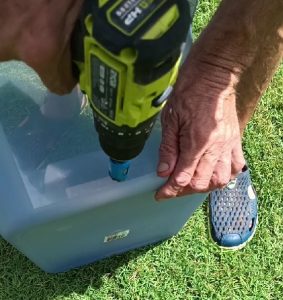 There does not seem to be much of a problem with making the boxes. They are just boxes you can buy from a hardware store. They do need a few holes drilled, but that does not appear to be a major issue.
 You can simply put out some bird seeds and the local birds will offer a free delivery service of fresh manure loaded with beneficial microbes. So simple no one believes me, but it works great.
Next, Wickimix needs minerals. A home grower may buy in bulk and store them, but an apartment dweller can still buy packets, and supplements like blood and bone can be readily purchased.
There doesn’t seem much alternative to buying these, mixing them up and putting them into a box that can be easily stored – no problem.
In addition, of course, we need worms, which are an integral part of the Gbiota system.
You can simply put out some bird seeds and the local birds will offer a free delivery service of fresh manure loaded with beneficial microbes. So simple no one believes me, but it works great.
Next, Wickimix needs minerals. A home grower may buy in bulk and store them, but an apartment dweller can still buy packets, and supplements like blood and bone can be readily purchased.
There doesn’t seem much alternative to buying these, mixing them up and putting them into a box that can be easily stored – no problem.
In addition, of course, we need worms, which are an integral part of the Gbiota system.
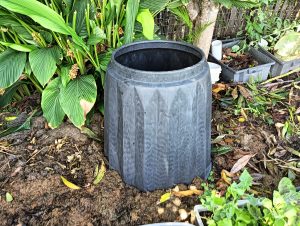 The real problem for the apartment dweller is how to handle the pongy food waste.
With a garden this is no problem – a couple of compost bins or rotating bins work fine – but having compost bins in an apartment is very not OK.
The real problem for the apartment dweller is how to handle the pongy food waste.
With a garden this is no problem – a couple of compost bins or rotating bins work fine – but having compost bins in an apartment is very not OK.
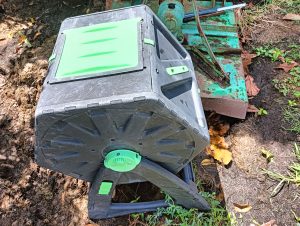 The smell problem can be solved by sealed containers, but those pesky flies still seem able to smell out a delicious meal – at least in sunny Queensland where I live.
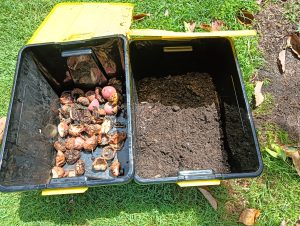 So I tried two experiments.
In the first, I used two boxes. One contains the nutrient mix and the other is for the waste. When I have some waste, I put it into the second box and cover it with the nutrient and worm mix from the first box.
So I tried two experiments.
In the first, I used two boxes. One contains the nutrient mix and the other is for the waste. When I have some waste, I put it into the second box and cover it with the nutrient and worm mix from the first box.
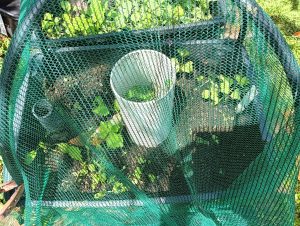 In the second experiment, I went back to an older system – the compost tube.
This is a pipe (about 100 mm diameter) that goes right down to the base of the box. This gives two input pipes: one for the water (or more correctly, soil blood) and one for the organic waste.
When I put any organic waste into the compost tube, I cover it with the nutrient mix and also flush with water. This takes any decomposed material to the bottom of the box where friendly worms kindly distribute it throughout the box.
In the second experiment, I went back to an older system – the compost tube.
This is a pipe (about 100 mm diameter) that goes right down to the base of the box. This gives two input pipes: one for the water (or more correctly, soil blood) and one for the organic waste.
When I put any organic waste into the compost tube, I cover it with the nutrient mix and also flush with water. This takes any decomposed material to the bottom of the box where friendly worms kindly distribute it throughout the box.

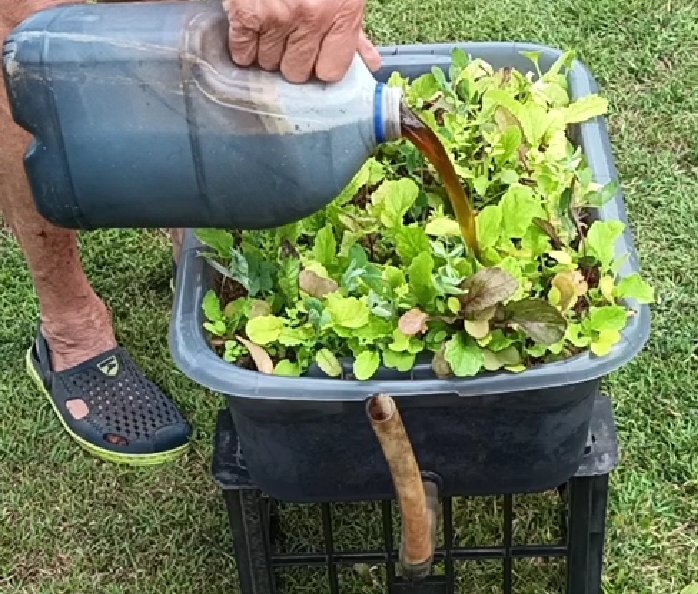

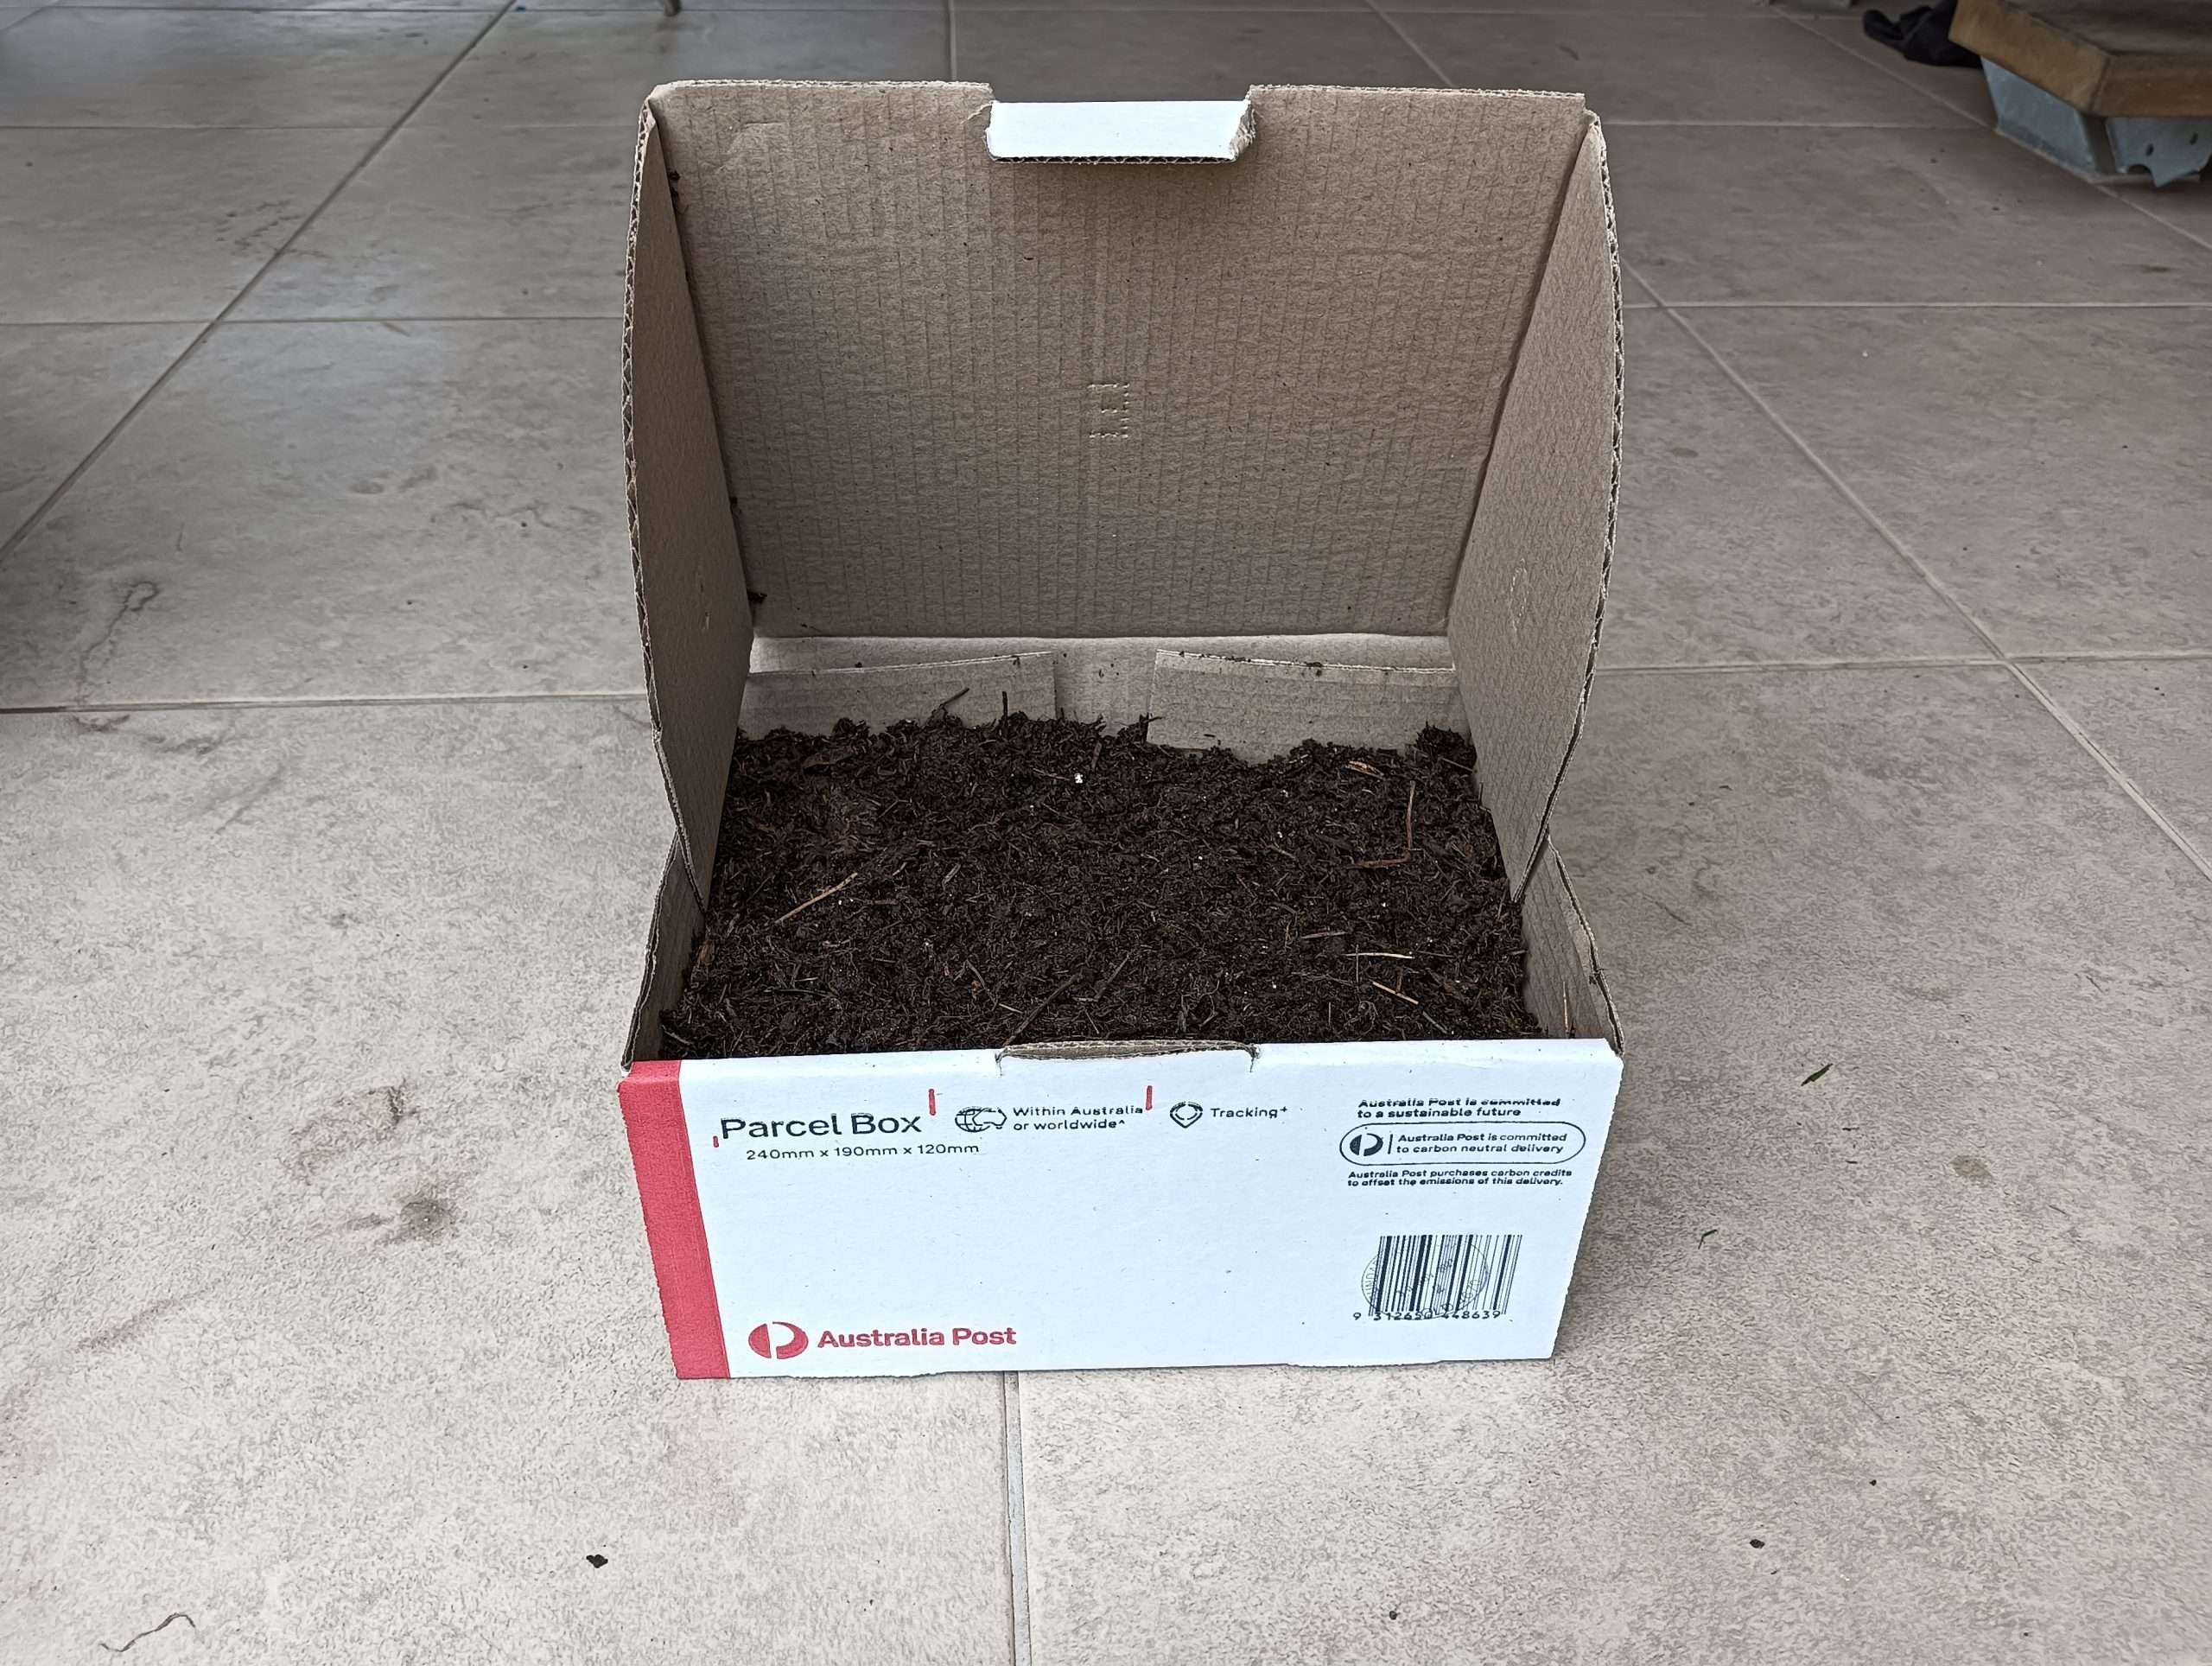
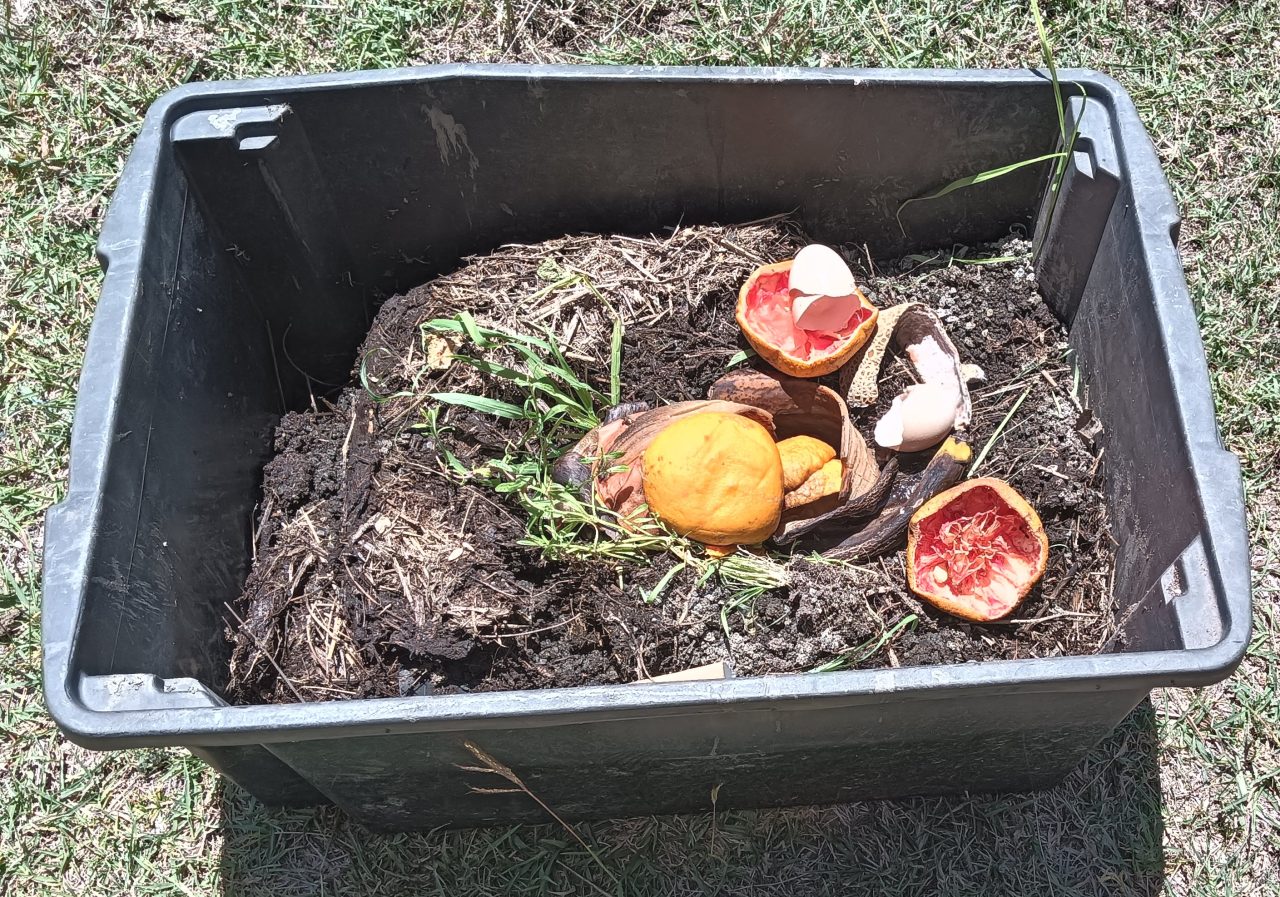
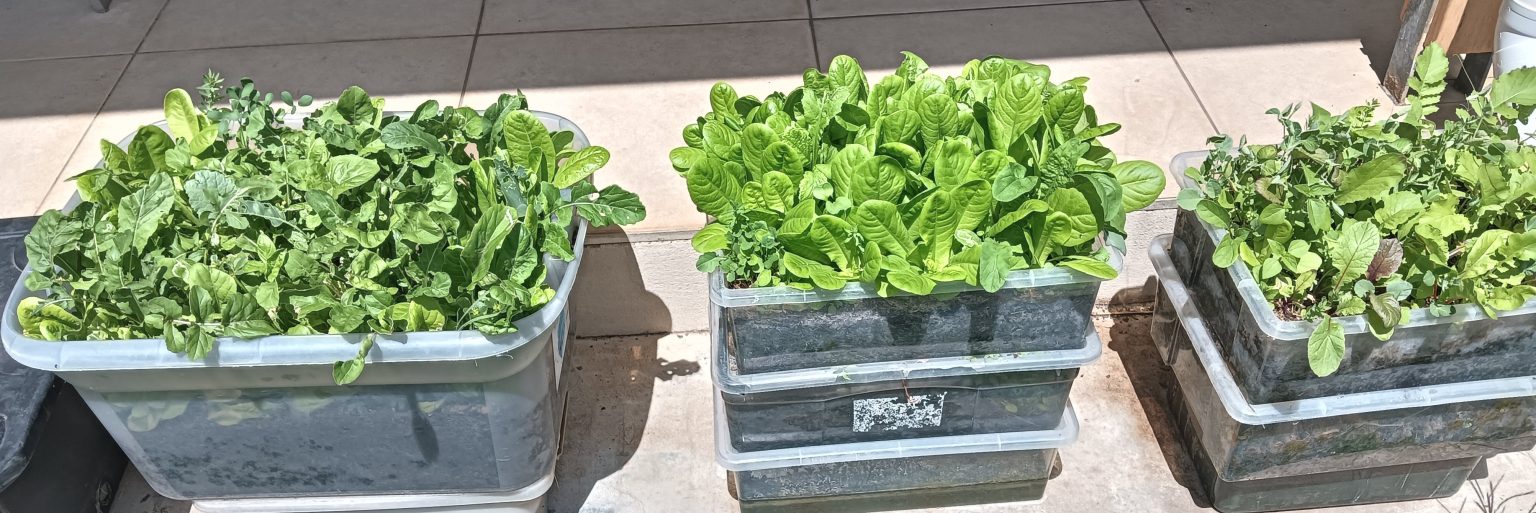
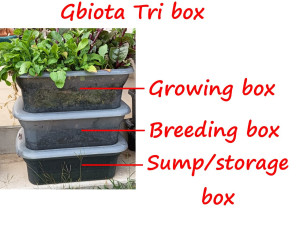
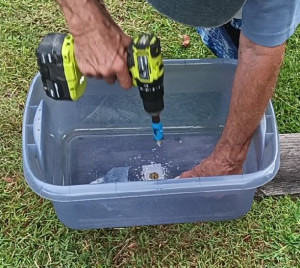
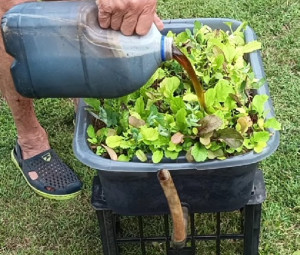
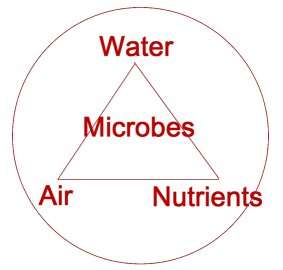
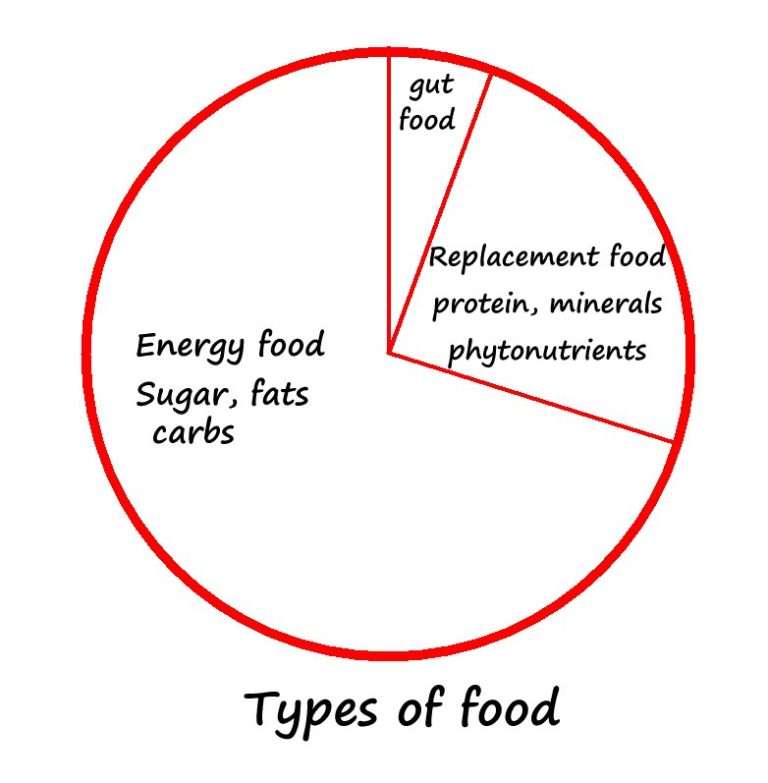
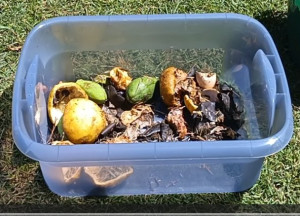
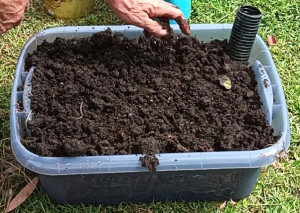
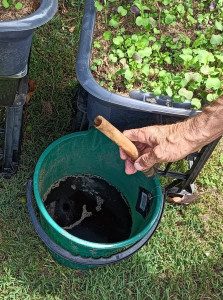
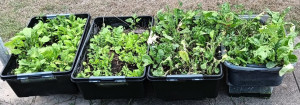
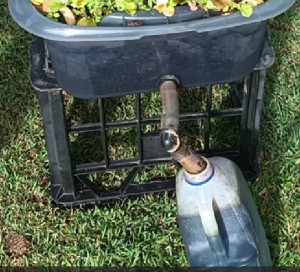

 With the swivel tube system there is always some water left in the bottom of the box so I fitted a sight tube (just a
bit of ag pipe pushed into the soil) so I could check that the water had been used up before I watered again.
That put the swivel tube system in the lead over the two-box system and it was clearly the system I was going to promote.
But when I was away for the best part of a week I had been too clever by half in trying to use the swivel box as a normal
Wicking Bed with a built-in water supply.
When I returned the plants had started to turn brown – a sure sign that they were suffering from waterlogging.
However, the plants in the twin box system (which had a hole in the base so there was no possibility of them becoming
waterlogged) were fine.
The plants were showing signs of beginning to wilt after being left, but as soon as I watered them they sprang back into life.
With the swivel tube system there is always some water left in the bottom of the box so I fitted a sight tube (just a
bit of ag pipe pushed into the soil) so I could check that the water had been used up before I watered again.
That put the swivel tube system in the lead over the two-box system and it was clearly the system I was going to promote.
But when I was away for the best part of a week I had been too clever by half in trying to use the swivel box as a normal
Wicking Bed with a built-in water supply.
When I returned the plants had started to turn brown – a sure sign that they were suffering from waterlogging.
However, the plants in the twin box system (which had a hole in the base so there was no possibility of them becoming
waterlogged) were fine.
The plants were showing signs of beginning to wilt after being left, but as soon as I watered them they sprang back into life.
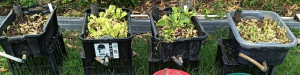
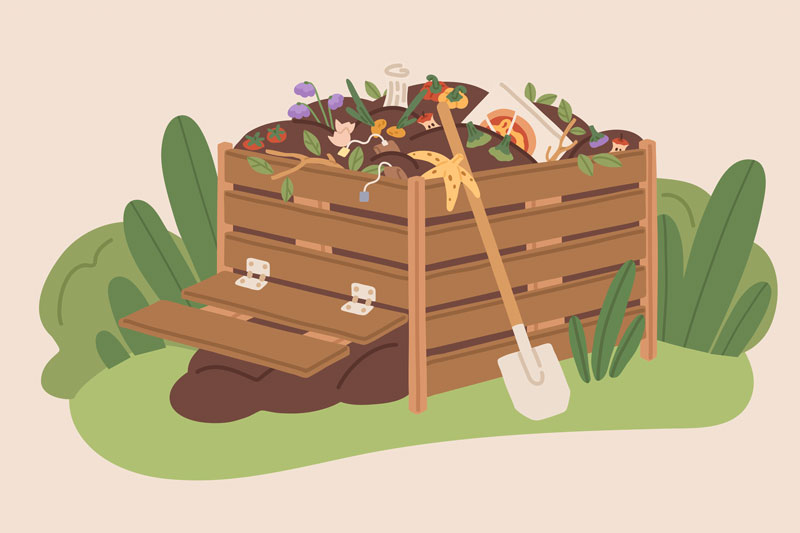
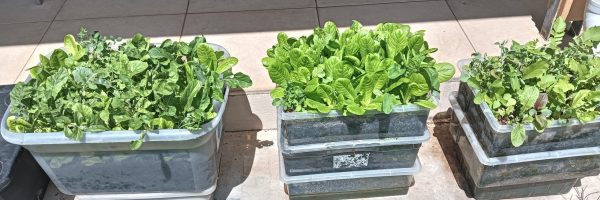
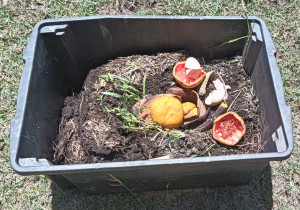
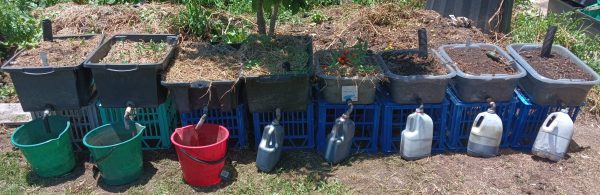

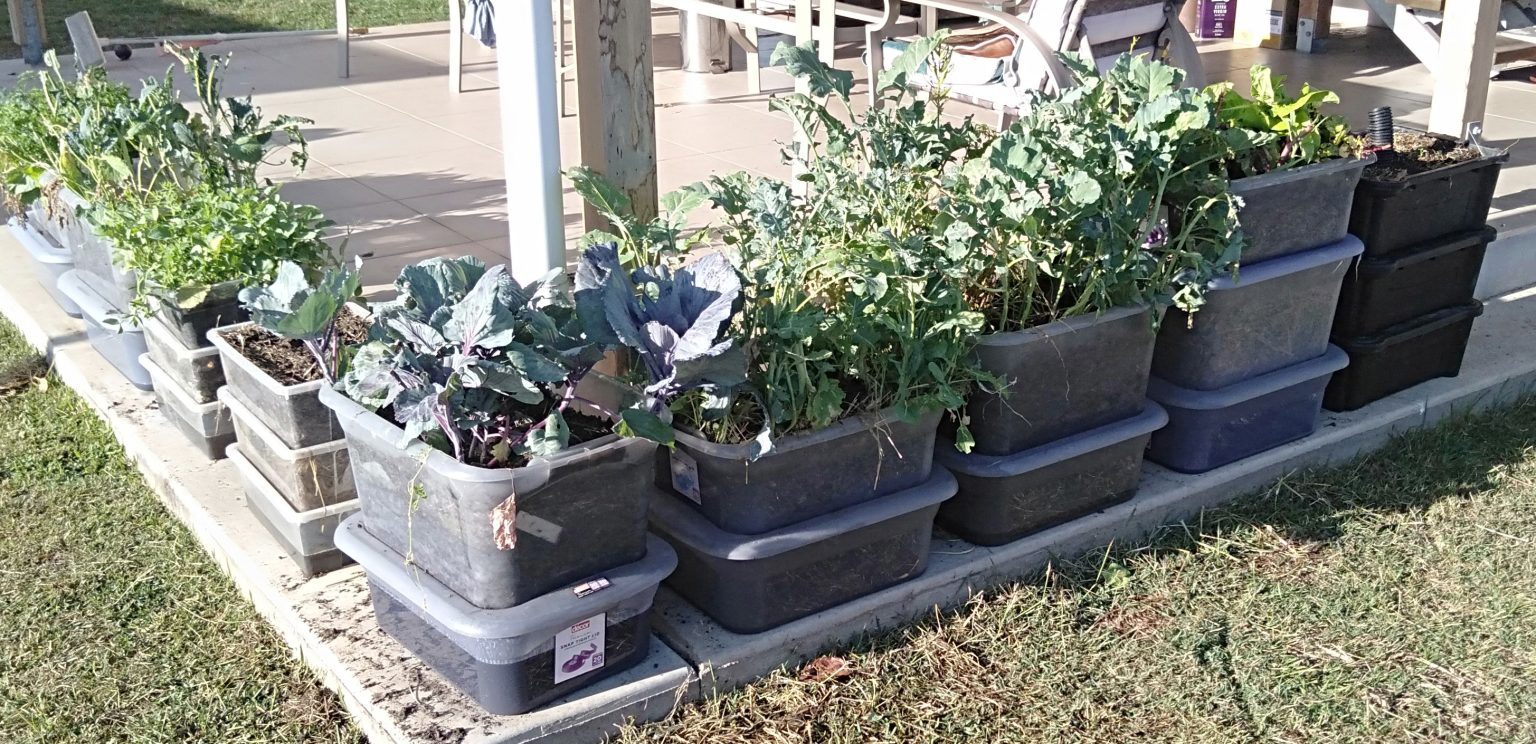
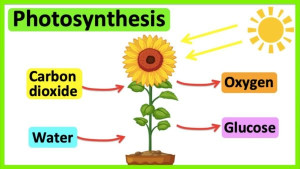

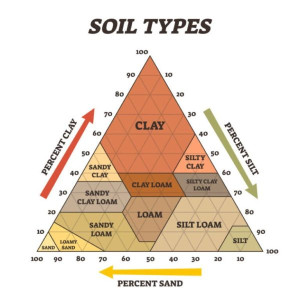

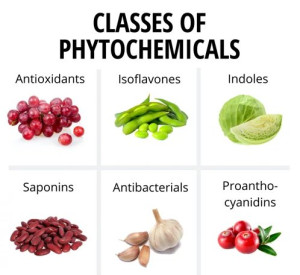



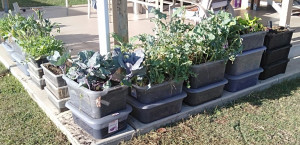
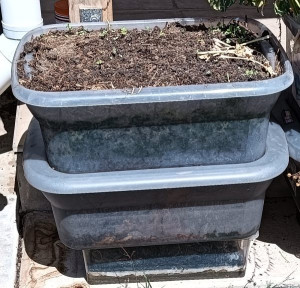
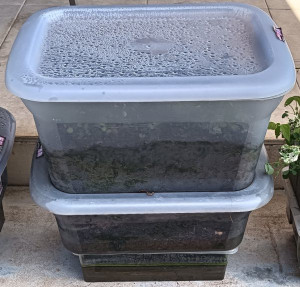
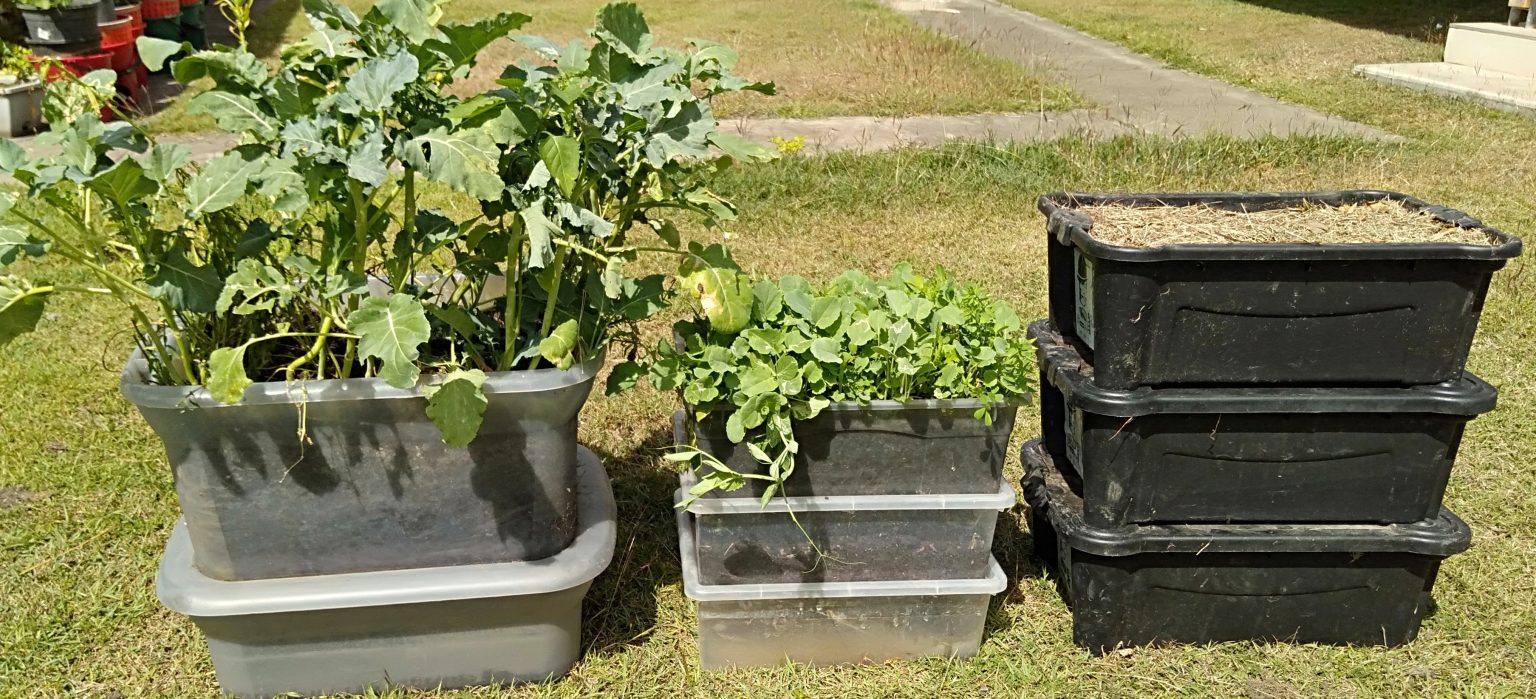
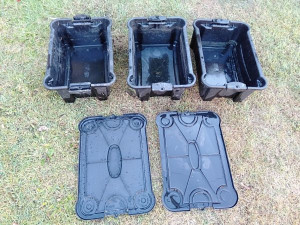
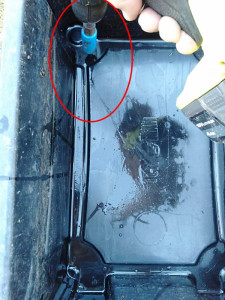 Then come the minerals—just dial up rent-a-volcano or buy a bag of rock dust if the volcano won’t fit in the empty house next door.
It pays to check that your rock dust has the right minerals. Most people are short on magnesium, women on iron and men on zinc
(one night of hanky-panky can exhaust a man’s store of zinc). Blood and bone is a good source of zinc and other minerals.
There are many articles on food and health on this web site.
Then come the minerals—just dial up rent-a-volcano or buy a bag of rock dust if the volcano won’t fit in the empty house next door.
It pays to check that your rock dust has the right minerals. Most people are short on magnesium, women on iron and men on zinc
(one night of hanky-panky can exhaust a man’s store of zinc). Blood and bone is a good source of zinc and other minerals.
There are many articles on food and health on this web site.
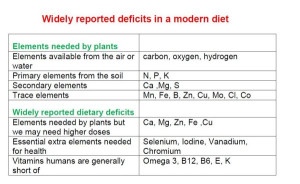 Then add the decomposers. You can buy worm eggs; soldier fly larvae and other maggots just appear with household waste.
If you leave out some old slices of bread the local pigeons may supply you with some free pigeon manure—no credit cards needed—or
you can buy some professionally created inoculant for $2,000. But the pigeon manure has worked fine for the last two hundred thousand
years, so it can be classified as “showing promise”.
Again you drill holes in the base of the top box and in the lid of the box below. This top box is where you grow the actual plants.
You will need some soil for a starter. Most people, including me, hate clay—but it does have very fine particles that nutrients cling to,
and after a few cycles the organic matter will have created aggregates that give the soil a beautiful texture.
If all else fails you can buy a bag of potting mix from the supermarket, just to get you going.
Whatever else, this soil must be free draining. Trust me—if the soil does not drain freely you will end up with a
squelchy, horrible, pongy mess that will breed the wrong sort of microbes, like E. coli, which will test your immune system. So:
free draining it is.
After a while, the organic matter from the breeding box below should give you adequate drainage. If not, some fine driveway gravel may
do the trick (though it is really heavy), while Vermiculite or Perlite are very light and improve the soil texture.
But the most important aerator of the soil is our friendly worms.
Then add the decomposers. You can buy worm eggs; soldier fly larvae and other maggots just appear with household waste.
If you leave out some old slices of bread the local pigeons may supply you with some free pigeon manure—no credit cards needed—or
you can buy some professionally created inoculant for $2,000. But the pigeon manure has worked fine for the last two hundred thousand
years, so it can be classified as “showing promise”.
Again you drill holes in the base of the top box and in the lid of the box below. This top box is where you grow the actual plants.
You will need some soil for a starter. Most people, including me, hate clay—but it does have very fine particles that nutrients cling to,
and after a few cycles the organic matter will have created aggregates that give the soil a beautiful texture.
If all else fails you can buy a bag of potting mix from the supermarket, just to get you going.
Whatever else, this soil must be free draining. Trust me—if the soil does not drain freely you will end up with a
squelchy, horrible, pongy mess that will breed the wrong sort of microbes, like E. coli, which will test your immune system. So:
free draining it is.
After a while, the organic matter from the breeding box below should give you adequate drainage. If not, some fine driveway gravel may
do the trick (though it is really heavy), while Vermiculite or Perlite are very light and improve the soil texture.
But the most important aerator of the soil is our friendly worms.
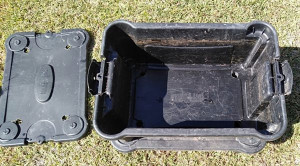
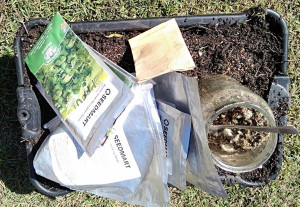
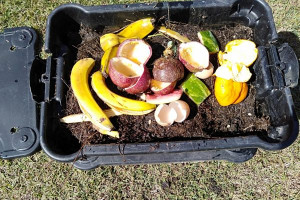
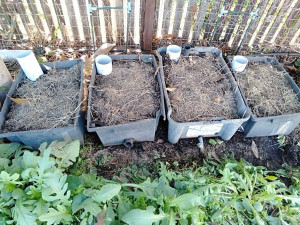 When the crop is finished and the box is being replenished, it is simply emptied and reloaded with compost on the bottom and the growing
soil on top. This is best if the box is flooded from below like in a normal wicking bed.
The best way is to have a long swivel tube so the box can be completely flooded from the filler tube, then the swivel tube twisted to let
the box completely drain.
[vdo id="a01a1f03819942779dbb71625fb972dc"]
A compost tube can also be used. Organic waste can be placed in the tube and the box filled by watering through the compost tube.
The tube can be moved to refurbish the soil and increase the time between full refurbishments of the box.
I have many boxes using this system and it is a good way of growing, but more complicated than the simple three-box stack.
If you want more details just email me at
When the crop is finished and the box is being replenished, it is simply emptied and reloaded with compost on the bottom and the growing
soil on top. This is best if the box is flooded from below like in a normal wicking bed.
The best way is to have a long swivel tube so the box can be completely flooded from the filler tube, then the swivel tube twisted to let
the box completely drain.
[vdo id="a01a1f03819942779dbb71625fb972dc"]
A compost tube can also be used. Organic waste can be placed in the tube and the box filled by watering through the compost tube.
The tube can be moved to refurbish the soil and increase the time between full refurbishments of the box.
I have many boxes using this system and it is a good way of growing, but more complicated than the simple three-box stack.
If you want more details just email me at


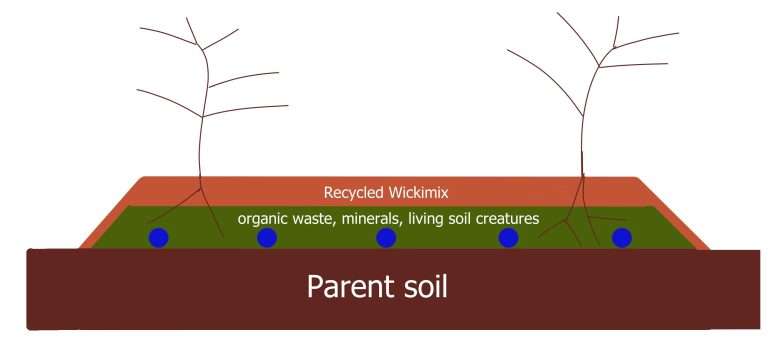

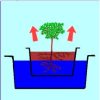
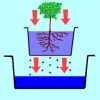
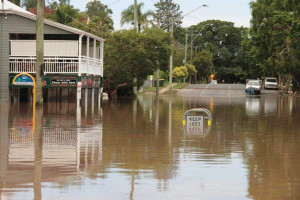
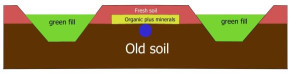
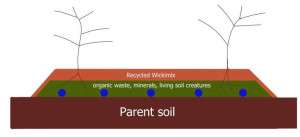
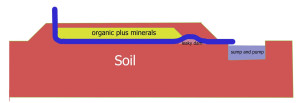
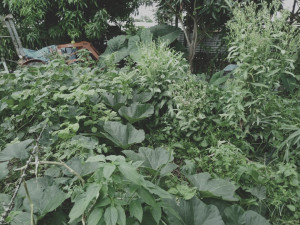
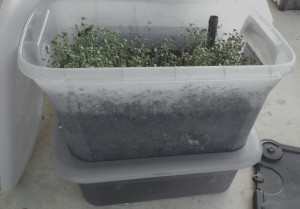
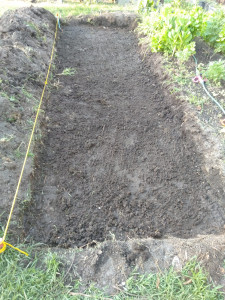
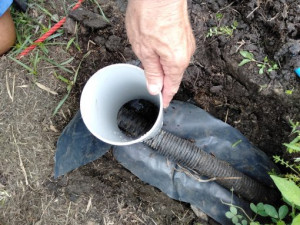
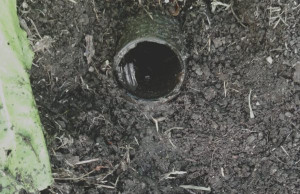
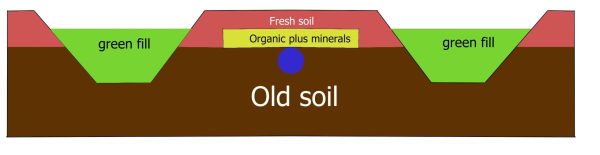
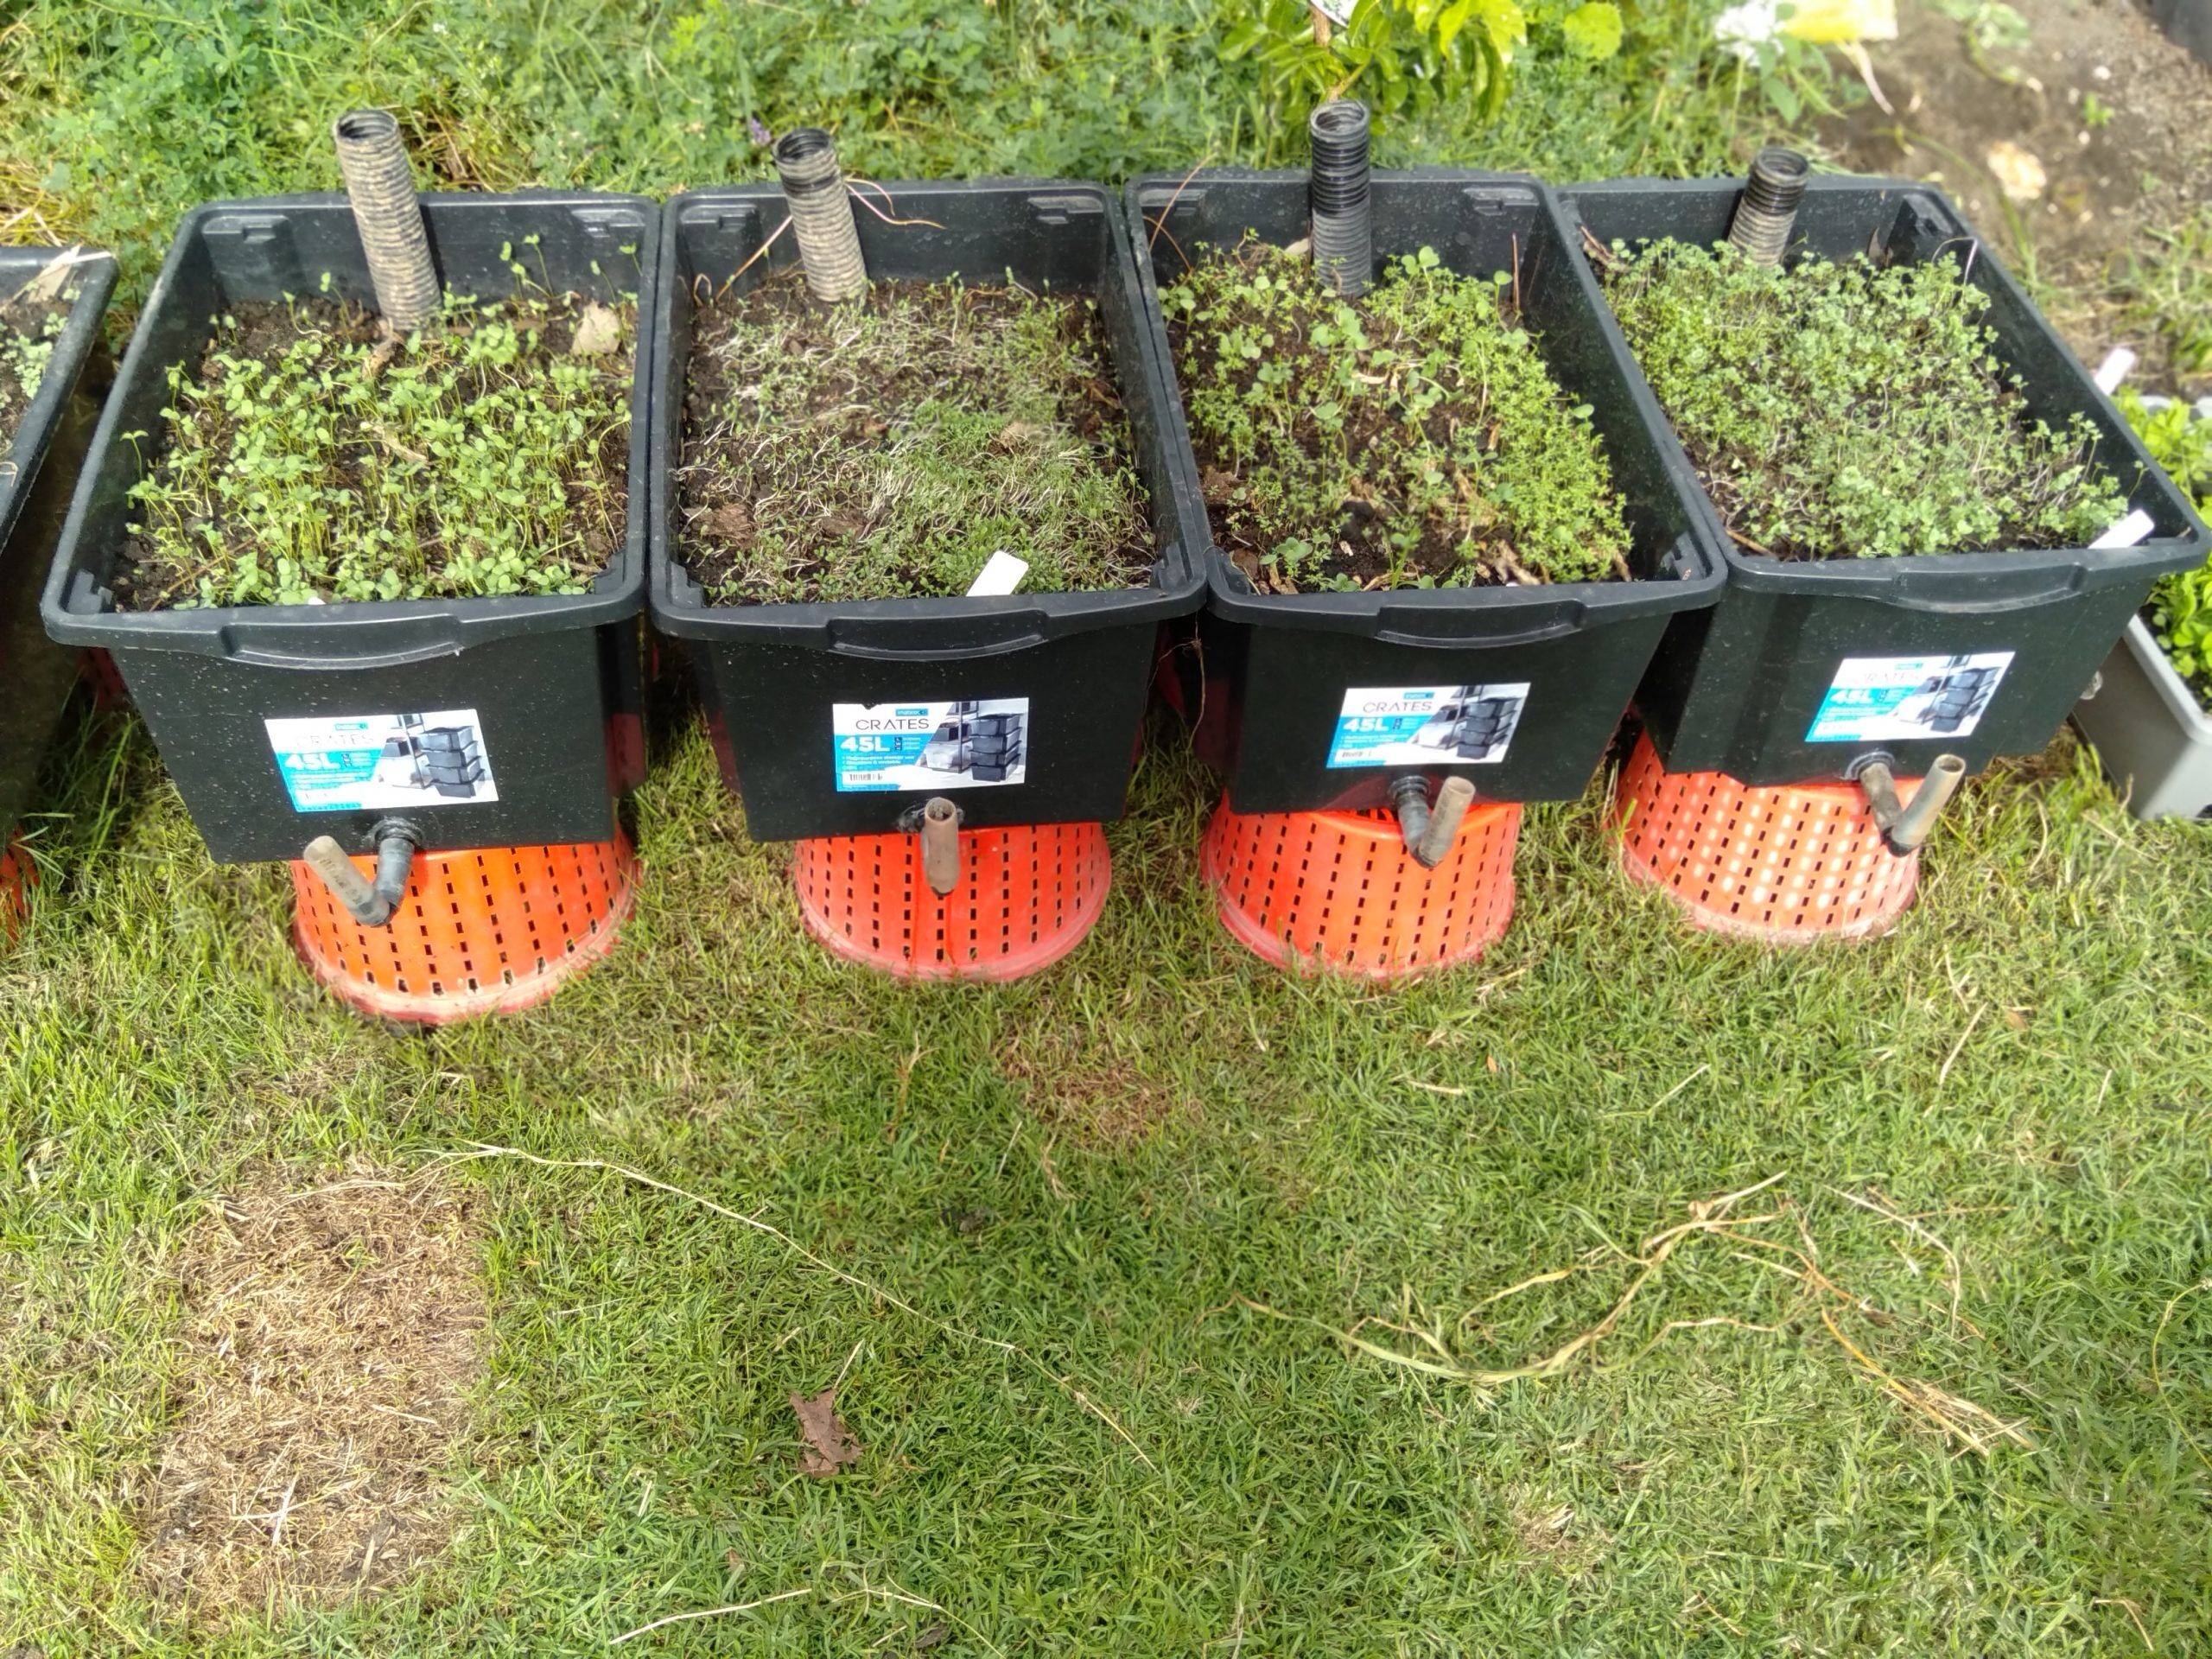

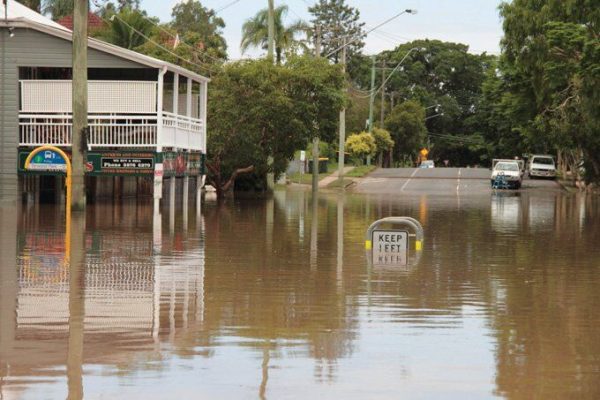
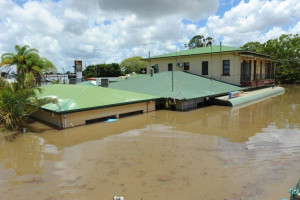
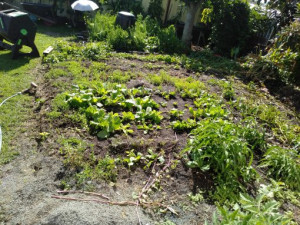
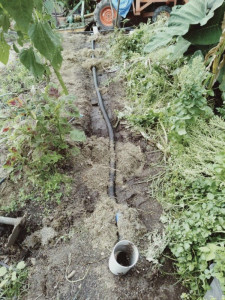

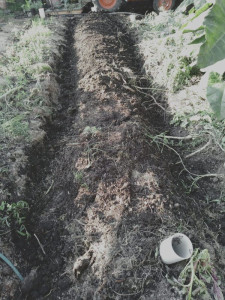
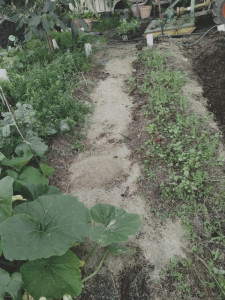
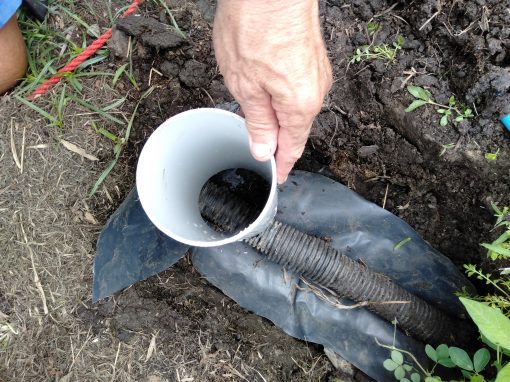
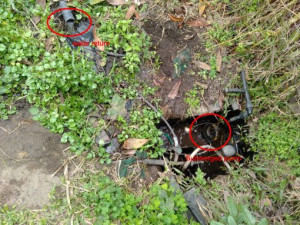
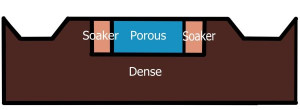
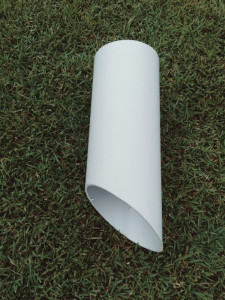
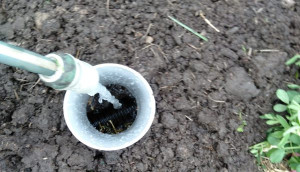
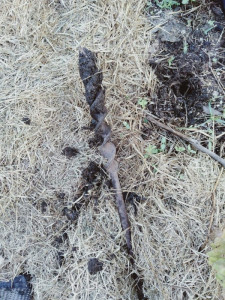
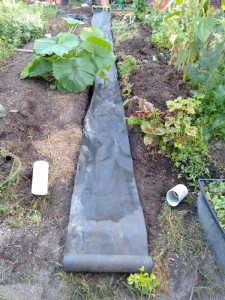
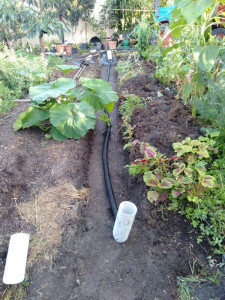
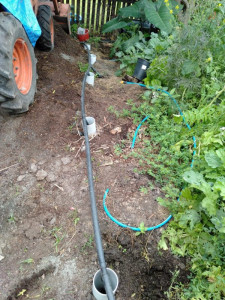
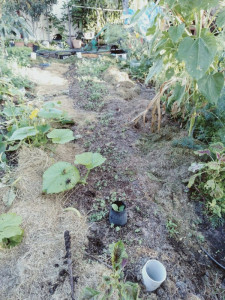
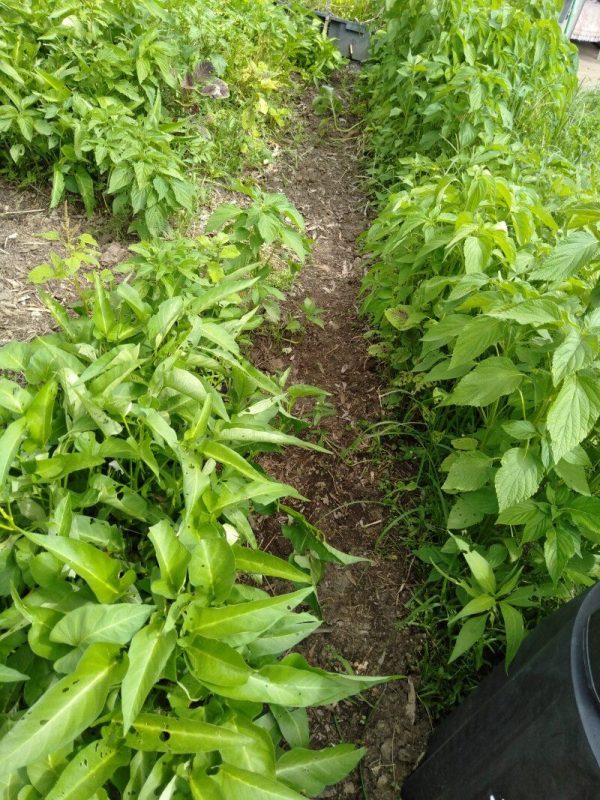
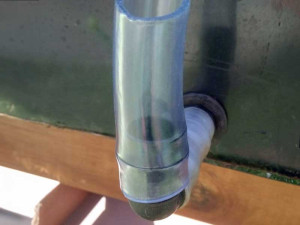 Traditionally the Ag pipe was bent up to the surface to act as a fill point. In newer designs we often add a larger vertical fill/inspection pipe so you can see the water level when filling manually.
The lowest layer around the pipe is a coarse, porous zone that helps distribute water. This can be made from:
Traditionally the Ag pipe was bent up to the surface to act as a fill point. In newer designs we often add a larger vertical fill/inspection pipe so you can see the water level when filling manually.
The lowest layer around the pipe is a coarse, porous zone that helps distribute water. This can be made from: