I normally drill with a regular hole saw. I used to heat up a suitable size socket from my tool kit, which melted rather than cut the plastic and left a ring of plastic that was stronger. That may be better for mass production, but drilling is easy if done gently.
The grommet and tube are pushed into the hole.
If you have watched previous videos you will see I laid a length of ag pipe along the base and up to provide a filler pipe. I now use the compost tube, so I just lay a length of ag pipe along the base. I often cut a second piece of ag pipe which I use like a telescope so it fits neatly.
Gbiota boxes – making and filling
In the past I have promoted that consumers should link up with a grower who can provide either Wickimix (the growing medium in Gbiota boxes) or pre-prepared Gbiota boxes as clean skins (ready to plant out) or with mature plants ready for harvesting.
I am now finding that many people want to do everything themselves, so I have simplified the whole process, including the preparation of Wickimix (the most difficult part of the process), and am publishing a series of articles on each stage.
I want to emphasise that Gbiota is more than just growing vegetables; it is about breeding beneficial microbes in the soil which will enter the plants growing in the soil and then our guts.
The plants are just a way of packaging the microbes – a lot better than plastic.
First job is to select a suitable box. The type of box is not critical. Depth is the most important. About 200 mm is fine for growing small, rapid turnover plants such as baby greens, while 300 mm is more suitable for larger plants. There is not much point in going deeper, as water will only wick up to about 300 mm.
I typically use a box with a height of 250 mm as that is the height of most readily available storage boxes and they work fine.
I prefer to use a number of smaller boxes. It allows a wider selection of plants and they are not too heavy to lift. A typical size would be about 400 mm by 500 mm with a total volume of around 30 litres, which is about as heavy as can be easily managed.
Foamed polystyrene boxes can often be got from local greengrocers for free and give good insulation, but they are a bit fragile.
Clear plastics are fine if they are UV stabilised. If not, they will go brittle and crack in the sun.
Regular tote boxes are quite fine and cheap.
First job is to drill and install the swivel tube. I use a standard hole saw of the same diameter as the grommet (in Australia 19 mm).
Drill gently, as it is easy to crack some plastic boxes.
Push the grommet into the hole.
Apply some oral lubricant and wriggle the straight-through connector into the grommet.
The standard connector has a small and large rib; the small rib goes into the grommet.
Fit the swivel tube onto the connector. Make sure the 90° bend rotates easily. I usually put some grease or Vaseline as a lubricant. You do not want the grommet to rotate as eventually it will leak.
Cut a length of ag pipe to snugly fit into the base of the box. You can always use a telescopic extension so it fits nicely (or if you cut the ag pipe too short).
Fill the base of the box to about one-third full with organic waste. When I first started this project I seemed to have plenty of kitchen waste, but I now use it faster than we make it, so I collect from local restaurants. Coffee grounds are great, but I still don’t have enough, so I use grass clippings from mine and the neighbours’ lawns.
I place the compost tube, usually in a corner of the box. I find the compost tube method really works great, so I have stopped using separate filler tubes as described in previous posts and videos.
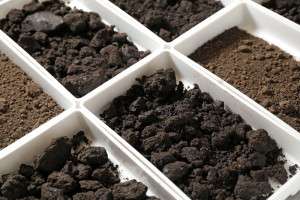
Now I add about 10 litres (a bucket full) of the nutrient mix. I make up a bulk mix of about 1.5 cubic metres of manure (chook preferred), 0.5 cubic metres of volcanic rock dust – volcanic rock dust is the best as it contains a broad spectrum of minerals, but use what is readily available – plus 20 kg of dolomite to balance the pH (chicken manure can be very acidic) and 20 kg of blood and bone which contains a broad spectrum of trace minerals.
I then add another bucket of Wickimix which contains both microbes and soil creatures, particularly worms. Microbes are already breeding in the soil, but the soil creatures are recyclers and have a gut like we do, which is where the bulk of the breeding occurs.
Wickimix is full of worms and if I see any on the surface I pop them into the compost tube so I don’t hurt them when I press down the soil.
Worms are essential for the Gbiota system to work.
Germination is always an issue with Wicking beds (and Gbiota beds are just a type of Wicking bed) as the surface is (or should be) dry.
I find the best way is to really saturate the soil (so it is really soggy) before seeding. If I see any worms I pop them into the compost tube.
I then just sprinkle the seed mix onto the surface. I have a separate post on seeds.
I cover the seeds with a layer of either Wickimix or Vermiculite. The big advantage of Vermiculite is that it is very light, so I can put a thick layer on and both the small and larger seeds will still germinate.
I don’t water from the surface again until the plants have put down roots and are stable (otherwise all the seeds end up in a corner of the box).
In my next post I will talk about irrigation scheduling.
![]()