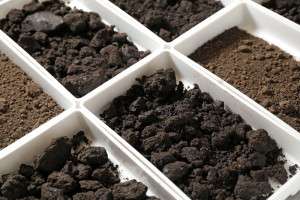
Wickimix is simply a growing medium – soil teaming with life and nutrients – and is central to the Gbiota system.
It has been produced in Wicking beds by a technology which is now well-matured and stable and is described in numerous articles which I can supply on request – just email me at colin@gbiota.com.
But while straightforward it does involve pumps and various irrigation technologies which are well suited to an experienced grower who could supply Wickimix as a growing medium, in clean skin boxes ready for planting or even better as in boxes with plants grown to the stage where they are ready to be harvested.
It is still our aim to establish a network of growers but right now there are many people who want to take advantage of the Gbiota technology but there is no local grower, so in this article I describe how people, even if they are living in an apartment, can produce their own Wickimix.
Gbiota is about breeding living, microbe-rich soil at home – whether you have a garden bed or just a balcony box.
Making Wickimix in a Garden Bed
I start with a section for people who have access to at least some garden, even if small.
The big advantage is that natural soil already contains the soil creatures on which Gbiota depends.
It is simple and anyone can do it even if it means getting back to nature.
Step 1 – Decide the Size of Your Bed
First decide how big you want to make your bed, it can be quite big but I would not recommend going above ten metre in one bed or very small, the bed I describe here is only a metre long and little more than half a metre wide.
Step 2 – Prepare the Base and Sump Box
Simply clear the topsoil into a pile. Just dig down to where the soil get firm, what is often called the B horizon.
Then dig a bit deeper for the sump box, any old plastic box will do.
If the soil is reasonably firm with a good content of fines (eg clay or silt) simply bang with a hammer to make it firm. If is is really sandy you may need to import some clay to form a base.
It is best to check out the levels by pouring some water onto the base to make sure it all flows into the box.
Step 3 – Install the Ag Pipe and Inlet
Now cut a piece of ag pipe to fit along the base of the bed and over the sump box.
You can bend the ag pipe to make an inlet but I prefer to use a larger pipe (eg 100mm PVC pipe) which makes a large inlet.
Step 4 – The Leaky Dam
Now comes the smart bit – the leaky dam. If the pipe was horizontal the water (or soil blood) would flow straight into the sump without wetting the soil. So raise the pipe just before the sump so it is at least one diameter higher than the base. This will force the water out into the soil.
But we don’t want to have stagnant water in the base of the bed so we make a leaky dam which will allow the water to slowly drain out. I use grass clipping for the leaky dam, they do rot down after a bit but I lift the pipe and add a few more grass clippings.
I usually line the whole bed with grass clippings so the water can flow across the base of the bed, but the real reason is that I have plenty of grass clippings but run short of organic waste. Before I started I seemed to have plenty of kitchen waste but now it has become a valuable item. (Move over gold, the value for the future is kitchen waste).
Step 5 – Building the Wickimix Layers
Next, I spread the kitchen waste over the base of the bed aiming for a depth of at least 100mm. It will soon drop down.
I now make the second layer with the nutrient mix which is a mixture of manure (whatever is available but chicken manure is good and readily available), rock dust, dolomite (to balance pH) and blood and bone.
Now I make the third layer by shovelling the topsoil from the pile. Initially, this may be poor quality soil with little nutrients or living creatures but this will soon change. But the action is on the surface of the soil particles so a soil with a bit of clay is best. Most soils have adequate fines but if sandy you will need to find some clay to give it body and a high surface area.
Smooth this top layer out ready for seeding.
Step 6 – Wetting and Seeding the Bed
This is really a Wicking Bed so the surface will be relatively dry which is not good for germination. I have found the best way is to totally wet out the surface, I mean really wet. Just go to ‘rent a kid’ from your local Kinder they are experts in making mud pies or if that does not work try your local mud wrestling team of whatever, but make sure it is really wet and sloppy.
Now sprinkle the seed mix on the surface.
Feeding and Breeding the Microbes
The real aim is to breed the beneficial microbes in the soil and they need to be fed. Just like us, they need energy and some of that will come from the organic waste but in a balanced Eco system, which is what Gbiota is all about, much of the energy will come from plants, that is what plants do – capture energy from the sun.
They create sugars which they exude from their roots to attract the various fungi and micro-organisms. Each species of plant exudes different sugars so to attract the right species we need a broad spectrum of species.
Gbiota is not about breeding some single magic species, it is about breeding a broad spectrum so you need to have a broad spectrum of plants. It will end up with the beds looking a bit of a mess but that is the way nature and Eco-systems work. You won’t find rows of neatly planted trees in nature, after a few billion years of evolution it has shown that a broad spectrum of living creatures works best.
But I will also add some sunflower seeds. Of all the plants I have experimented with Sunflowers are best for attracting mycorrhizal fungi.
Worms play a critical role, if there are no worms I suggest you go and buy some, red wrigglers are widely available.
I will now irrigate as described in my article on Eco-systems.
Irrigate, wait around three months, and let the worms, fungi and soil creatures transform waste into living Wickimix.
 It is now just a question of irrigating and waiting for three months or so for the worms, creatures of the soil and the fungi and microbes to do their thing and bingo you will have some beautiful Wickimix full of beneficial creatures and nutrients to grow plants that will keep you healthy.
I have to add more to the post to show how you can make Wickimix in a Gbiota box. I will do that as soon as get a round tuit. But in the mean time you can email me at colin@gbiota.com.
But first my next job is to write and article on how to schedule the irrigation which is at the core of the Gbiota system.
No Wickimix – What Now? (Making Wickimix in a Gbiota Box)
Ok I have found my round tuit so heres how to make Wickimix in your Gbiota box.
Well I have now got my round tuit so I can talk about how to set up a Gbiota box if you don’t have a garden and probably live in a flat with just a balcony.
The big advantage of a gbiota bed with soil is that it is likely to have the myriad of creatures that live in the soil but if all you have is a balcony then you just have to look for a viable alternative.
Basically everything is the same as I have described above and you just have to make your own version of Wickimix. But that is OK because as long as you keep on topping up the compost tube and you have worms the soil will gradually improve over time.
There is a lot of chemistry happening in a Gbiota box and this occurs on the surface of soil particles, clay is actually great as the particles are so small they have a huge surface area but a silt or just regular soil you should be able to buy that from any good gardening supplier.
You could also buy some Vermiculite which is great for growing but more expensive.
As I am into serious recycling I may use old coffee from the local coffee shop.
But what you do need is some Vermicast (worm casting) and some worms.
I suggest you use a 50/50 mix of Vermicast and whatever soil you decide to use.
Regeneration
Now comes the process of upgrading your soil over time.
As you will have guessed by now I am a bit of a compost enthusiast but it is important to recognise that labile or young compost is not good for growing plants in.
It often contains growth inhibitors as plants are in a state of stationary warfare and generate compounds in their battle against competing plants and insects.
You certainly do not want to be putting this labile compost onto the soil surface.
In the Gbiota system we start with three zones, compost at the bottom which act a bit like a sponge to hold water, then the nutrient layer which contains manure to supply nitrogen which will help the compost to decompose and the Wickimix where the plants are seeded.
By the time the roots have reached the bottom layer the compost will have largely decomposed.
Compost Tube
You can move the compost tube to a new position by just digging down to make a new hole, lifting the compost tube out while pushing down on the compost so it stays in place, filling with raw compost as it becomes available and using the soil you have dug out to top up the upper layer (which will have dropped as the original compost decomposes.
You can easily get six new positions for the compost tube which gives plenty of time for the compost to break down.
This would typically done when reseeding which occurs on average every three months depending on what you are growing.
Inter-sowing
In my seed mix I will have a wide spectrum of plants, some fast growing other slower. This means I can pull out the plants that have done their thing and replace with fresh seeds. I don’t use compost for this but will use whatever version of Wickimix I have available.
I find the easiest way if to use the soil from the new hole I have just dug when moving the compost tube.
Flipping
At some point in time I may want to rebuild the box entirely but I will try and keep the layer of top soil intact. I just put a lid on the box and turn upside down. That’s the easy bit.
Then I will clean out the base and pipes and flip the old contents back into the refurbished box. This is a bit like tossing pancakes , sometime I get it right and sometimes I miss but it does not really matter, just put the soil back into the box.
Further Reading on Gbiota Beds and Wickimix
Gbiota beds are a mature technology and I have written many articles – here is a list:
https://www.gbiota.com/2024/07/01/gbiota-overview/
https://www.gbiota.com/2024/04/24/making-a-gbiota-box/
https://www.gbiota.com/2024/04/10/eco-balance/
https://www.gbiota.com/2024/04/02/compost-bin-or-bury/
https://www.gbiota.com/2024/02/28/learning-plan/
https://www.gbiota.com/2024/02/05/growers-and-gut-biota/
https://www.gbiota.com/2024/01/31/recycle-to-survive/
https://www.gbiota.com/2024/01/26/become-a-gbiota-supplier/
https://www.gbiota.com/2024/01/18/support-plastic-sheeting/
https://www.gbiota.com/2024/01/17/solving-the-food-crisis/
https://www.gbiota.com/2023/12/08/inoculants/
https://www.gbiota.com/2023/11/20/gbiota-soil/
https://www.gbiota.com/2023/10/03/what-plants-to-grow/
https://www.gbiota.com/2023/05/04/the-wickimix-story/
https://www.gbiota.com/2023/04/09/upgraded-beds-introduction/
https://www.gbiota.com/2023/04/04/upgraded-beds/ ****
https://www.gbiota.com/2023/01/05/health-starts-in-the-soil-3/
https://www.gbiota.com/2022/12/15/gbiota-bed-update-4-dec-2022/ ****
![]()