
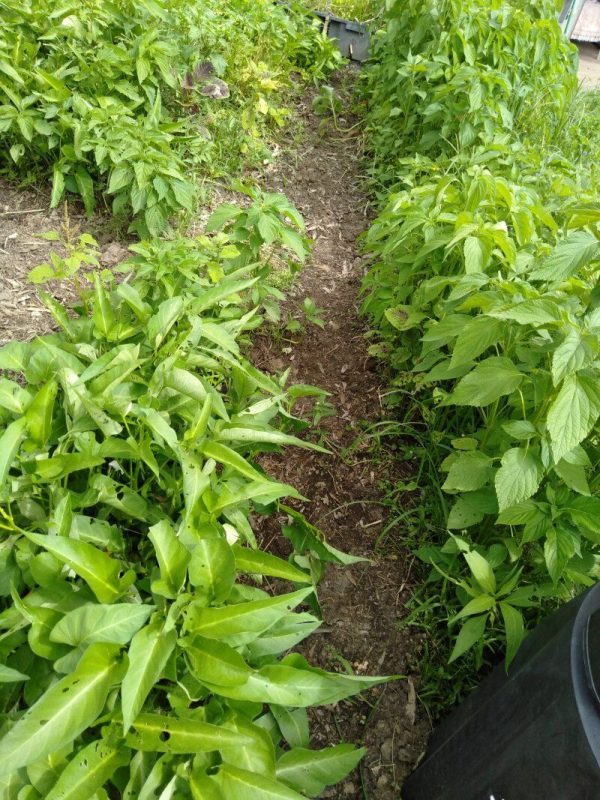
Sump Beds vs Basic In-Ground Beds
Sump beds were the first in-ground Gbiota beds developed to take advantage of the partial flood and drain cycle. They are automated with pumps and timers and are well suited to commercial or larger-scale growers. Many home growers, however, are put off by pumps, timers and wiring. To make Gbiota beds more accessible, we developed basic in-ground beds. These are extremely simple, very effective, and only need a manual check on water levels. For most home growers, the “tool kit” is just a spade, some Ag pipe, clay or plastic film, and a bit of energy to dig a shallow trench. Basic in-ground beds are almost embarrassingly simple, which is why they’re ideal for home and small-scale growers. They can even be partially automated later if needed. Understanding the drainage principles is important so you don’t end up with a soggy bed that favours harmful microbes.Early Sump Beds
I started promoting wicking beds in 1995 to improve water efficiency and reduce watering frequency. Many of these early wicking beds effectively became self-watering pots. In 2015 I learned more about gut biota and its impact on health span. It became clear that the same wicking principles could be used to breed beneficial microbes by maintaining “Goldilocks” moisture levels in the soil – consistently moist but never saturated.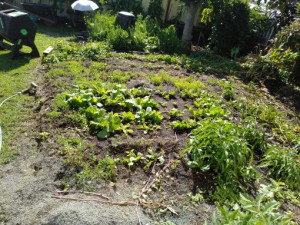
These early Gbiota sump beds were built during a dry period and used the partial flood and drain principle. The entire bed was raised above the parent soil and any excess water drained back to a sump. Beds were about two metres wide, lined with plastic sheet and hidden under the soil, so they appeared as large raised beds. The system was fully automatic, with overflow returning to the sump. The main challenge then was supplying enough water under very high evaporation and minimal rainfall. Over-saturation simply wasn’t an issue. In recent years, with heavy and more frequent rain events, beds needed redesigning to handle extreme rainfall and avoid prolonged saturation.
Sump and Pump In-Ground Beds
In-ground Gbiota beds have several advantages:- They stay connected to the existing soil life.
- They can be built large enough to feed a family.
- They can be automated and scaled.
- A sump or micro dam to collect drainage water.
- Channels that collect drainage from multiple rows.
- A pump on a timer that periodically feeds a manifold at the top of the beds.
- Ag pipe along each row to distribute water and support the partial flood and drain cycle.
How to Make an In-Ground Gbiota Bed
1. Dig the Trench
- Dig a trench no deeper than about 300 mm. With heavy rains, a depth of about 200 mm or less is often enough when combined with a raised ridge.
- Plan for the bed surface to finish above the parent soil level to improve drainage.
2. Create the Impervious Layer
Install a base layer to hold water long enough for it to wick:- Most commonly, use plastic film about 1 m wide with a 100 mm lip on each side, giving an 800 mm wet “channel” down the centre.
- Alternatively, dig down to a heavy clay layer and line the trench with clay. This works but over time the clay may convert to more porous soil, so the bed may need rebuilding later.
3. Fit Ag Pipe and Inspection Tube
- Lay Ag pipe along the base of the trench so it is level.
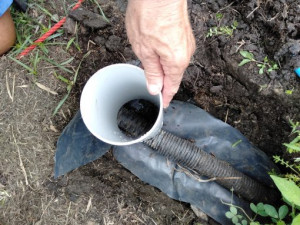
- At the inlet end, fit a larger vertical filler/inspection pipe over the Ag pipe and cut the bottom at an angle. This should be wide enough for you to reach down and feel soil moisture.
- At the outlet end, build a leaky soil dam at least 50 mm high so water must flood the base before it can escape.
4. Leaky Dam and Irrigation Cycle
The Ag pipe runs along the base, then up and over the leaky soil dam. The dam:- Holds water back until the base of the bed is flooded to about 50 mm.
- Allows excess water to flow back into the sump once the level reaches the top of the dam.
Filling the Bed with Growing Media
After the base and pipework are in place, fill the trench in layers:- Bottom organic layer: about 200 mm of organic waste (green waste, shredded plant material, food waste).
- Manure and minerals layer: about 100 mm of manure, often blended with rock dust for additional minerals and improved structure.
- Topsoil/growing layer: about 100 mm of good soil and/or finished compost for seed germination and root growth.
Inspection Tubes and Moisture Management
In addition to the main fill tube, you can add one or more inspection tubes mid-row. These allow you to check whether water has drained away properly after irrigation or heavy rain. In wet periods, these tubes are useful for confirming that the base is not staying waterlogged. In practice, you can also use indicator plants (such as tomatoes) at key points in the bed: wilting suggests the soil is drying and irrigation is needed.Feeding Worms and Soil Life
Worms are central to Gbiota beds. They:- Feed on organic matter and produce vermicast, a highly fertile soil.
- Help shape soil structure and improve aeration.
- Placing open-bottom compost bins on the bed so worms can access the compost.
- Burying perforated containers filled with compost.
- Periodically digging a narrow trench down to the base, refilling it with organic waste, manure and minerals, as when the bed was first made.
Growing Soil for Gbiota Boxes
In-ground beds are not only for producing vegetables; they are also a way of growing soil for Gbiota boxes. You can periodically:- Dig out the soil in a narrow trench above the Ag pipe, or lift the pipe and dig to the base.
- Refill the trench with fresh organic waste, manure and mineral-rich material.
Basic In-Ground Gbiota Beds (No Sump)
Many people don’t want the expense or maintenance of pumps, timers and sumps. Basic in-ground beds offer a simpler option that still uses partial flood and drain cycles, but with manual watering and no sump. Instead of returning water to a sump, basic beds use soaker or capture zones at one or both ends of the bed to make use of overflow water.Layout of a Basic In-Ground Bed
In the test bed layout:- A central filler/inspection tube is installed over the Ag pipe.
- The plastic film runs to the very end of the bed, with one or both ends open so water can escape into the soaker zones.
- The Ag pipe stops about 1 metre before each end and is curled up to the surface.
- The last metre on each end is filled with soil to form soaker beds that capture overflow water.
The soaker beds are ideal for water-loving plants such as lettuce, tomato, spinach or linseed, so excess water is not wasted. To check drainage, you can:
- Feel the soil at the bottom of the inspection tube.
- Observe the soaker-bed plants – wilting or stress can indicate dry soil.
Manual Watering and Moisture Cycles
If you are happy to water most days, a simple method is:- Trickle water into the inspection tube until about 50 mm of water has accumulated in the base. This is usually enough for a full hot day.
- On days when you want longer intervals between watering, you can fill to around 100 mm, as long as you allow water to drain or be used by plants before watering again.
- Flood the base, let water wick up and feed the plants.
- Allow liquid water to drain or be used so the bed is not waterlogged for more than a few days.
Feeding Soil Organisms in Basic Beds
Feeding and maintaining biology in basic in-ground beds is very similar to sump beds. You can:- Use small compost bins on the surface.
- Bury perforated containers of compost.
- Dig narrow trenches down to the base and refill them with layers of organic waste, manure and growing medium.

I am not clear about the connection between the inspection pipe and the AG pipe. In the picture it looks like the inspection pips is just on top, how do we make sure the water actually flows into the AG pipe, an out of the bed close up picture of this connection would be super helpful.
I am not clear about the connection between the inspection pipe and the AG pipe. In the picture it looks like the inspection pips is just on top, how do we make sure the water actually flows into the AG pipe, an out of the bed close up picture of this connection would be super helpful.